
PrestaShop
Installation Guide
Complete technical guide for installing and configuring SendPol for PrestaShop. Integrate your webshop with the Peppol network in a few steps.
Table of Contents
What is SendPol?
SendPol for PrestaShop is a module that automatically integrates your PrestaShop webshop with the Peppol network. It transforms your order processing by automatically converting completed orders into UBL (Universal Business Language) invoices and sending them via Peppol without manual intervention.
Key Features
- Complete PrestaShop integration: Automatically recognize and convert orders to invoices
- UBL (Universal Business Language) invoices: Compatible with governments and business customers
- Automatic sending via Peppol: Standardized & legally valid
- B2B ready: Perfect for businesses selling to other companies or government entities
- EU compliance: Ready for Peppol e-invoicing requirements (mandatory from 2026 in many EU countries)
Why Choose SendPol?
From 2026, Peppol e-invoicing will become mandatory in more and more European countries, especially for businesses and government contracts. With SendPol, you're ready for compliance without complex setups or high development costs.
See the PrestaShop integration
Step-by-step in under 3 minutes
Start in test mode
By default, every new webshop is in test mode. Documents are validated and visible in your SendPol dashboard, but they are not forwarded to the Peppol network. This lets you safely test your workflow before any invoice goes live.
When you are ready for production, switch off test mode in your webshop settings under MyAccount.
Go to my webshopsInstallation
Prerequisites
Make sure your PrestaShop installation meets the following requirements
- PrestaShop 1.7 or higher
- PHP 7.4 or higher
- SendPol account (register at www.sendpol.com)
Installation
Prerequisites
- PrestaShop 1.7 or higher
- PHP 7.4 or higher
- SendPol account (register at www.sendpol.com)
Module Installation
Upload and install the SendPol module in PrestaShop
Download the SendPol for PrestaShop module (ZIP file)
Go to your PrestaShop admin dashboard
Navigate to Modules > Module Manager
Click 'Upload a module' or 'Een module uploaden'
Select the module ZIP file and click 'Upload this module'
After upload, click 'Install' to install the module
Activate the module by clicking 'Enable'
You should see 'Peppol e-Invoicing Integration by SendPol' in your PrestaShop modules list
Step-by-step in PrestaShop
From installation to an invoice going out over Peppol — below you walk through the full flow inside your PrestaShop admin.
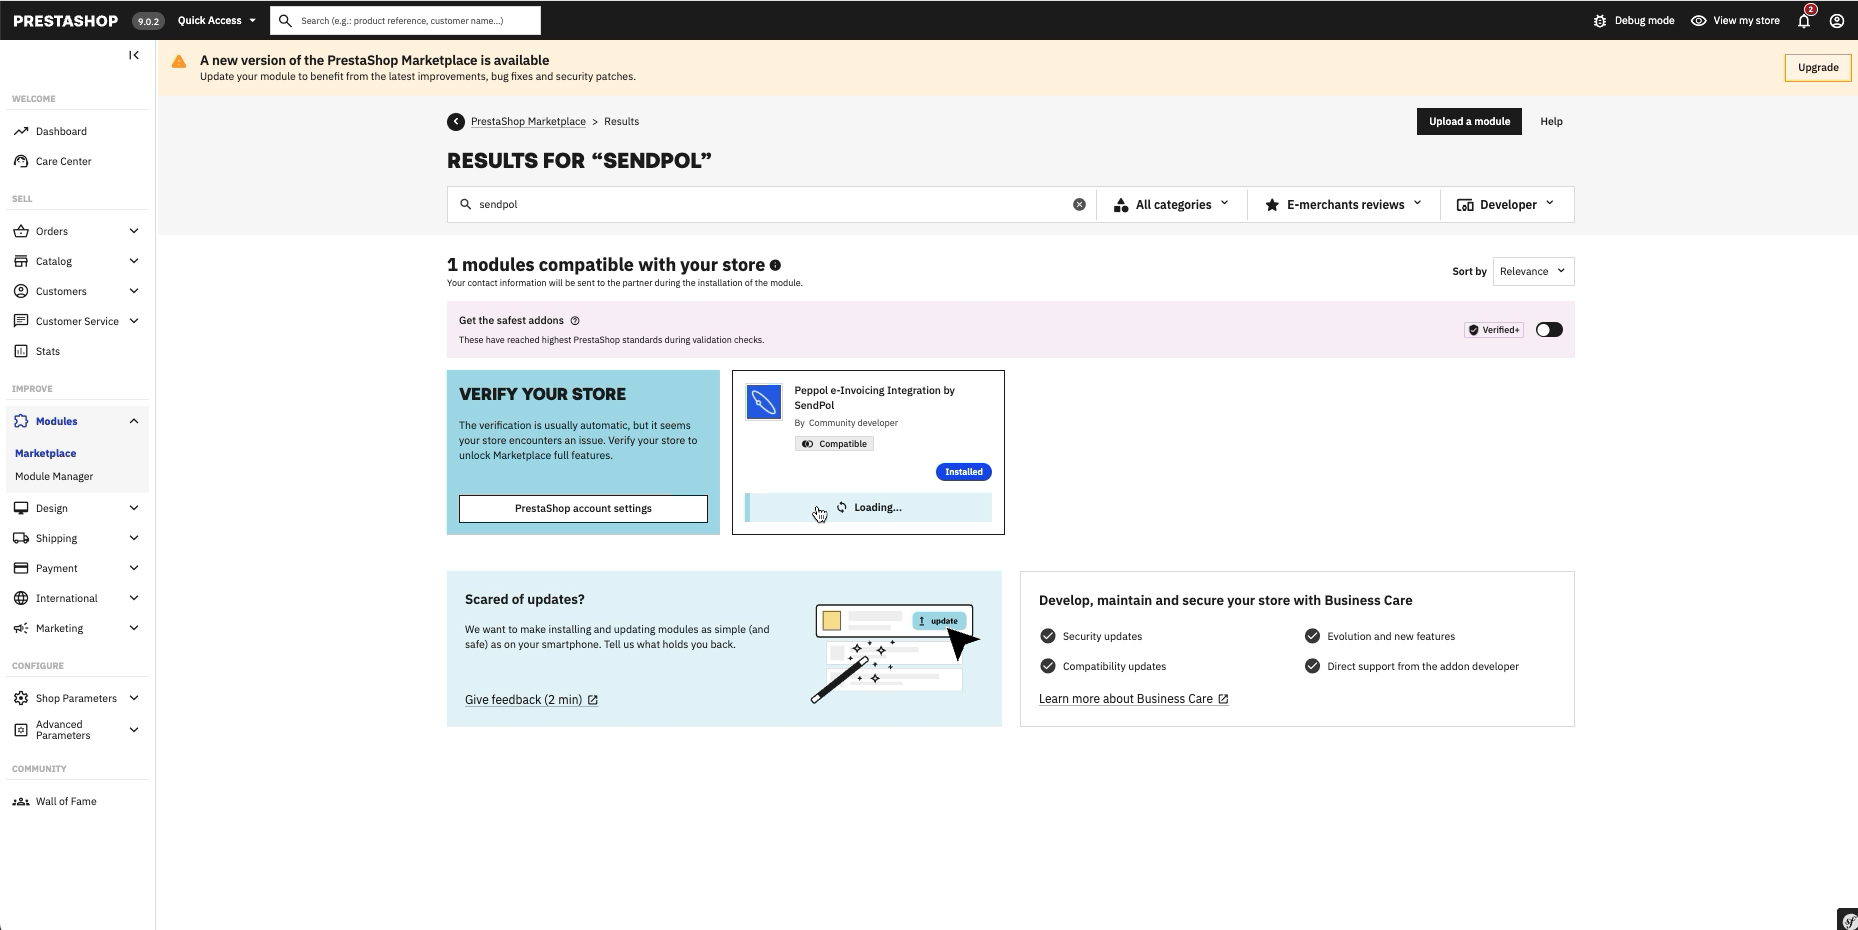
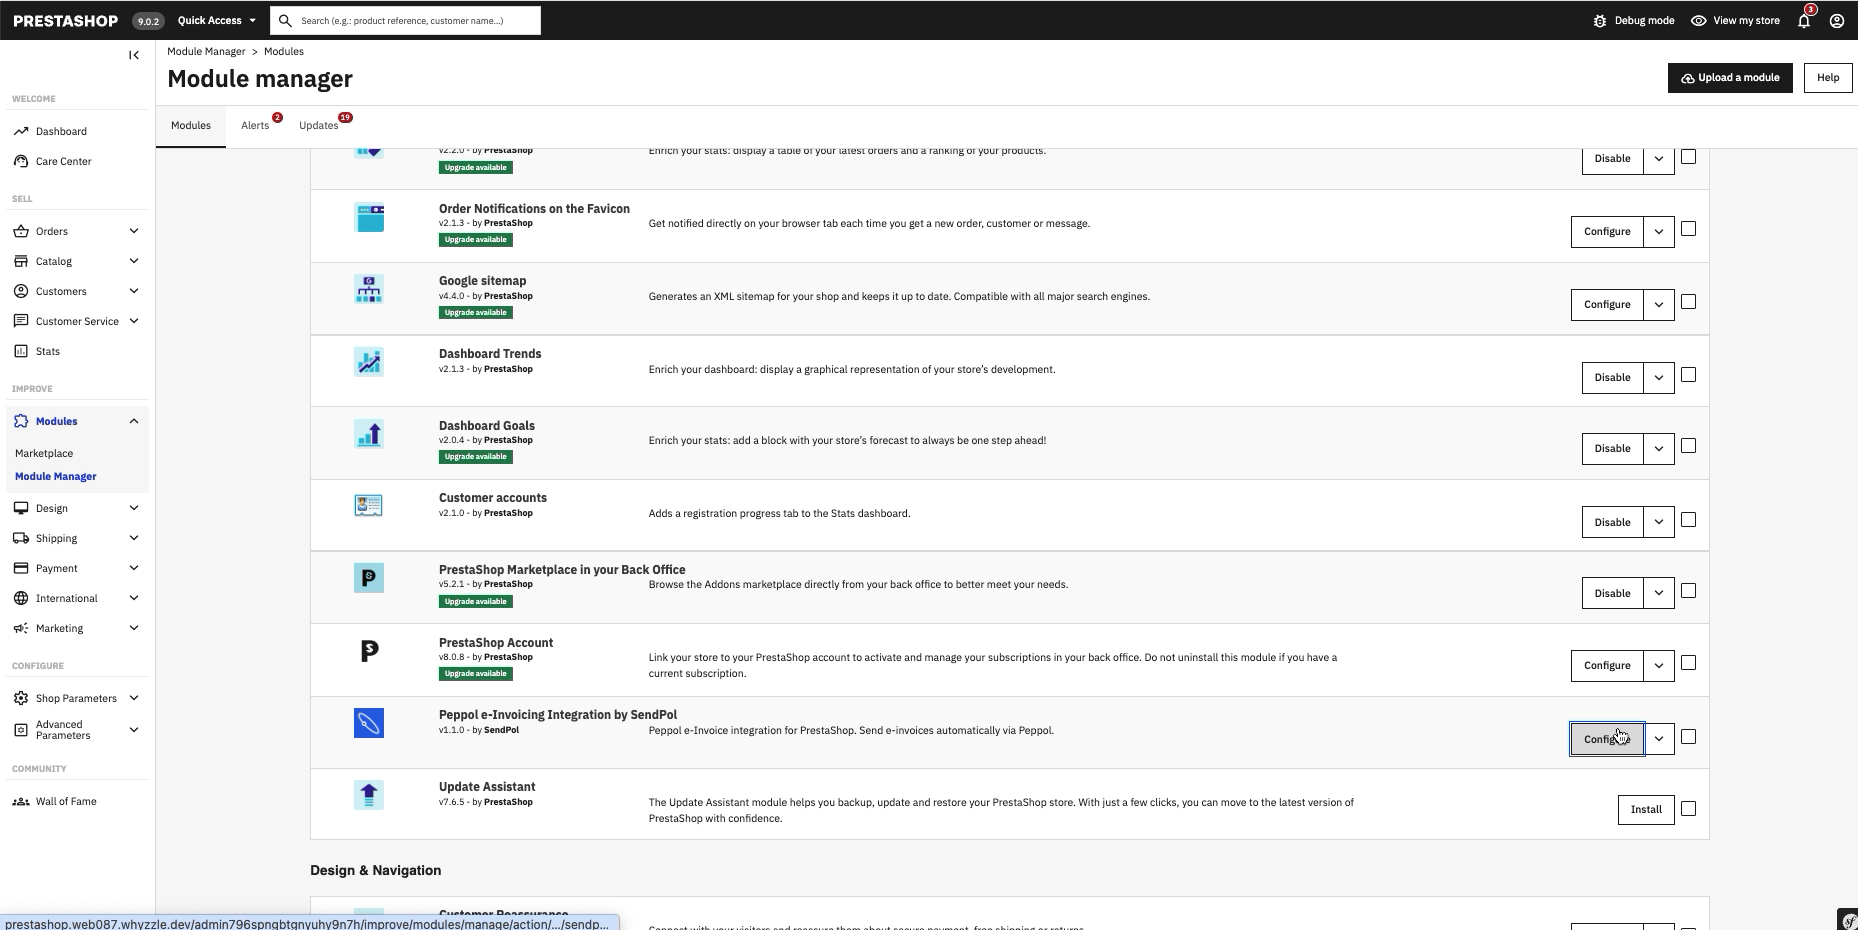
1Find and open the SendPol module
Search "SendPol" in the PrestaShop Marketplace, or open the module via Modules → Module Manager and click "Configure".
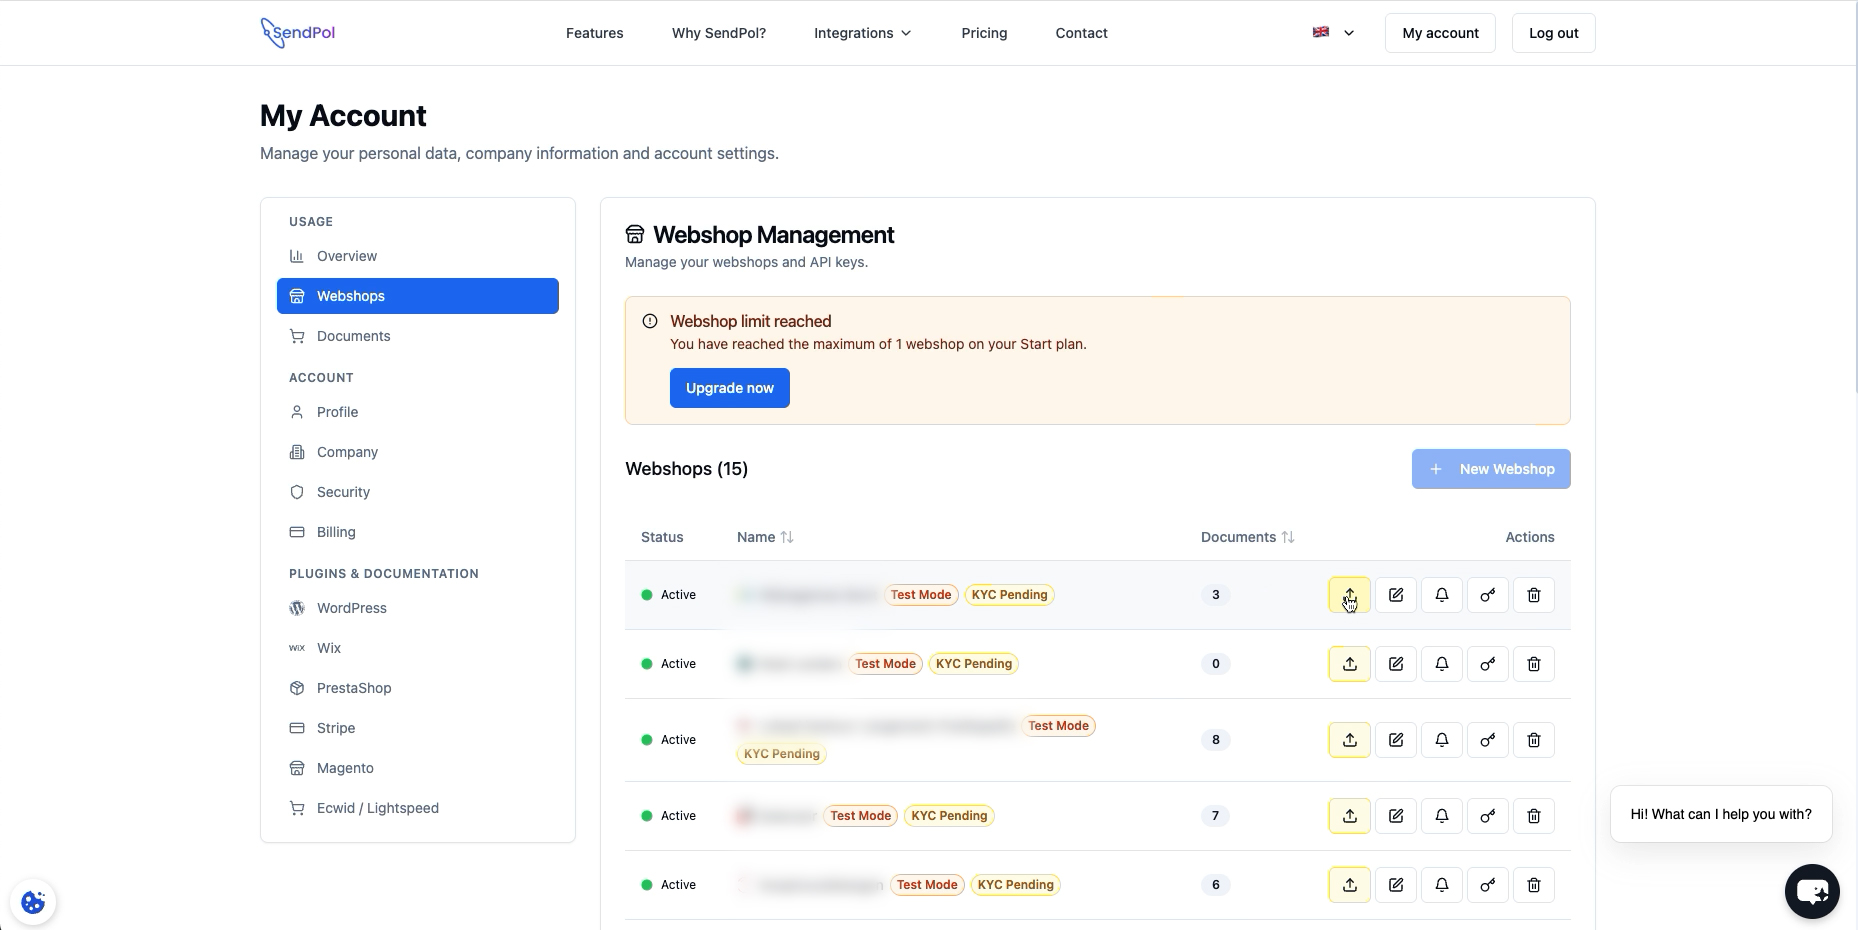
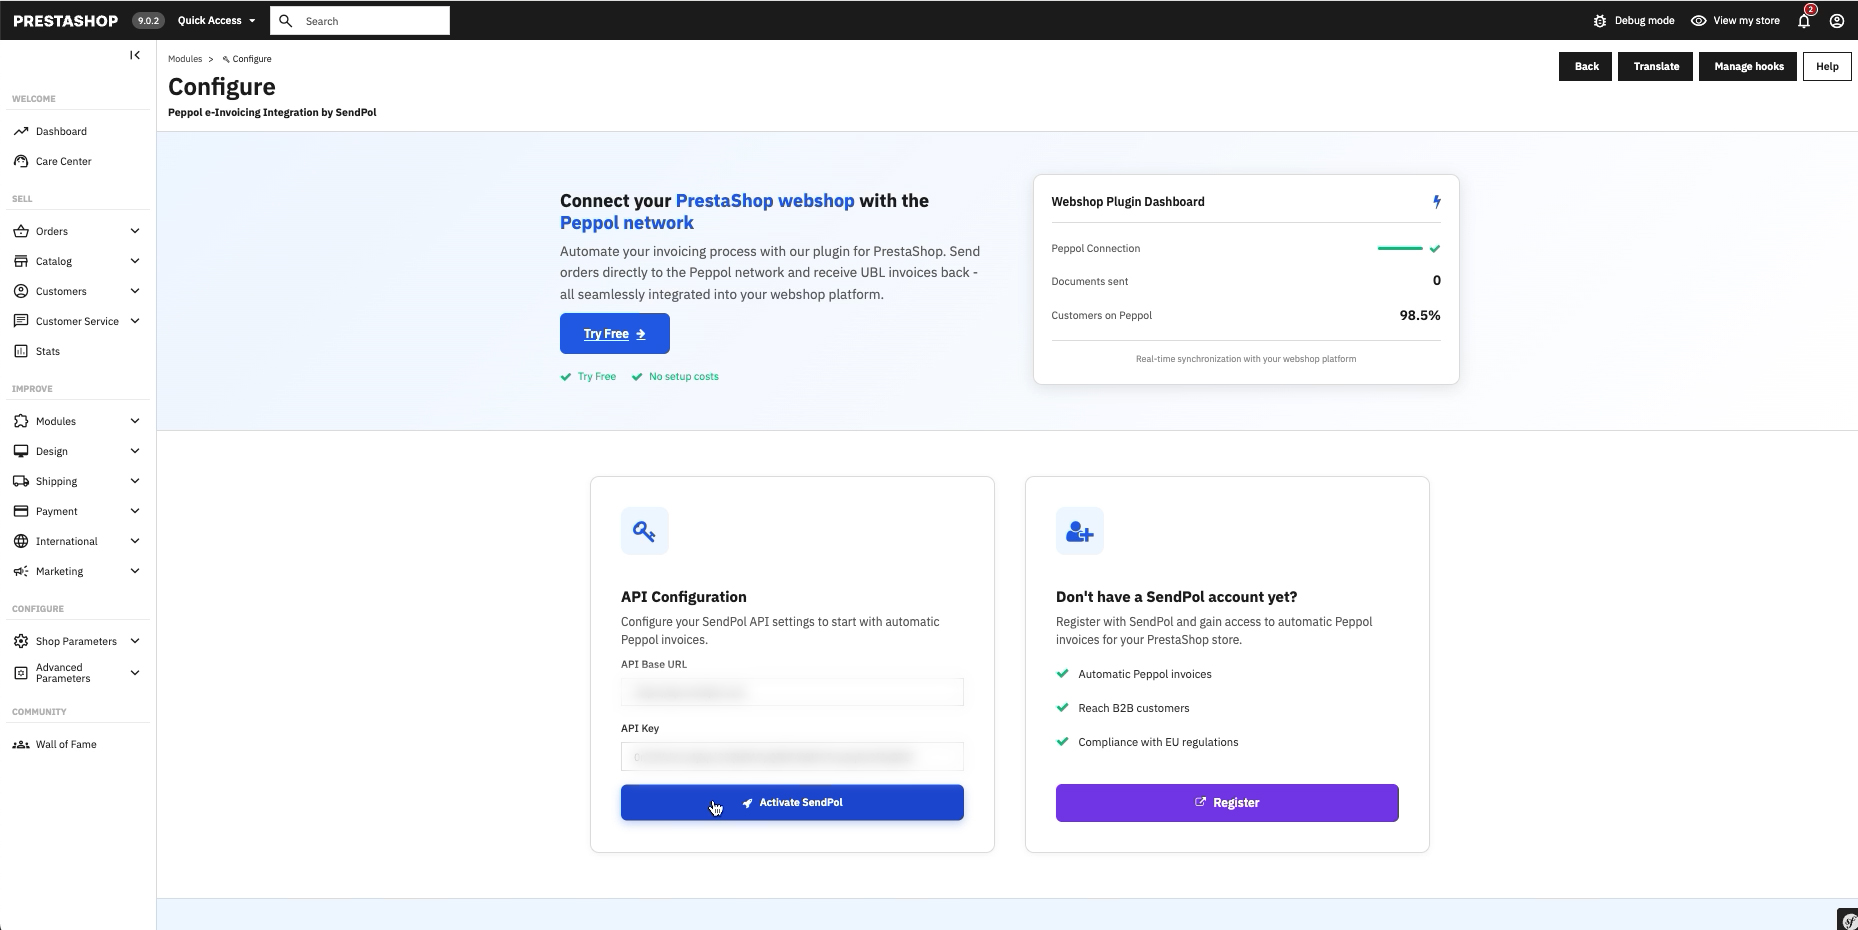
2Activate SendPol with your API key
Copy your webshop's API key from your SendPol account (My Account → Webshops), paste it together with the API Base URL into the module and click "Activate SendPol".
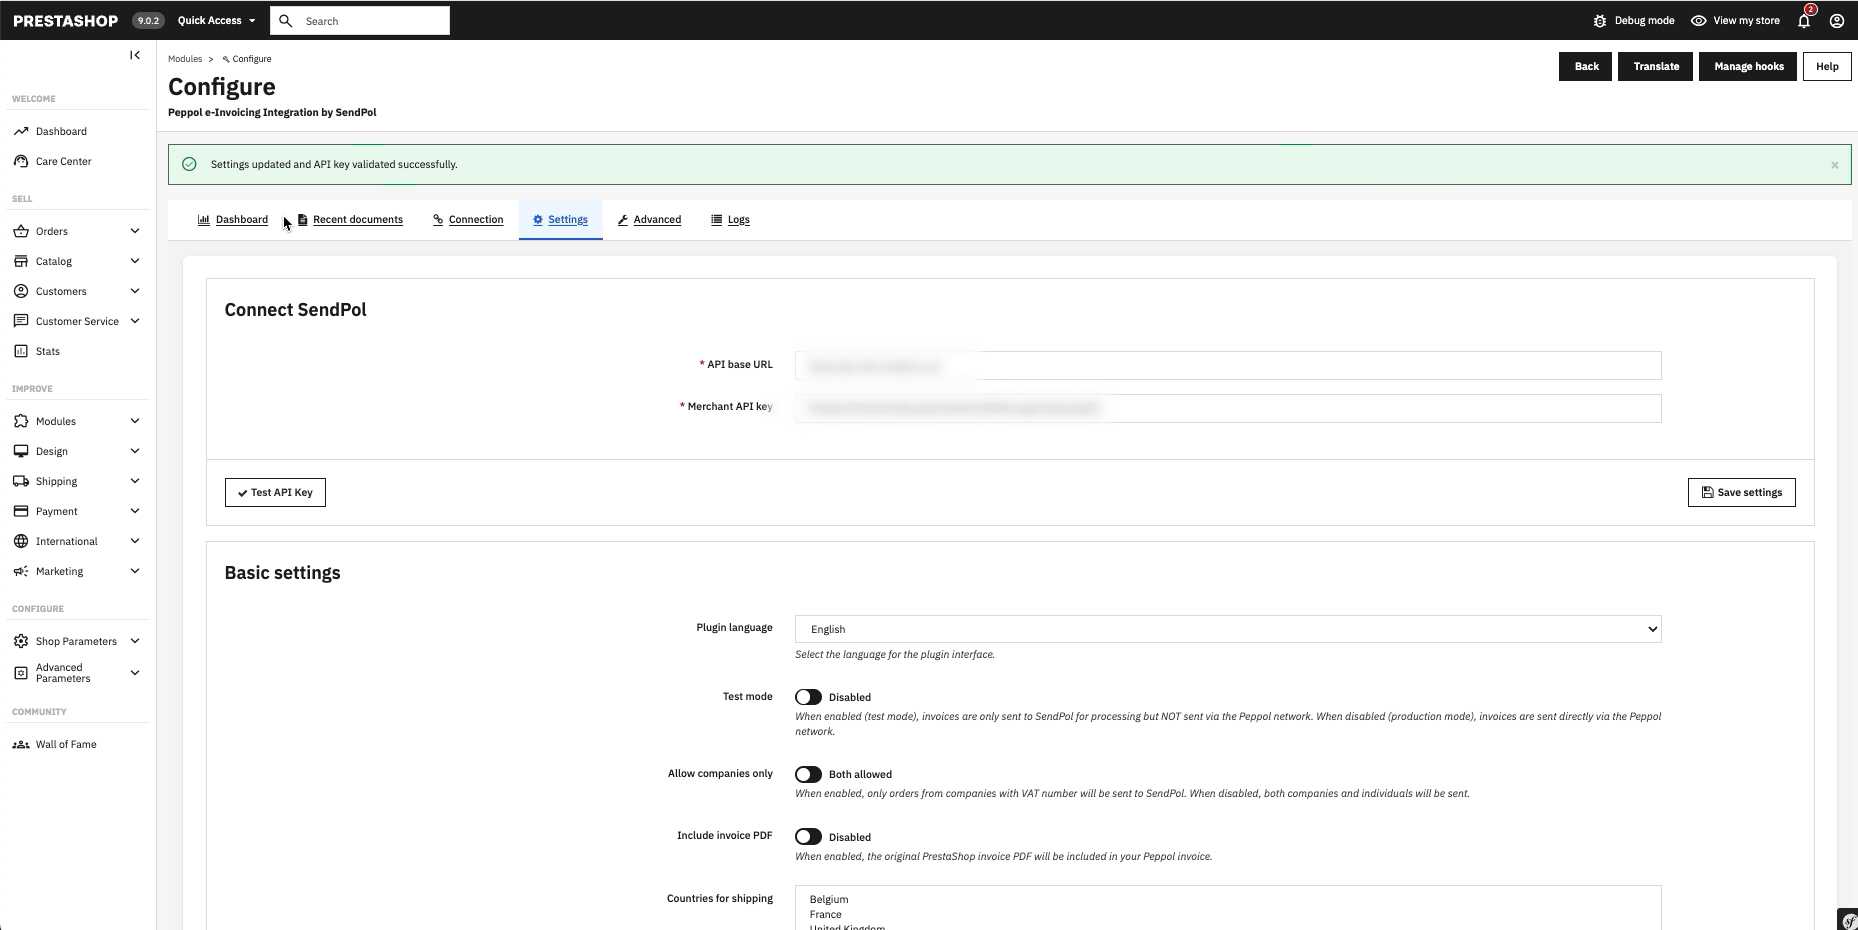
3Configure your settings
On the Settings tab you choose the plugin language and control who gets invoiced: test mode, companies only (VAT number required), include the invoice PDF, and the billing countries. Click "Save settings".
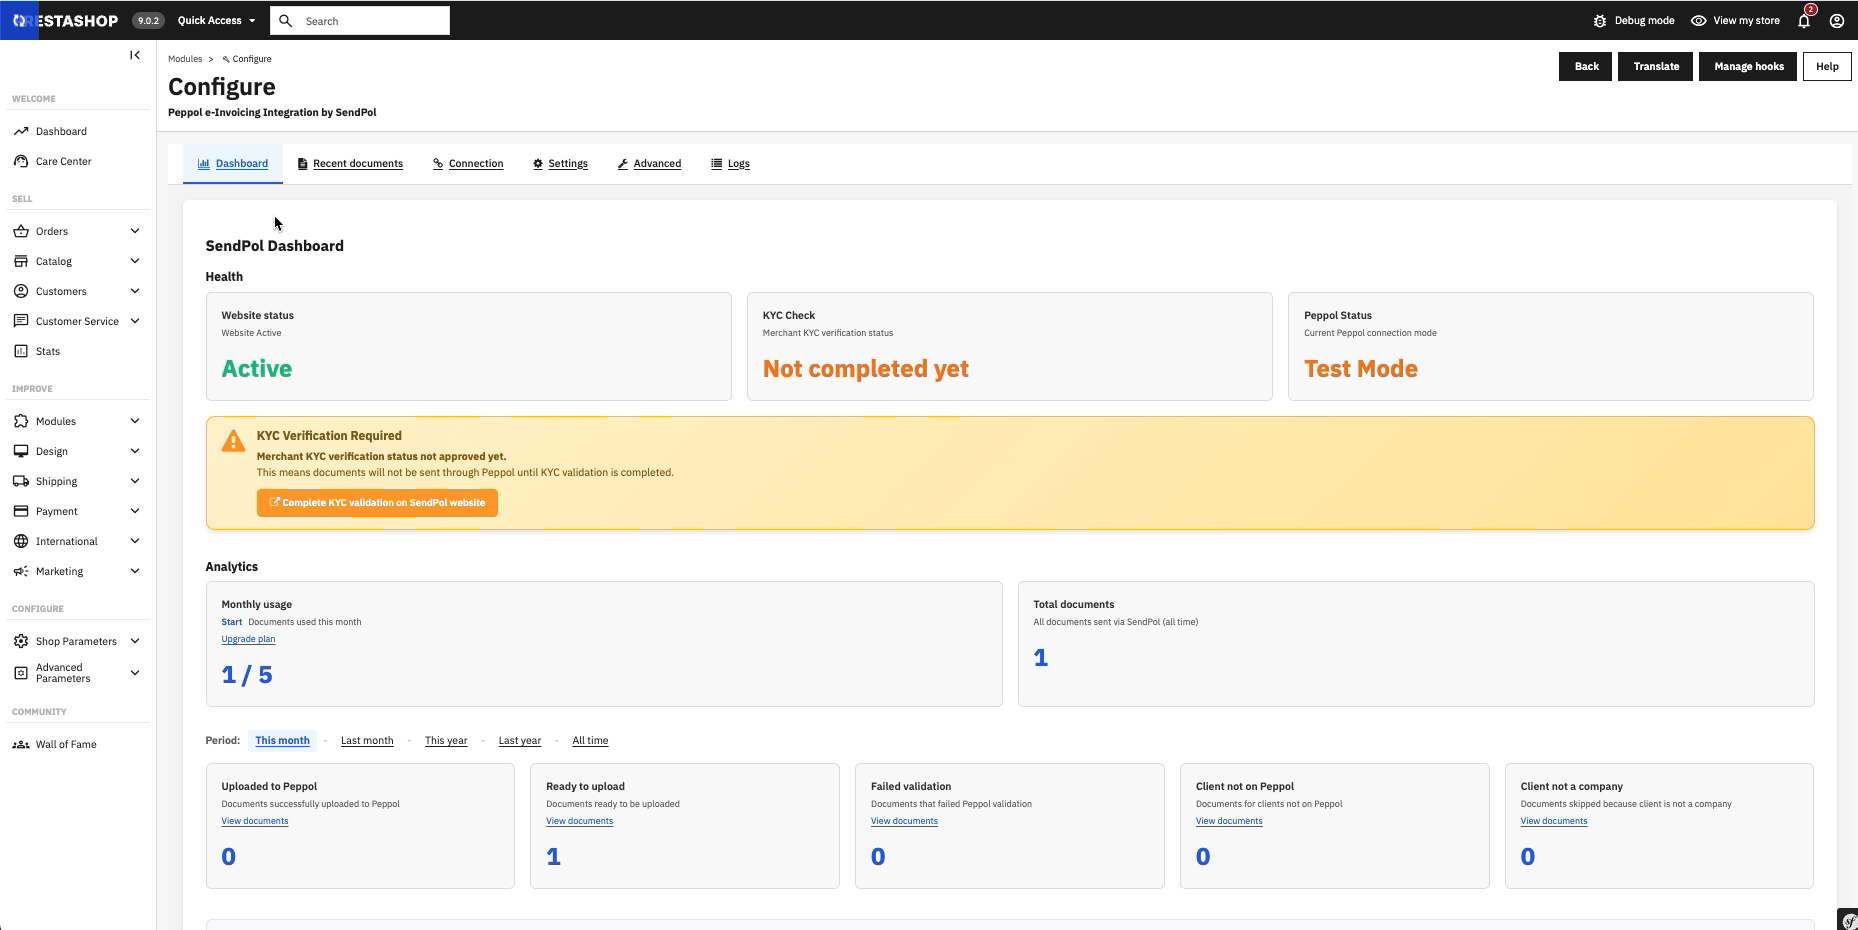
4Check the dashboard and complete KYC
The Dashboard tab shows your website status, KYC check and Peppol mode, plus your document usage. Complete the KYC verification on the SendPol website; the status then changes from "Not completed yet" to "Completed" and you can send live via Peppol.
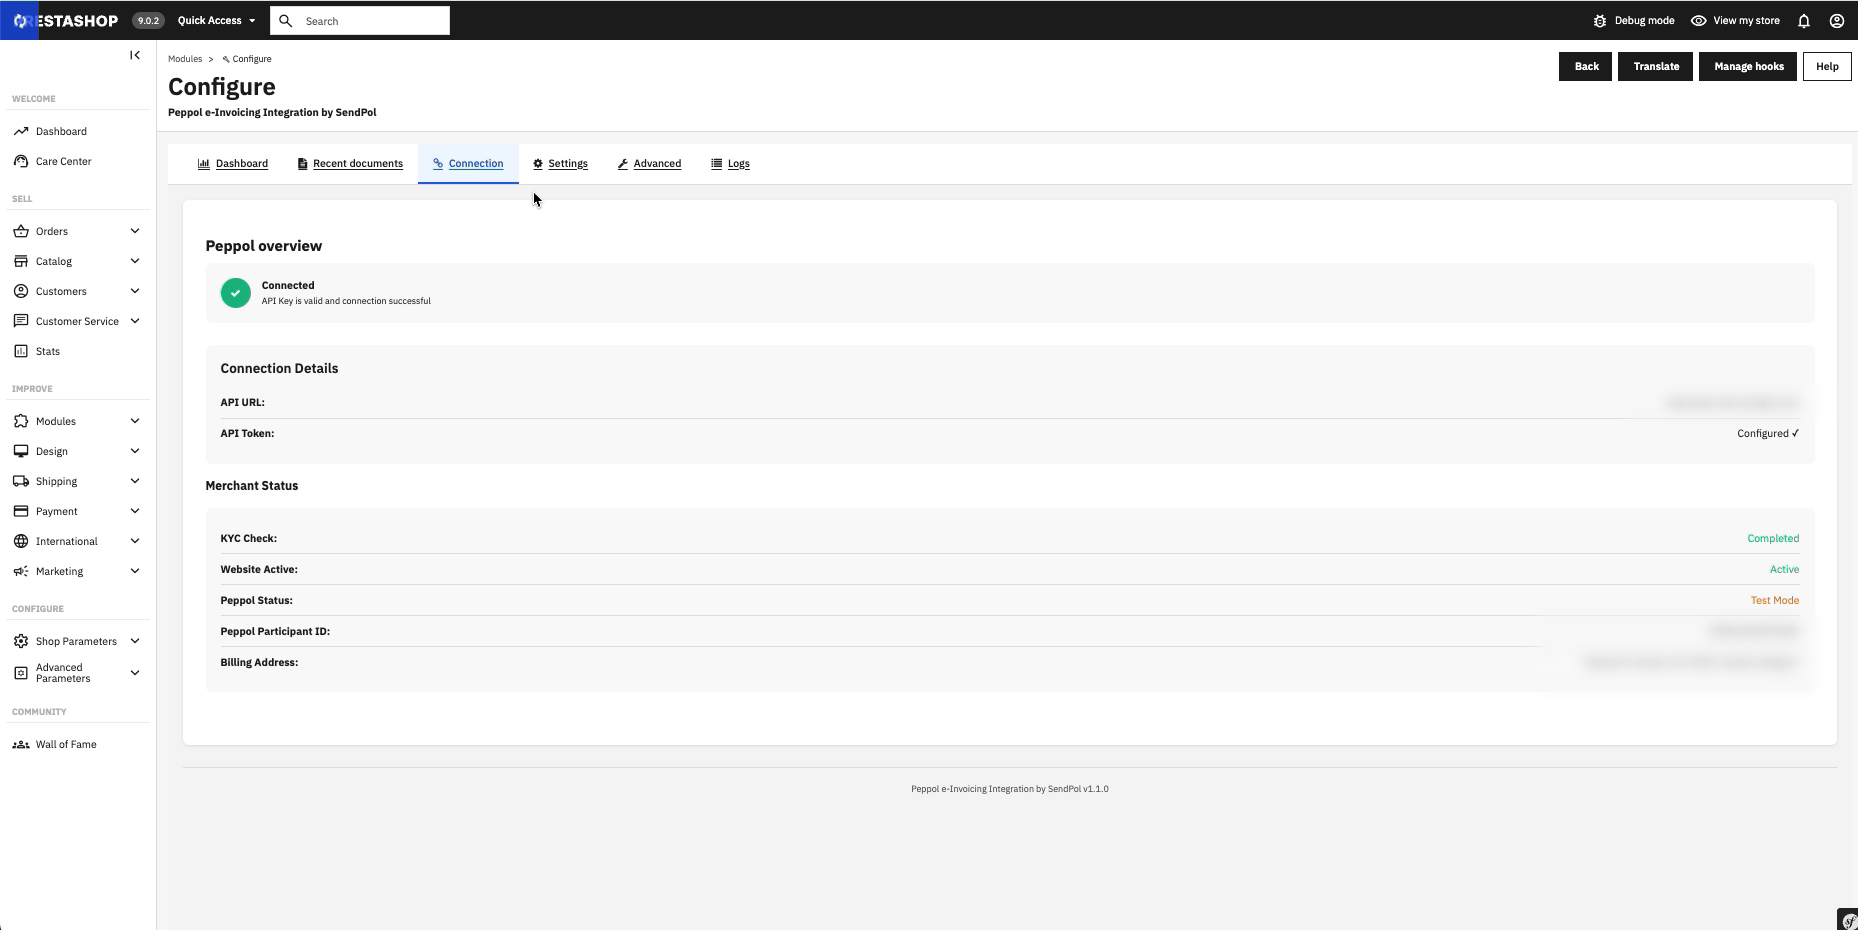
5Verify the connection
The Connection tab confirms your API key is valid and shows your merchant status and your Peppol Participant ID.
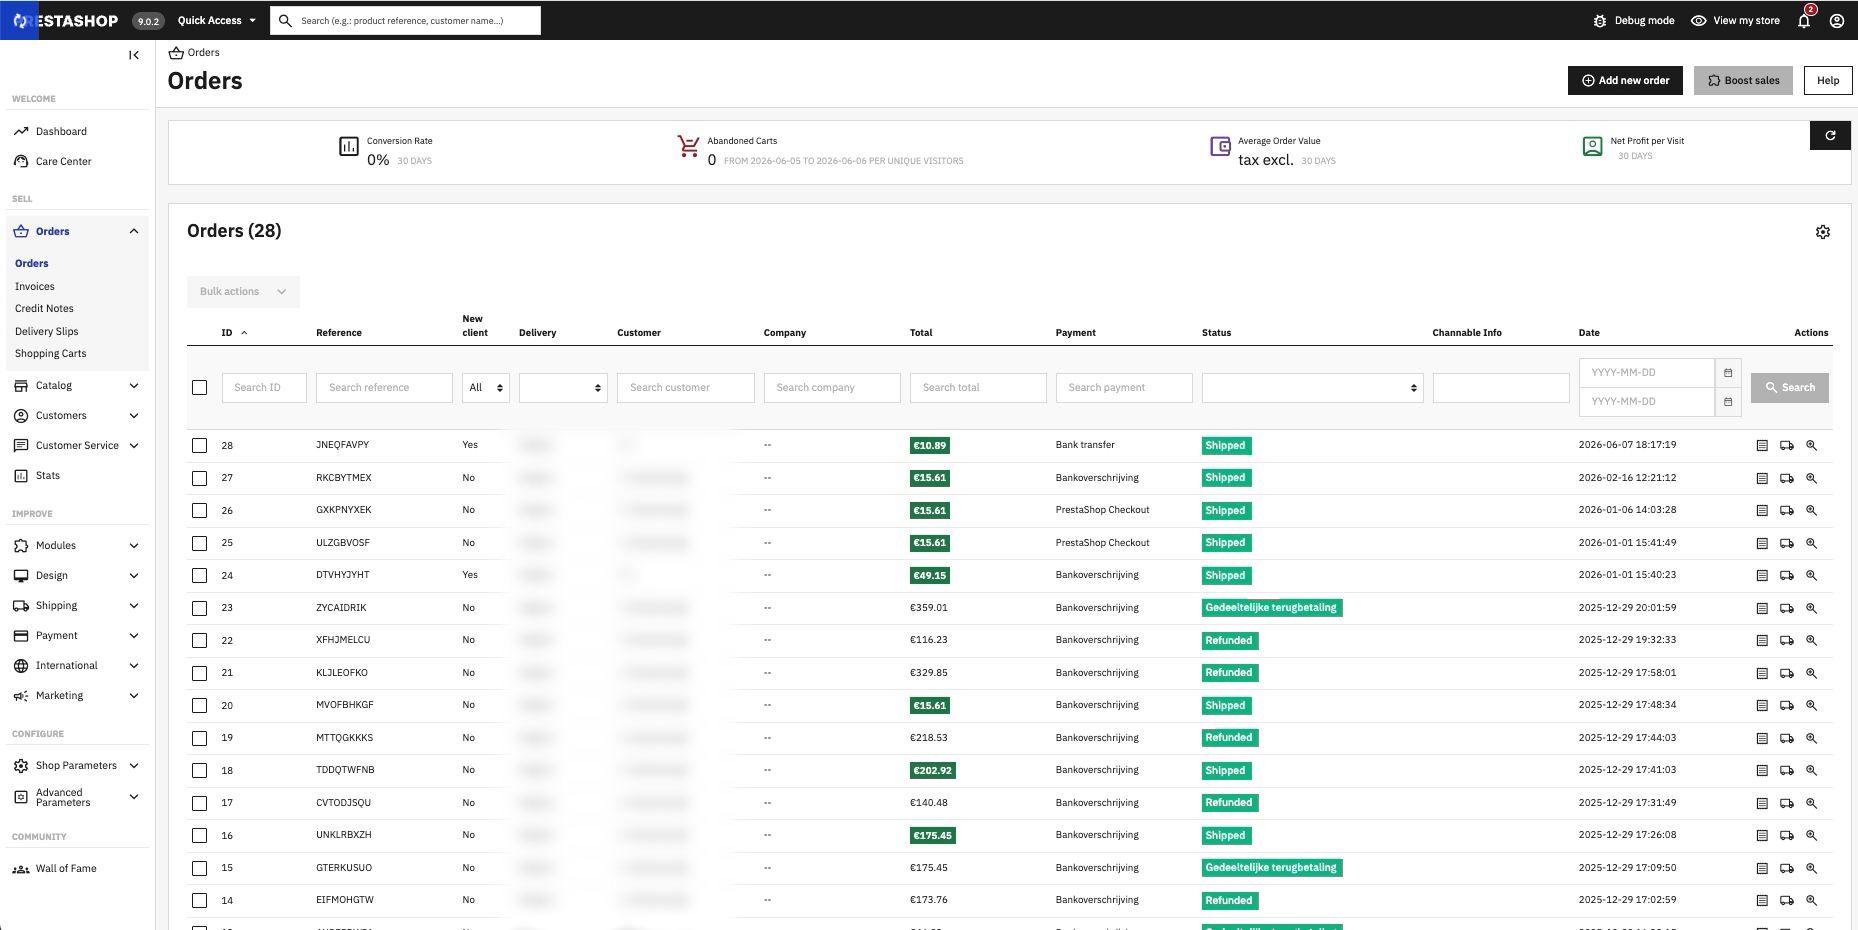
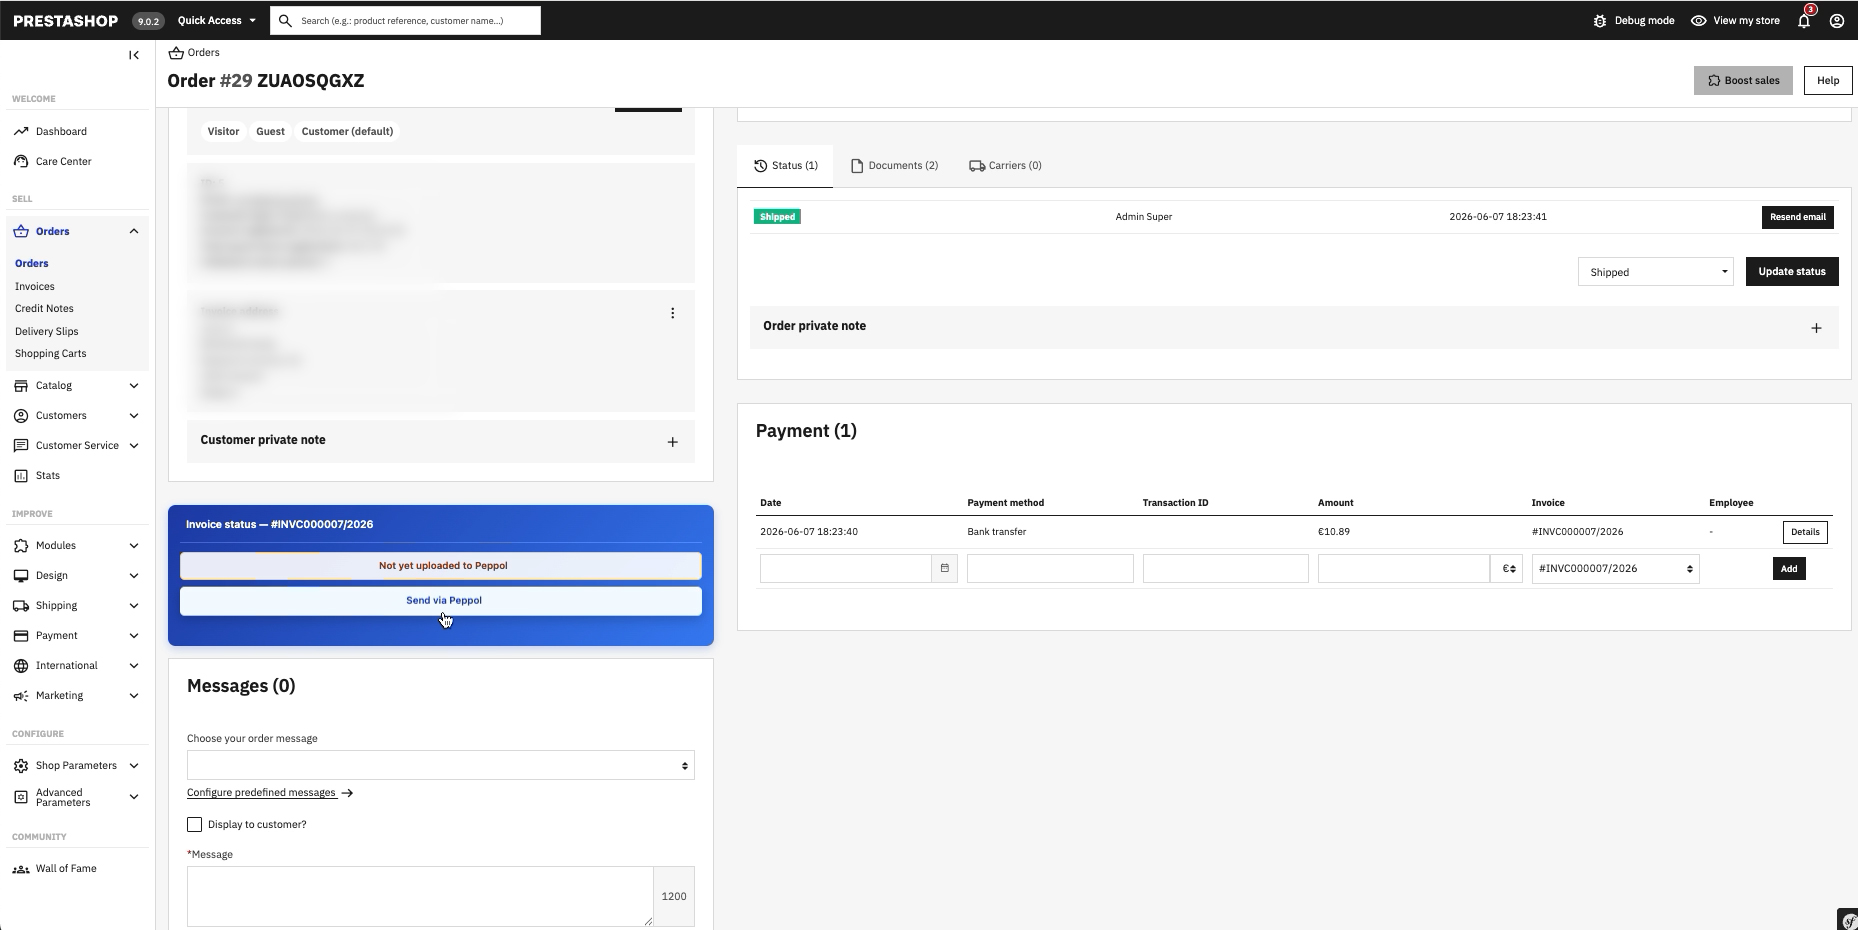
6Send an invoice from an order
In PrestaShop, open an order that has an invoice. In the SendPol box on the order page, click "Send via Peppol" to submit the invoice.
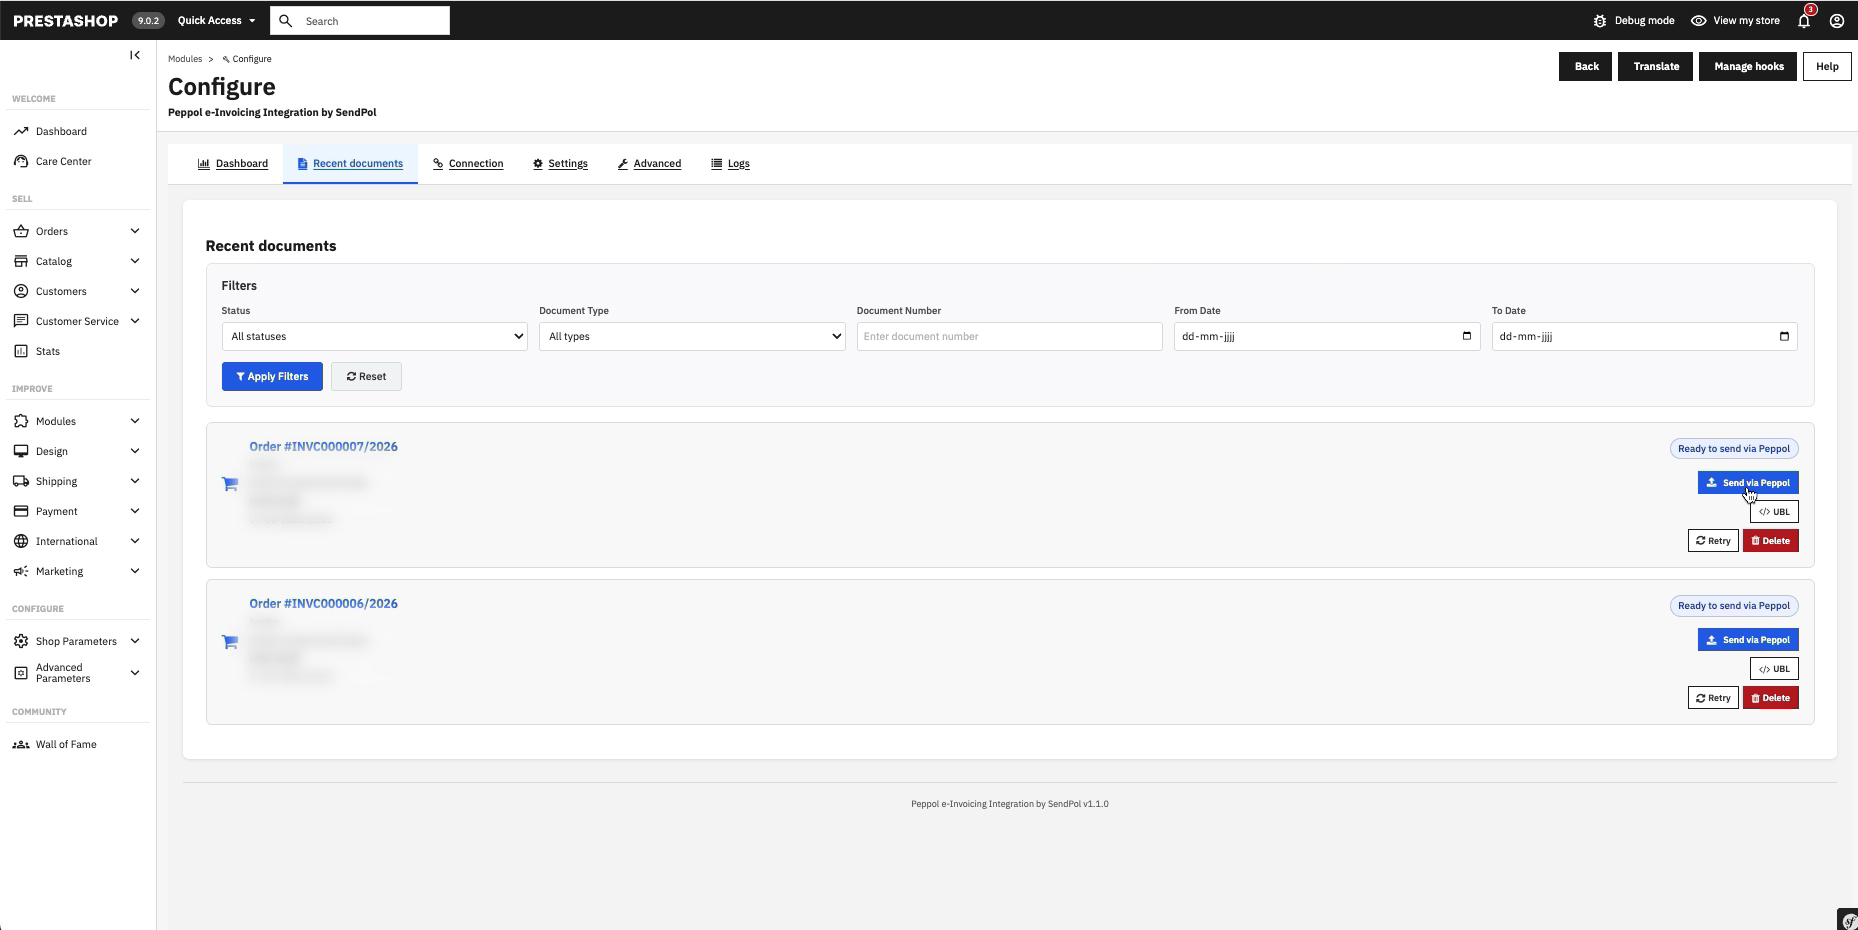
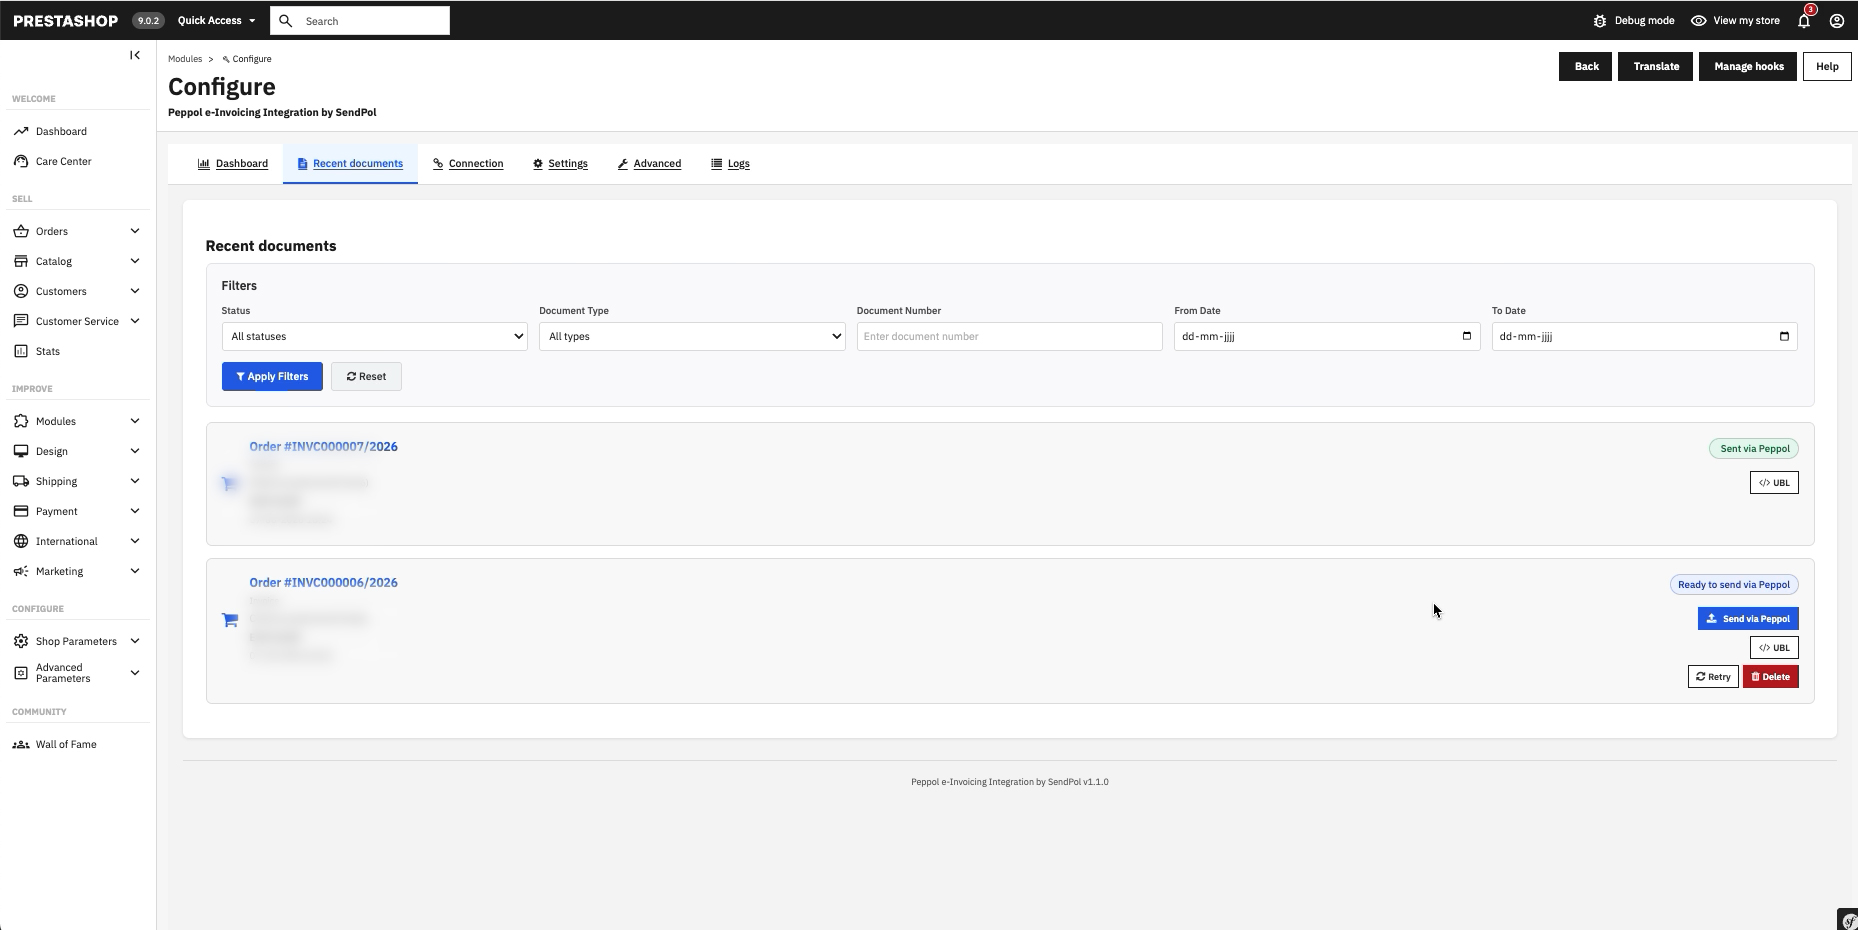
7Track your documents
On the Recent documents tab you track the Peppol status per document and can send, retry or view the UBL manually. Once sent, the status shows "Sent via Peppol".
Initial Setup
Getting Your API Credentials
Register with SendPol
Visit www.sendpol.com and create an account or log in to your existing account.
Find Your API Key in the SendPol Dashboard
API Base URL: https://api.sendpol.com
To find your API Key:
- Go to www.sendpol.com and log in with your account
- On the left side of the dashboard, select "Webshops"
- Click on the key icon (🔑) to view your API key
- Copy this key and keep it safe
First-Time Configuration
Configure the SendPol module after installation
Go to Modules > Module Manager in your PrestaShop admin
Find the SendPol module and click "Configure"
Enter the API Base URL: https://api.sendpol.com
Enter your SendPol API key
Click "Save" - the module will automatically test your connection
PrestaShop Settings
Rounding Settings
It is important that rounding in PrestaShop is configured on the total rather than line by line. Applying VAT line by line causes discrepancies of several cents, which creates issues with Peppol.

Rounding Rule
You can choose between 6 different ways to round prices. 'Round to the nearest higher value' is the recommended behavior.
Rounding Type
You can choose when to round prices: for each item, each line or the total (of an invoice, for example).
Configuration Steps
Follow these steps to configure rounding settings in PrestaShop
Go to your PrestaShop admin dashboard
Navigate to Shop Parameters > General > Rounding
Set the 'Rounding Rule' to 'Round to the nearest higher value'
Set the 'Rounding Type' to 'Round the total'
Click 'Save' to save the settings
Configuration
Status Mapper
About the Status Mapper
With the status mapper, you can determine when a PrestaShop order should automatically generate and send a Peppol invoice. You choose which PrestaShop order status triggers the invoice sending.
Key Features
- Flexible status mapping: Choose which PrestaShop status triggers the invoice
- Multiple statuses possible: Configure different statuses for different scenarios
- Automatic processing: Once an order reaches the chosen status, the invoice is automatically generated and sent
- Custom workflow: Adapt the module to your specific order processing workflow
- Map multiple statuses: Set up different statuses for different types of orders or customers
Configure Status Mapper
Follow these steps to set up the status mapper
Go to the SendPol module configuration in your PrestaShop admin
Navigate to the 'Status Mapper' or 'Status Mapping' section
Select the PrestaShop order status that should trigger sending Peppol invoices
Common statuses are: 'Shipped', 'Paid', 'Processing', or a custom status
Optional: Configure multiple statuses for different scenarios (for example, different statuses for B2B and B2C)
Save the settings - the module will now automatically send invoices when orders reach this status
Tip: Tip: Choose a status that fits your workflow. For example 'Shipped' if you want to send invoices after shipping, or 'Paid' if you want to send invoices after payment. You can also configure multiple statuses for different workflows.
Status mapping examples
Practical examples of how you can use the status mapper for different workflows
Invoices after shipping
Map the 'Shipped' status to automatically send invoices once an order is shipped. Ideal for webshops that want to send invoices after physical shipping.
Invoices after payment
Map the 'Paid' status to send invoices once an order is paid. Perfect for webshops that want to send invoices after receiving payment.
Invoices on order confirmation
Map the 'Processing' or 'Confirmed' status to send invoices immediately upon order confirmation. Suitable for webshops with immediate invoicing.
Using the Module
Automatic Invoice Processing
Once configured, the module works automatically
Order Validation
The module validates orders before sending, checks for required customer information, verifies VAT numbers if provided, and ensures all necessary data is present.
Status Tracking
Monitor invoice status in the SendPol dashboard, view delivery confirmations, and track any processing errors.
Manual Actions
Resending Invoices
If an invoice was not sent or an error occurred, you can manually resend it.
Go to the PrestaShop order you want to resend
Look for the SendPol section in the order details
Click 'Resend' or 'Resend Invoice'
The module will regenerate and resend the invoice via Peppol
Bulk actions
Process multiple orders at once for efficient invoice processing.
Dashboard Overview
Dashboard Features
The SendPol dashboard in PrestaShop provides a real-time overview of your Peppol integration. Monitor shipments, document statuses, connection status, and view detailed logs.
- Real-time monitoring: See immediately which invoices have been sent and their status
- Document tracking: Track individual invoices from generation to delivery
- Connection status: Check if the connection to the Peppol network is active
- Logs and error messages: View detailed logs for troubleshooting
- Statistics: Overview of sent invoices, successful deliveries, and any errors
Order Management
About Order Management
Manage your PrestaShop orders and Peppol invoices from the module interface. Manual actions, bulk operations, and status tracking.
Resending Invoices
If an invoice was not sent or an error occurred, you can manually resend it.
Go to the PrestaShop order you want to resend
Look for the SendPol section in the order details
Click 'Resend' or 'Resend Invoice'
The module will regenerate and resend the invoice via Peppol
Bulk actions
Process multiple orders at once for efficient invoice processing.
Troubleshooting
FAQ
Quick Start
Get started quickly with SendPol for PrestaShop
Register with SendPol
Create an account at www.sendpol.com and get your API key
Install the Module
Download and upload the SendPol module in your PrestaShop Module Manager
Configure API
Enter your API key and test the connection to the Peppol network
Need Help?
Our support team is ready to help you with your SendPol integration