
SendPol Stripe App
Installation Guide
Send Stripe invoices directly to the Peppol network with the SendPol Stripe App. Choose between manual or fully automatic processing via webhooks.
Table of Contents
What is the SendPol Stripe App?
The SendPol Stripe App enables you to send invoices from Stripe directly via the Peppol network for e-invoicing compliance. You can choose between manual processing via the Stripe App, or fully automatic processing via webhooks.
Features
- Manual or automatic: Choose the method that fits your workflow
- Status tracking: View the processing status of sent invoices (Created, Ready to send, Sent via Peppol)
- UBL download: Download the generated UBL invoice
- Seamless integration: Works directly from the Stripe Dashboard
See SendPol in Action
See how easy the integration is
Start in test mode
By default, every new webshop is in test mode. Documents are validated and visible in your SendPol dashboard, but they are not forwarded to the Peppol network. This lets you safely test your workflow before any invoice goes live.
When you are ready for production, switch off test mode in your webshop settings under MyAccount.
Go to my webshopsRequirements
- A SendPol account with active subscription
- A Stripe account with invoices
- A webshop created in SendPol with API key
Method 1: Manual processing
Via the SendPol Stripe App
With the SendPol Stripe App you can manually send invoices to Peppol. This is ideal if you want to control which invoices are sent.
1Find and install the SendPol app
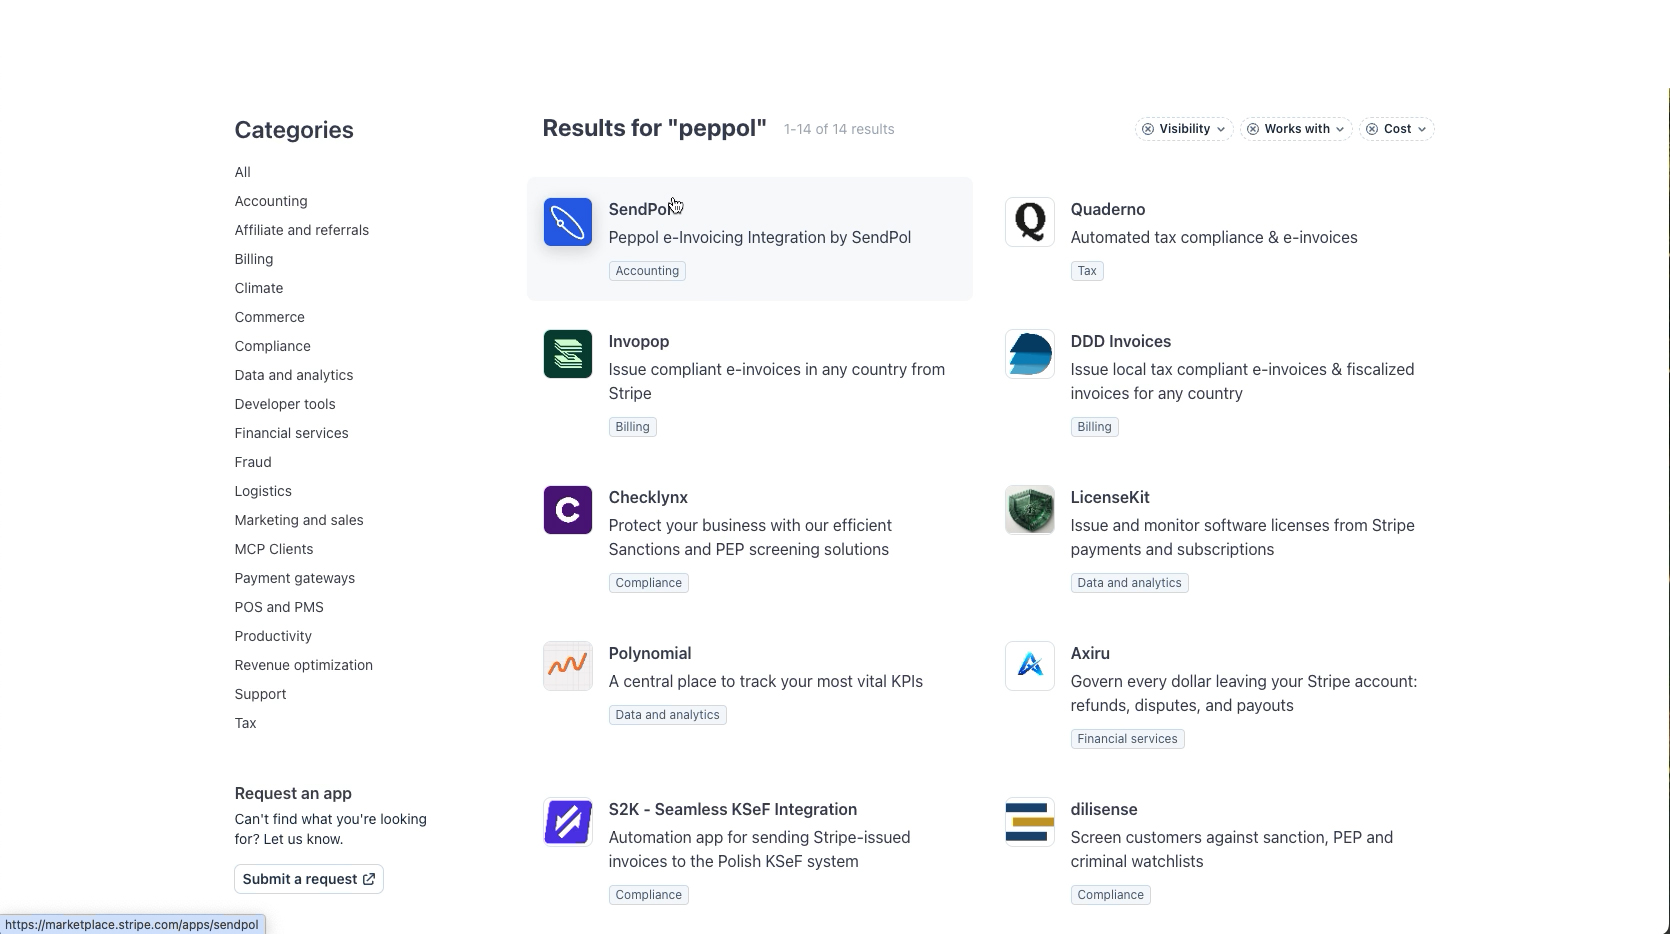
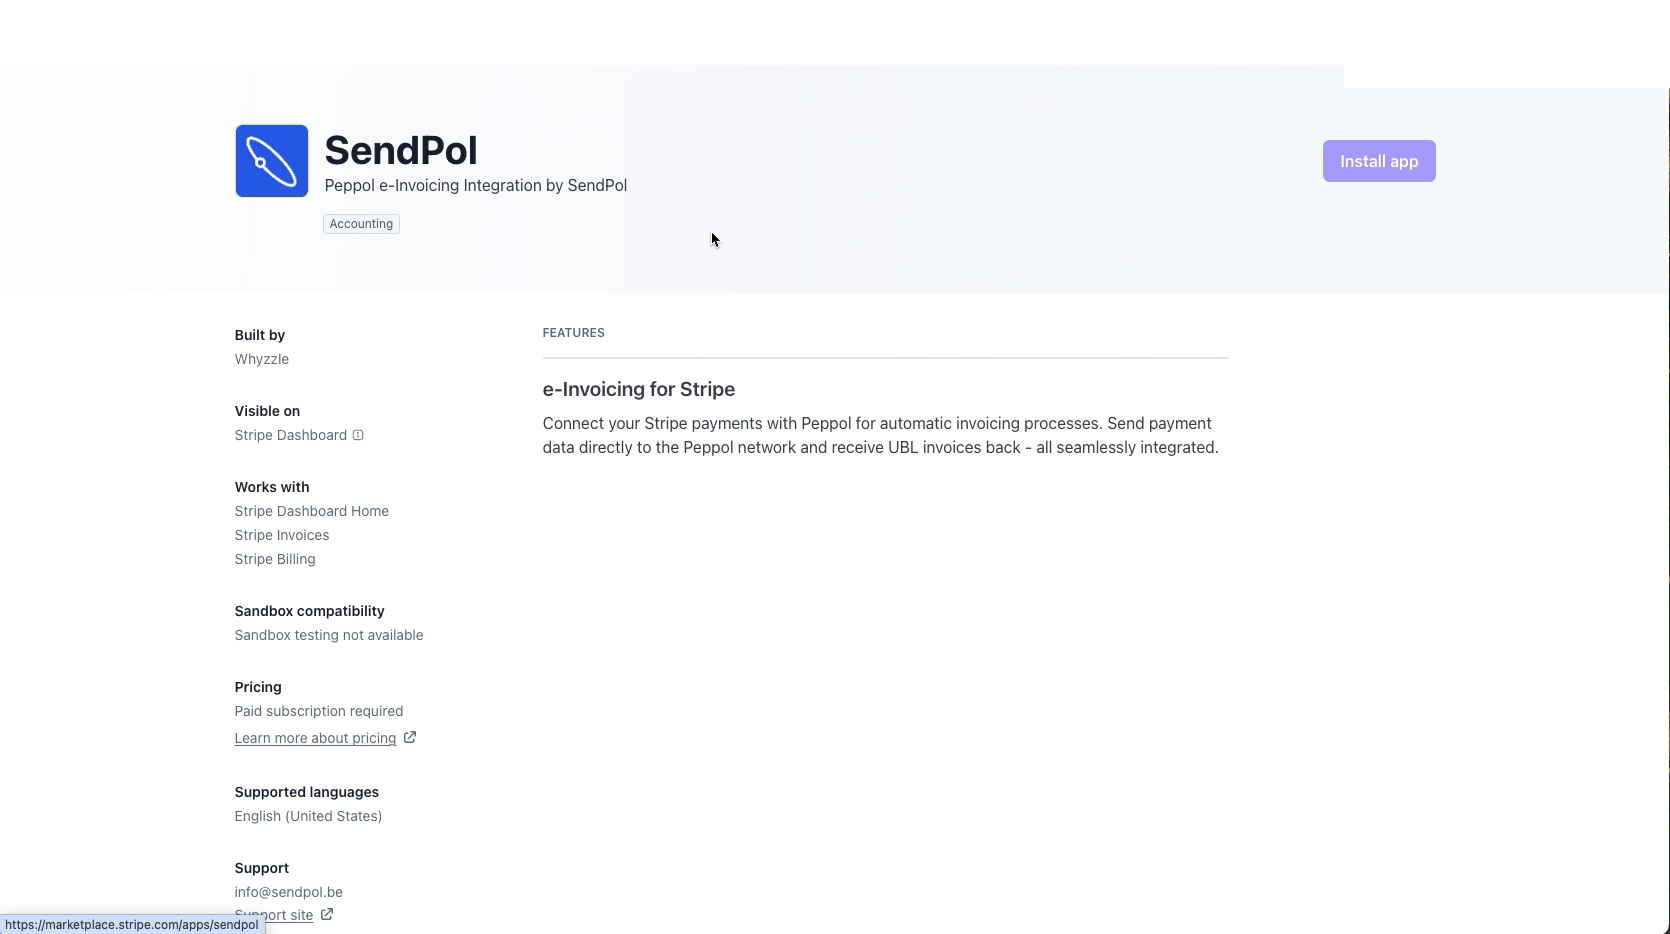
In your Stripe Dashboard, open the App Marketplace and search for "peppol". Open the "SendPol – Peppol e-Invoicing Integration" listing and click "Install app".
2Copy your API key from SendPol
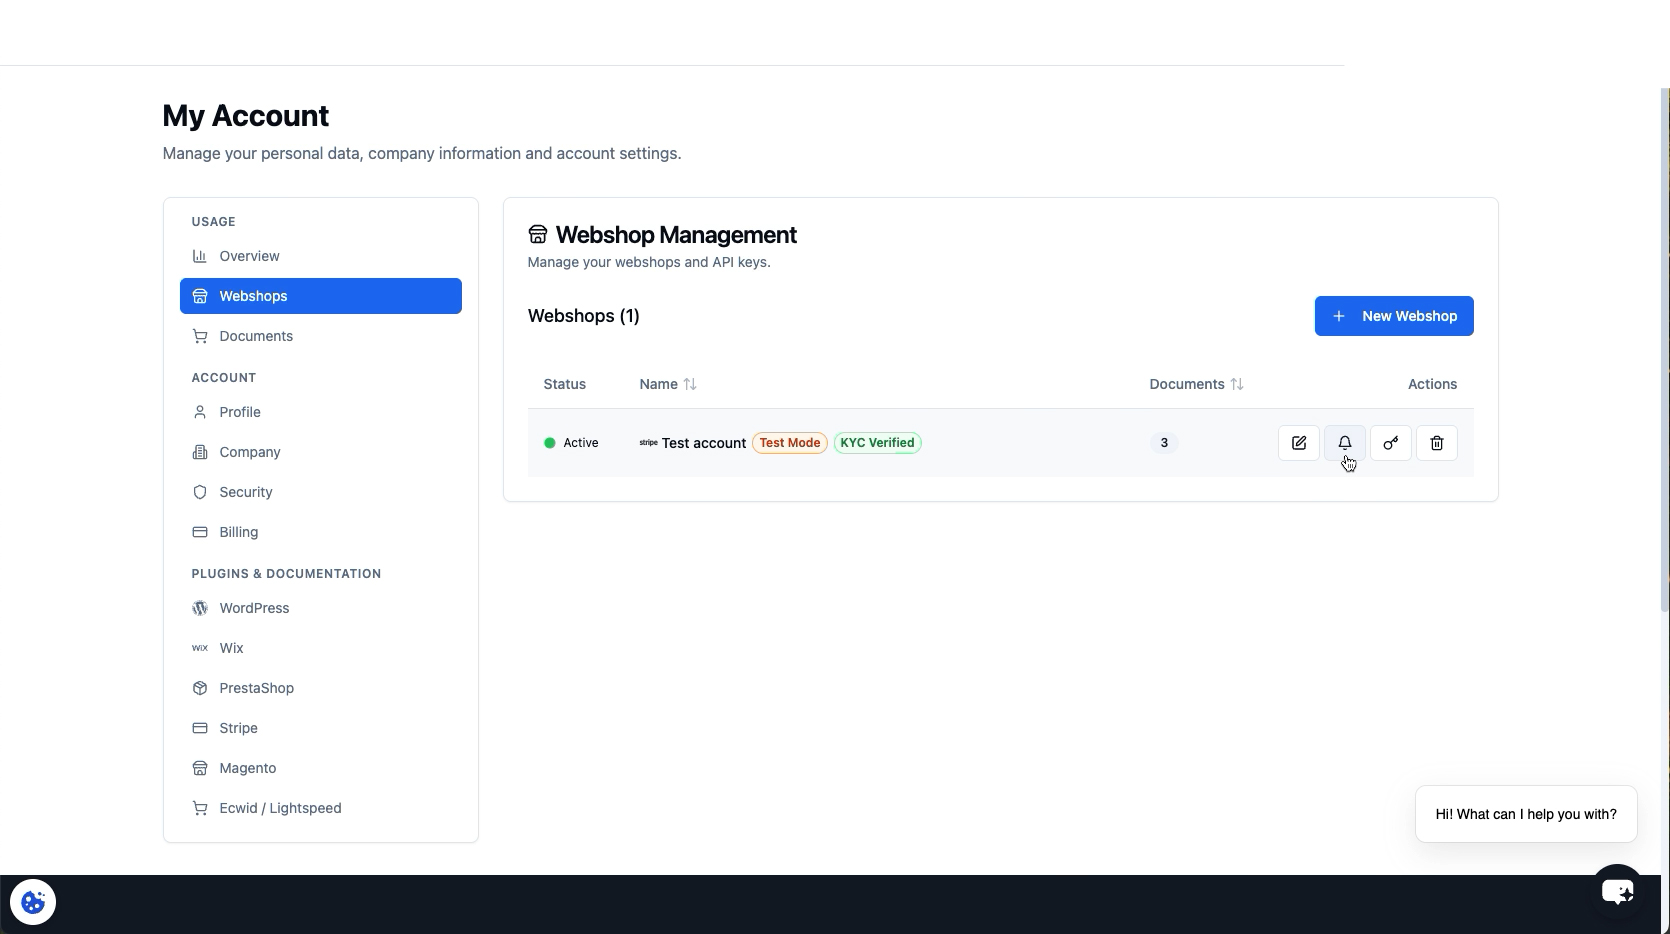
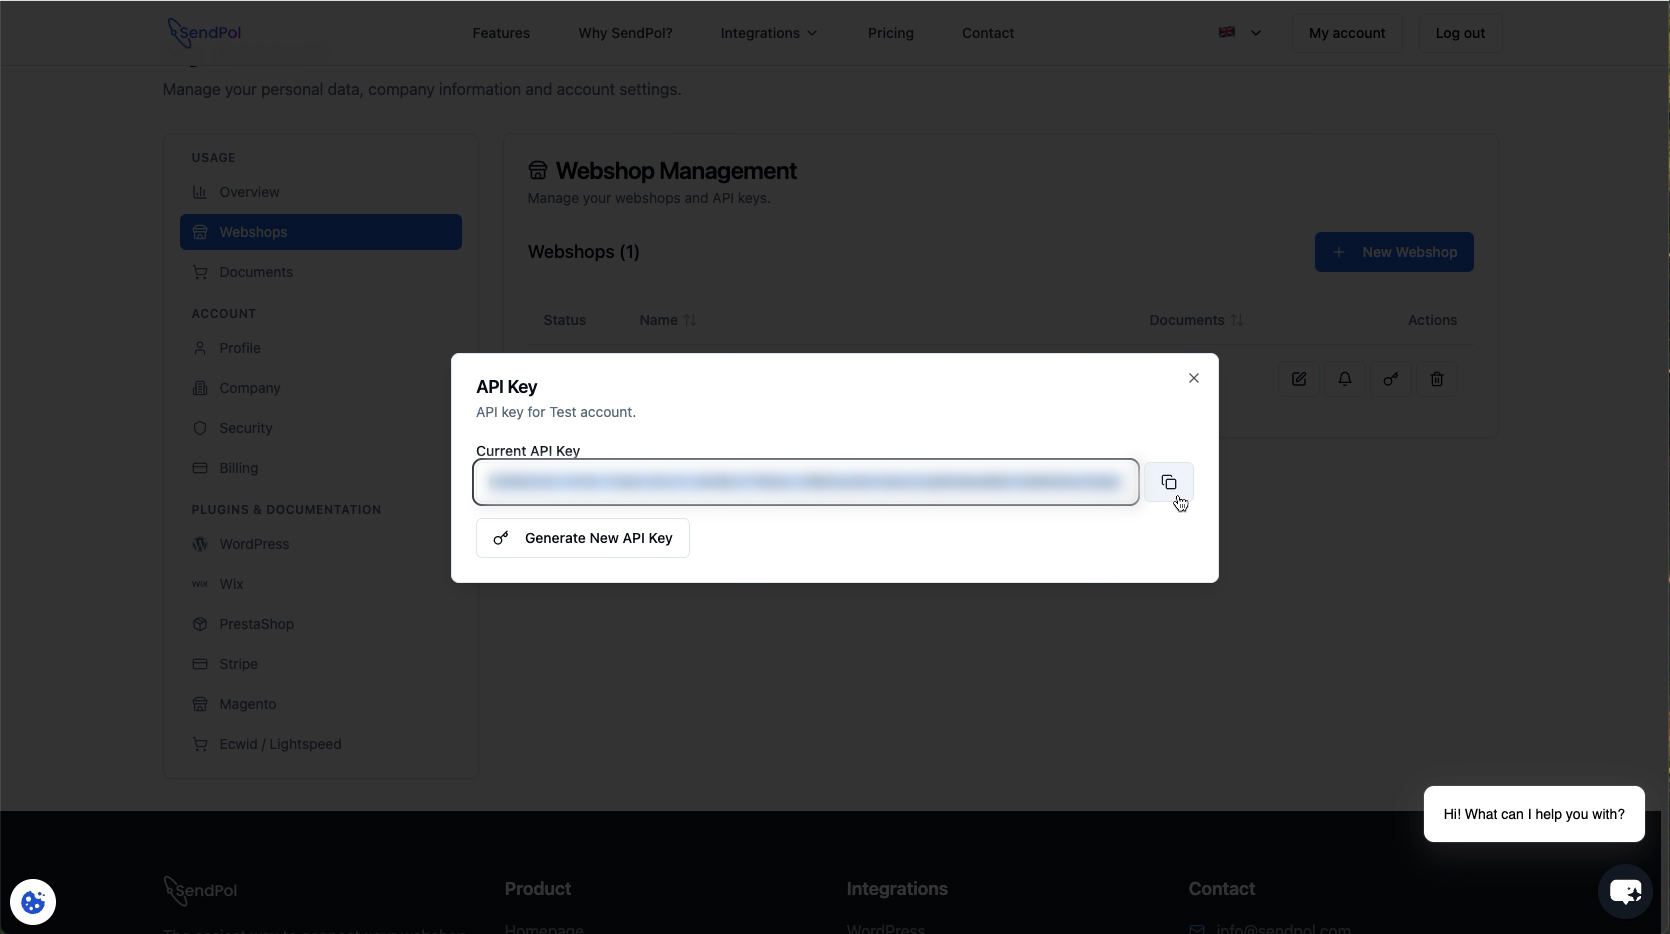
Log in to SendPol and go to My Account → Webshops. Open the webshop you want to connect and copy its API key — you'll paste it into Stripe in the next step.
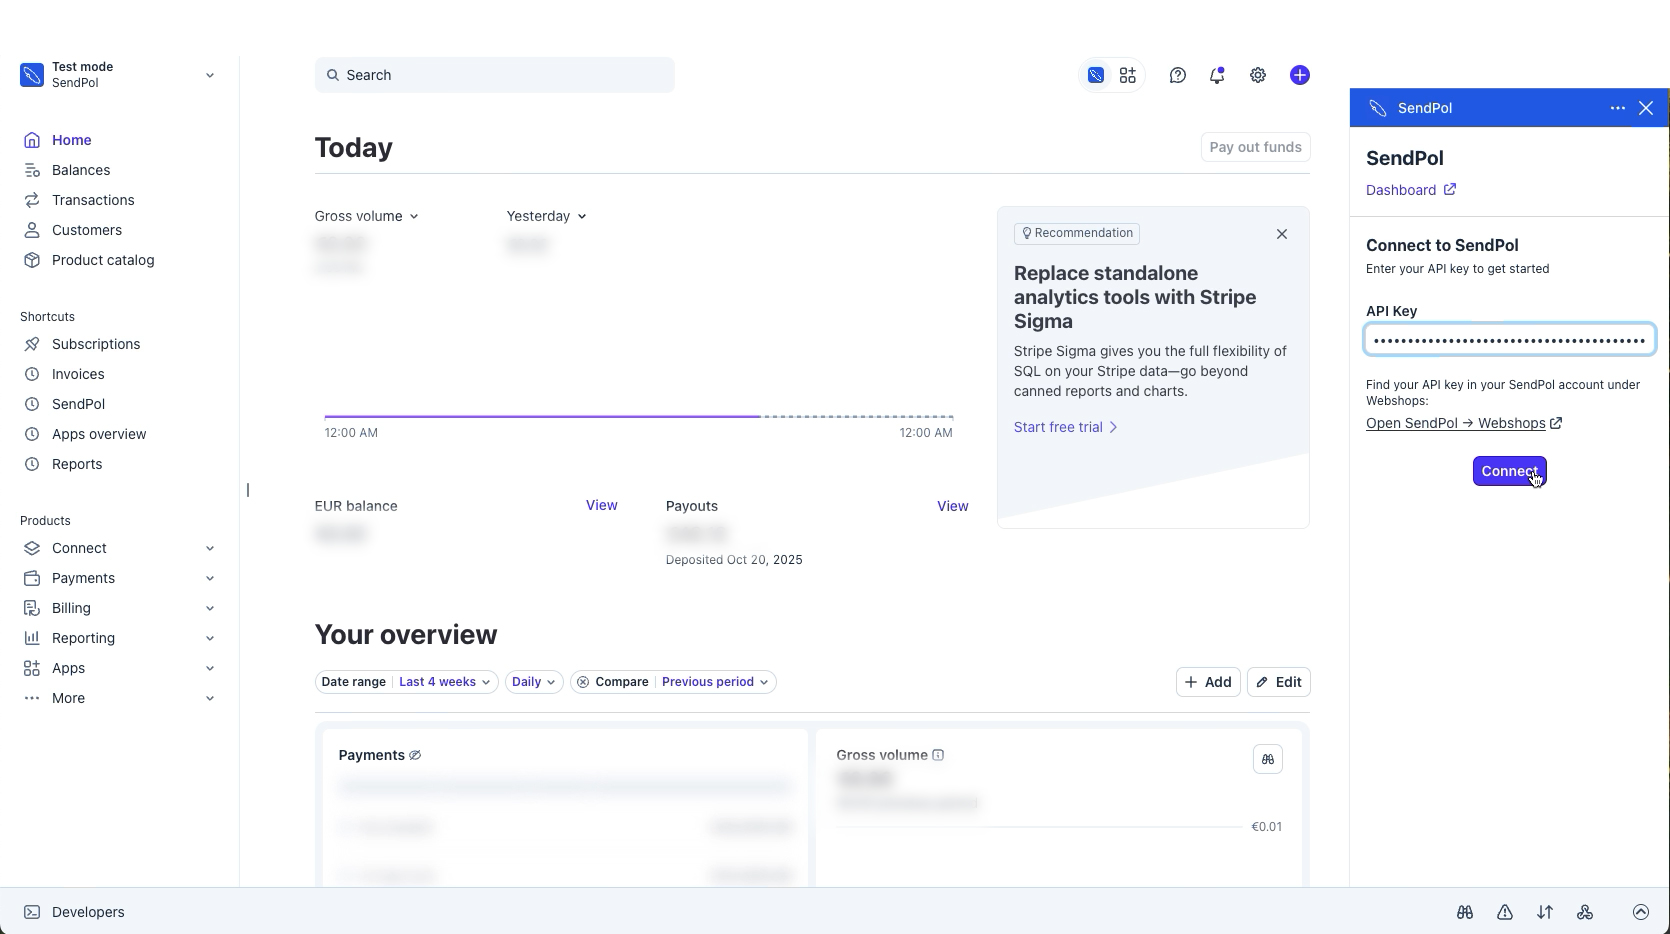
3Connect SendPol in Stripe
Back in Stripe, open the SendPol panel, paste your API key and click "Connect". SendPol confirms the connection with a "Connected" badge.
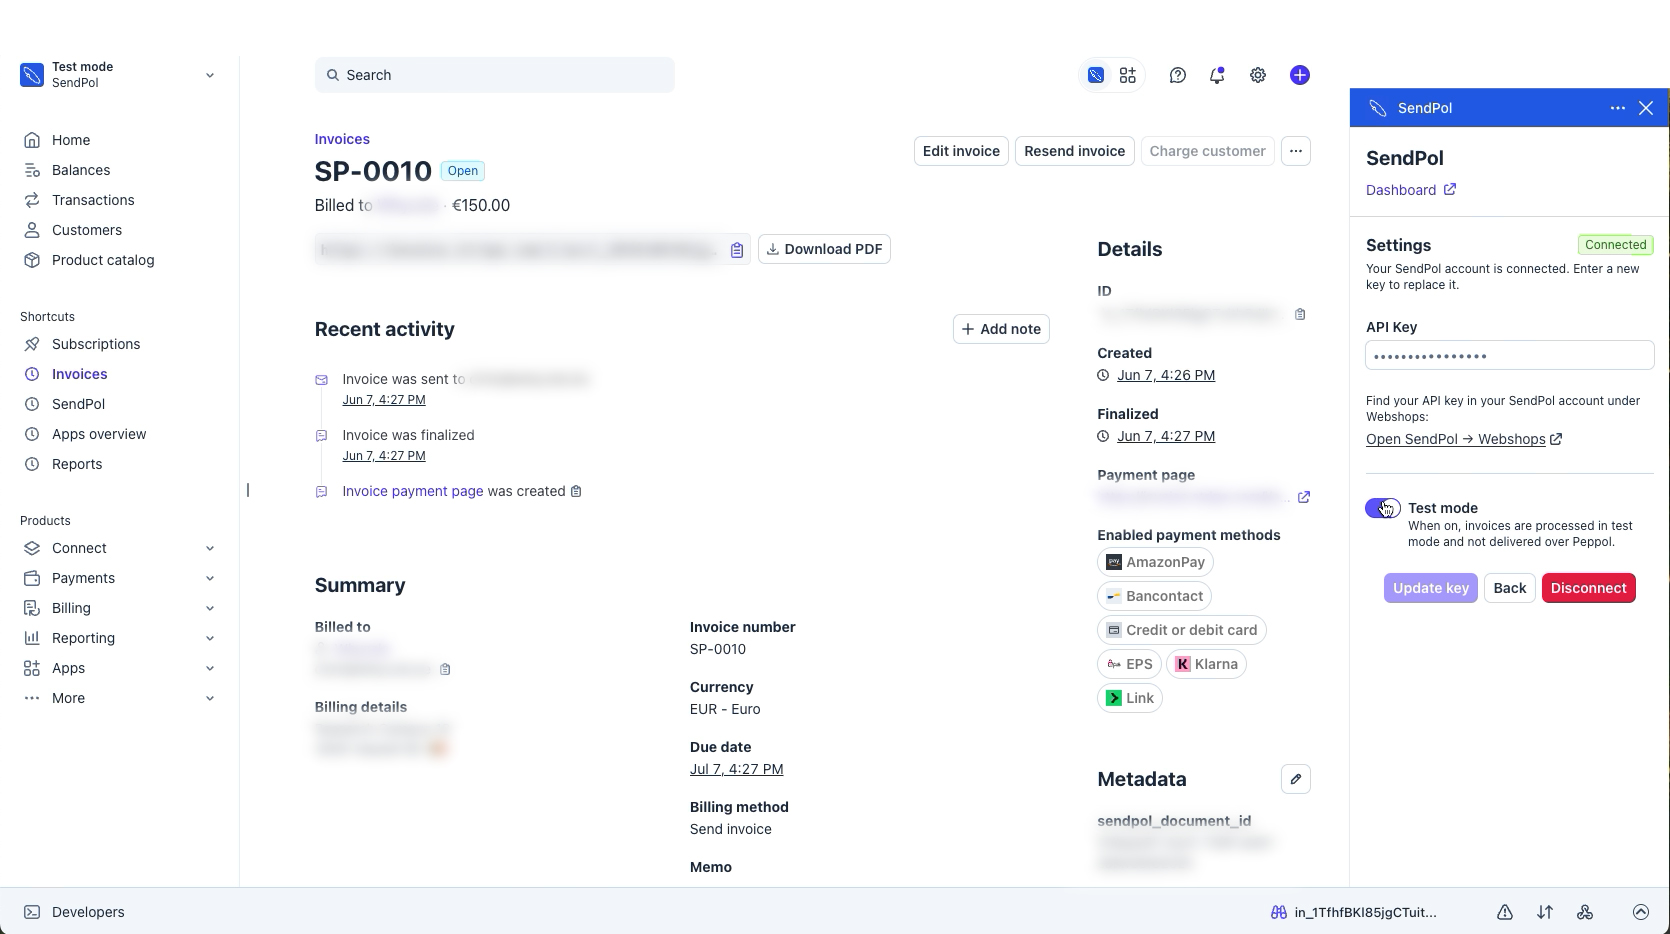
4Check your settings and test mode
In the SendPol settings panel you can toggle test mode on or off. In test mode invoices are processed but not delivered over Peppol — switch it off (and complete KYC) to go live. From here you can also update your key or disconnect.
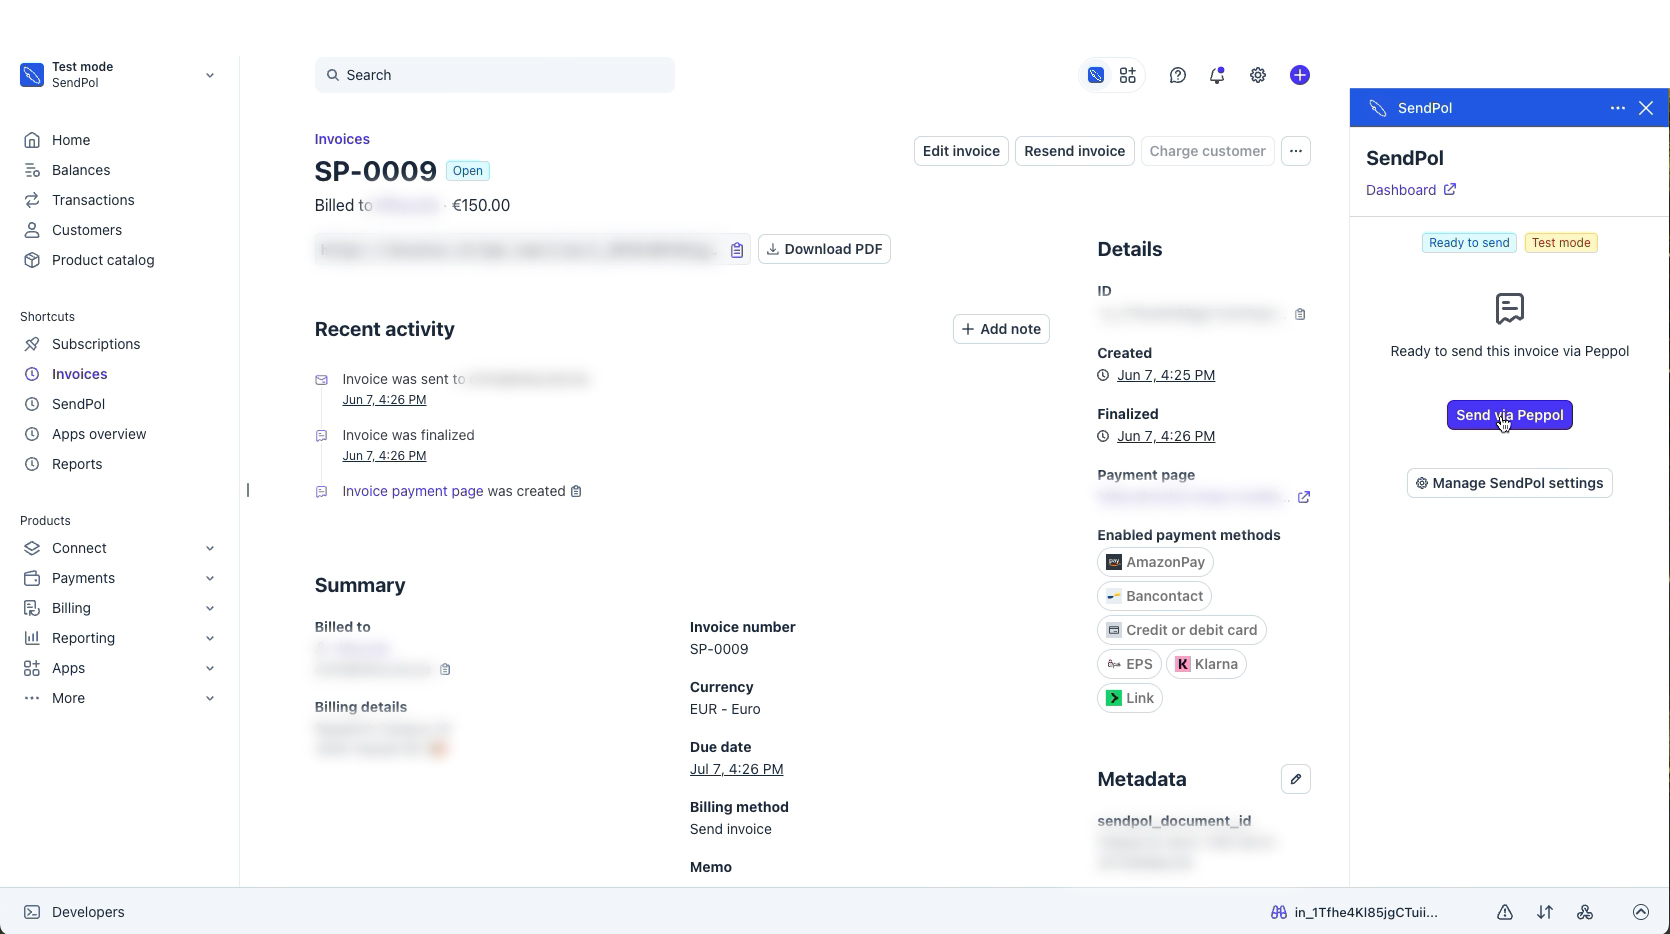
5Send an invoice via Peppol
Open any Stripe invoice. The SendPol panel shows whether it's ready to send; click "Send via Peppol" to submit it to the network.
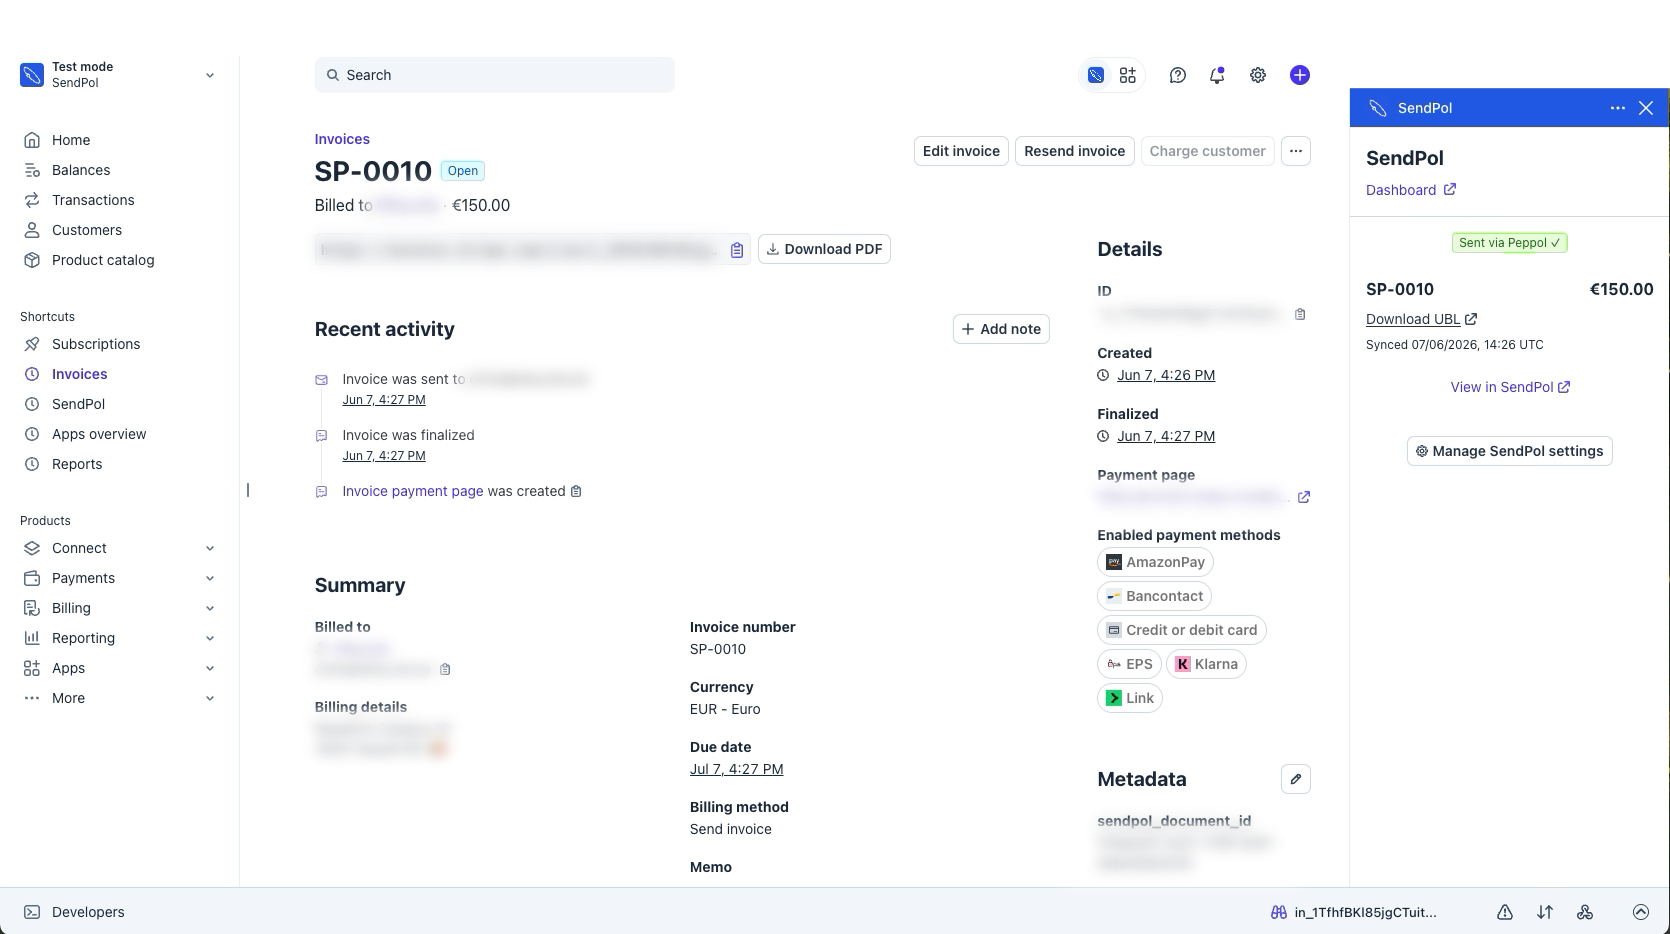
6Confirm delivery and download the UBL
Once delivered, the panel shows "Sent via Peppol" with the sync time. You can download the generated UBL or open the document in SendPol.
Method 2: Automatic processing
Via Stripe Webhooks
With webhooks, invoices are automatically sent to Peppol as soon as they are created or paid in Stripe. This is the most efficient method for businesses with many invoices.
Benefits
- Fully automatic - no manual action required
- Works even when you're not logged into Stripe
- Ideal for high volumes
- One-time configuration
Generate your Webhook URL
Select your webshop to generate the unique webhook URL. You'll use this URL in Stripe to set up automatic processing.
Log in to generate your webhook URL
Log in1. Go to Stripe Webhooks
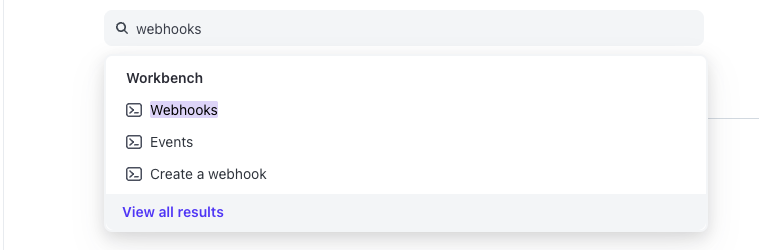
Log in to your Stripe Dashboard and go to Developers → Webhooks. Click 'Add endpoint' to add a new webhook.
2. Create a new webhook
Click 'Add endpoint' to create a new webhook endpoint.

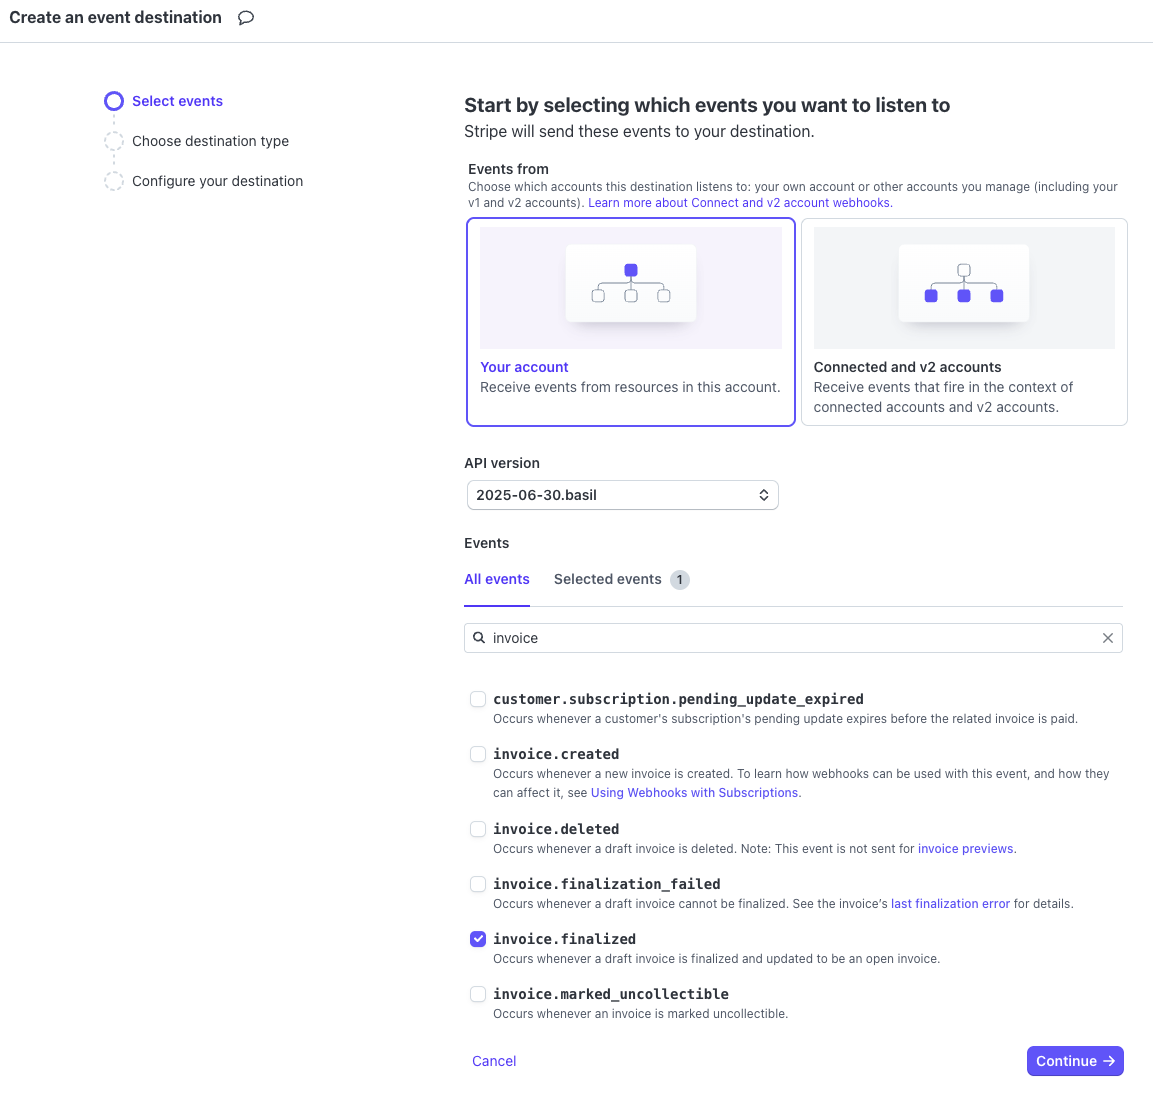
3. Select events
Select the events for which you want to receive webhooks. For automatic invoice processing, select 'invoice.paid' or 'invoice.finalized'.
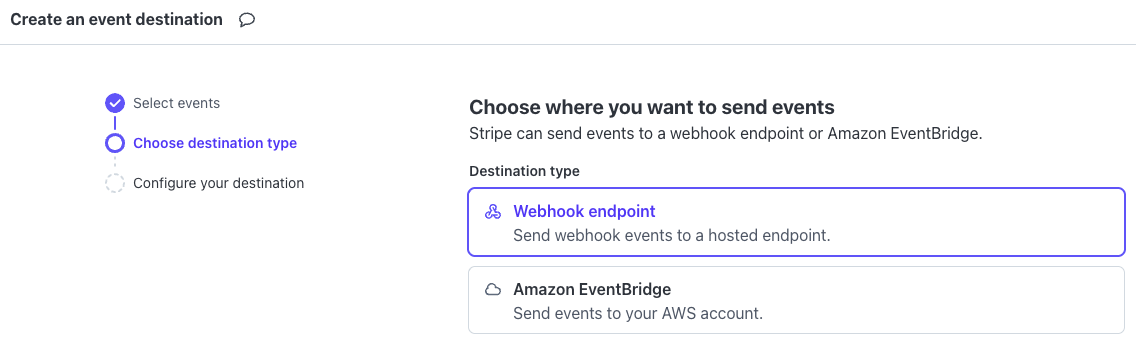
4. Choose webhook type
Select the webhook type. Choose a standard webhook endpoint.
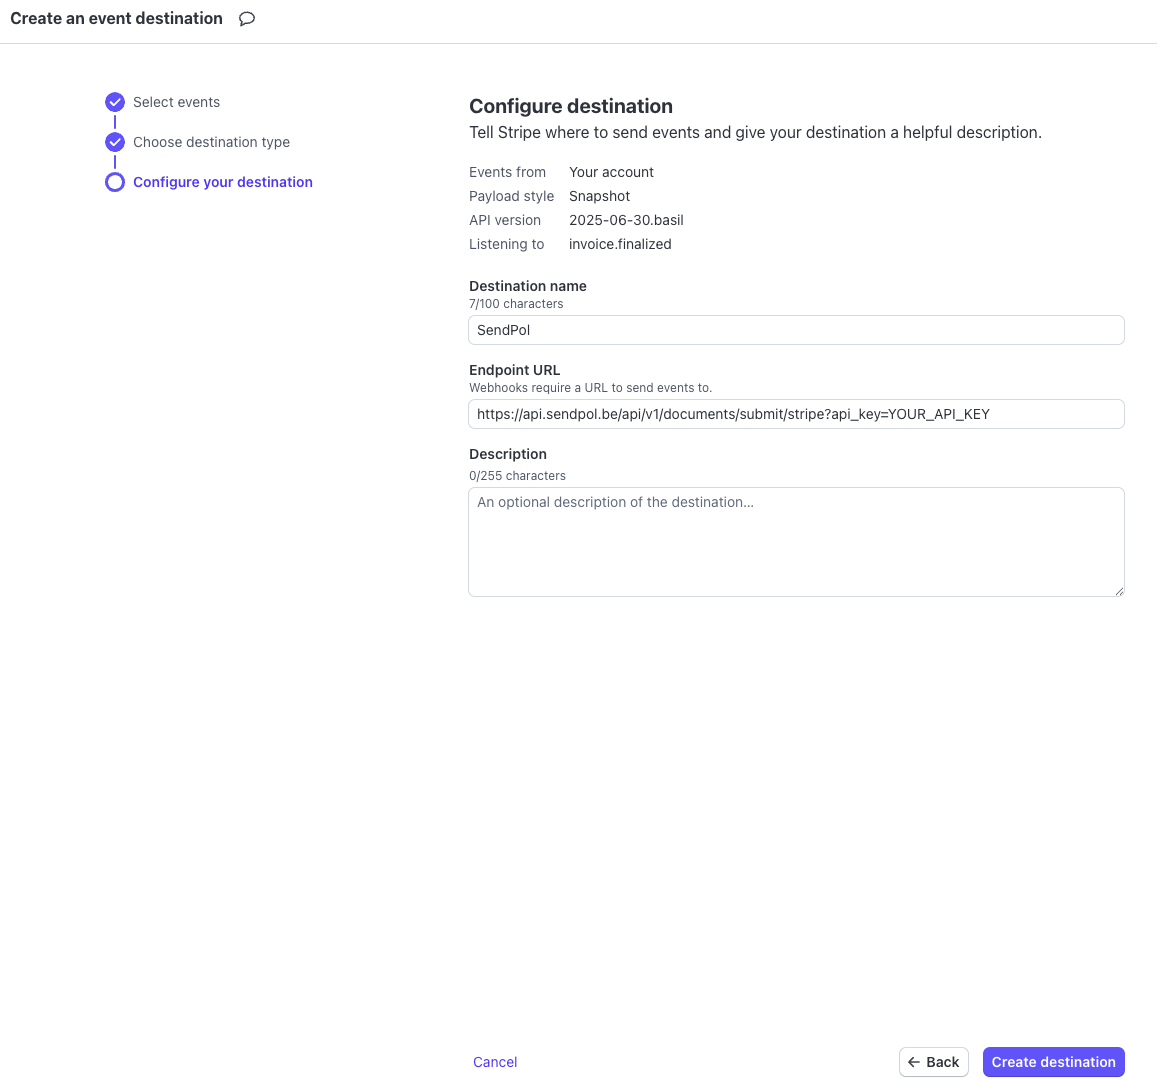
5. Enter the SendPol URL
Paste the webhook URL you generated above. This URL contains your API key and ensures that invoices are automatically forwarded to SendPol.
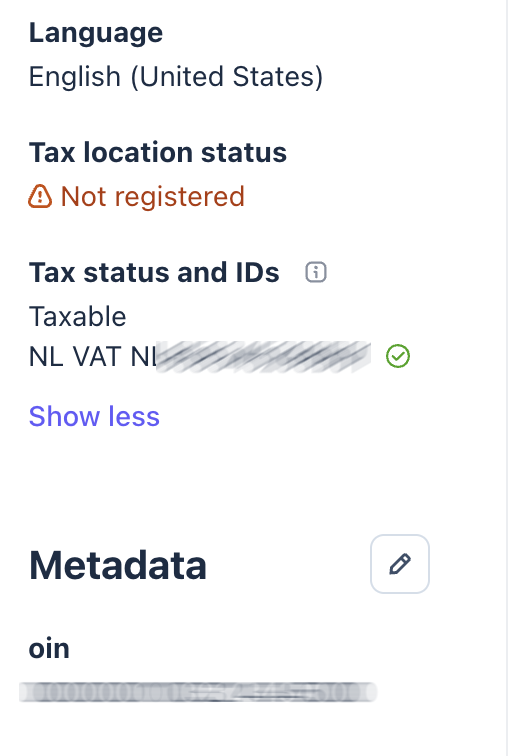
Add an OIN for a customer
For Dutch (semi-)government customers you can provide an OIN via the customer's metadata in Stripe. SendPol reads this field and uses the OIN as the Peppol identifier (scheme 0190) for that customer.
- In Stripe, go to Customers and select the relevant customer.
- Next to Metadata, click the pencil icon to edit.
- Add a key oin with the 20-digit OIN number as its value.
- Save. SendPol automatically uses this OIN for that customer's next invoices to Peppol.
Add a registration number (KvK/KBO) for a customer
For business customers you can provide the national company registration number via the customer's metadata in Stripe — KvK (NL, 8 digits), KBO (BE, 10 digits), SIREN (FR, 9 digits), matricule (LU) or Handelsregister number (DE). SendPol places it on the e-invoice as the registration number (BT-30) and uses it as an extra key to find the customer on Peppol when the VAT number returns nothing. It is separate from the VAT number.
- In Stripe, go to Customers and select the relevant customer.
- Next to Metadata, click the pencil icon to edit.
- Add a key company_registration_number with the customer's registration number as its value (the number for the customer's country).
- Save. SendPol automatically uses this number for that customer's next invoices.
Troubleshooting
API key is not accepted
Check that you have copied the correct API key from your SendPol account. Make sure there are no extra spaces.
Invoice cannot be sent
Check that the invoice contains all required fields, including a valid VAT number of the recipient.
Status remains on 'Ready to send via Peppol (check your settings)'
This may be related to test mode still being enabled, or the KYC procedure not being completed yet.
API key works but invoices are not being sent
Your webshop may be set to inactive. Check the status of your webshop in your SendPol account.
Webhook is not receiving events
Check in Stripe Dashboard → Developers → Webhooks if the webhook is correctly configured and if there are no errors. Make sure the webhook URL exactly matches the generated URL.
Frequently Asked Questions
Ready to get started?
Install the SendPol Stripe App and start sending invoices via Peppol right away - manually or fully automatically.