
Wix Stores
Installation Guide
Complete technical guide for configuring Peppol for Wix Stores. Integrate your webshop with the Peppol network in a few steps.
Still using the old Wix app (v1)?
Version 2 is an all-new app. The old app goes offline on 1 August 2026.
Table of Contents
What is SendPol?
Peppol for Wix Stores automatically integrates your Wix webshop with the Peppol network. It transforms your order processing by automatically converting completed orders into UBL (Universal Business Language) invoices and sending them via Peppol without manual intervention.
Key Features
- Complete Wix Stores integration: Automatically recognize and convert orders to invoices
- UBL (Universal Business Language) invoices: Compatible with governments and business customers
- Automatic sending via Peppol: Standardized & legally valid
- B2B ready: Perfect for businesses selling to other companies or government entities
- EU compliance: Ready for Peppol e-invoicing requirements (mandatory from 2026 in many EU countries)
Why Choose SendPol?
From 2026, Peppol e-invoicing will become mandatory in more and more European countries, especially for businesses and government contracts. With SendPol, you're ready for compliance without complex setups or high development costs.
Security and Safety
Two-Factor Authentication (2FA)
SendPol supports two-factor authentication to add an extra layer of security to your account. Enable 2FA in your account settings for enhanced protection.
KYC (Know Your Customer) Verification
SendPol performs a KYC check to verify that you are authorized to use a VAT number. This ensures that only authorized businesses can send invoices via the Peppol network, ensuring the security and integrity of the system.
See SendPol in Action
See how easy the integration is
Start in test mode
By default, every new webshop is in test mode. Documents are validated and visible in your SendPol dashboard, but they are not forwarded to the Peppol network. This lets you safely test your workflow before any invoice goes live.
When you are ready for production, switch off test mode in your webshop settings under MyAccount.
Go to my webshopsPrerequisites
System Requirements
- Wix Stores account with active webshop
- SendPol account (register at www.sendpol.com)
- Access to Wix Editor
Initial Setup
Registration, the secure connection (OAuth) and the KYC check all happen directly in the Wix app. You no longer need to enter an API key — just follow the steps below.
1Install the SendPol app
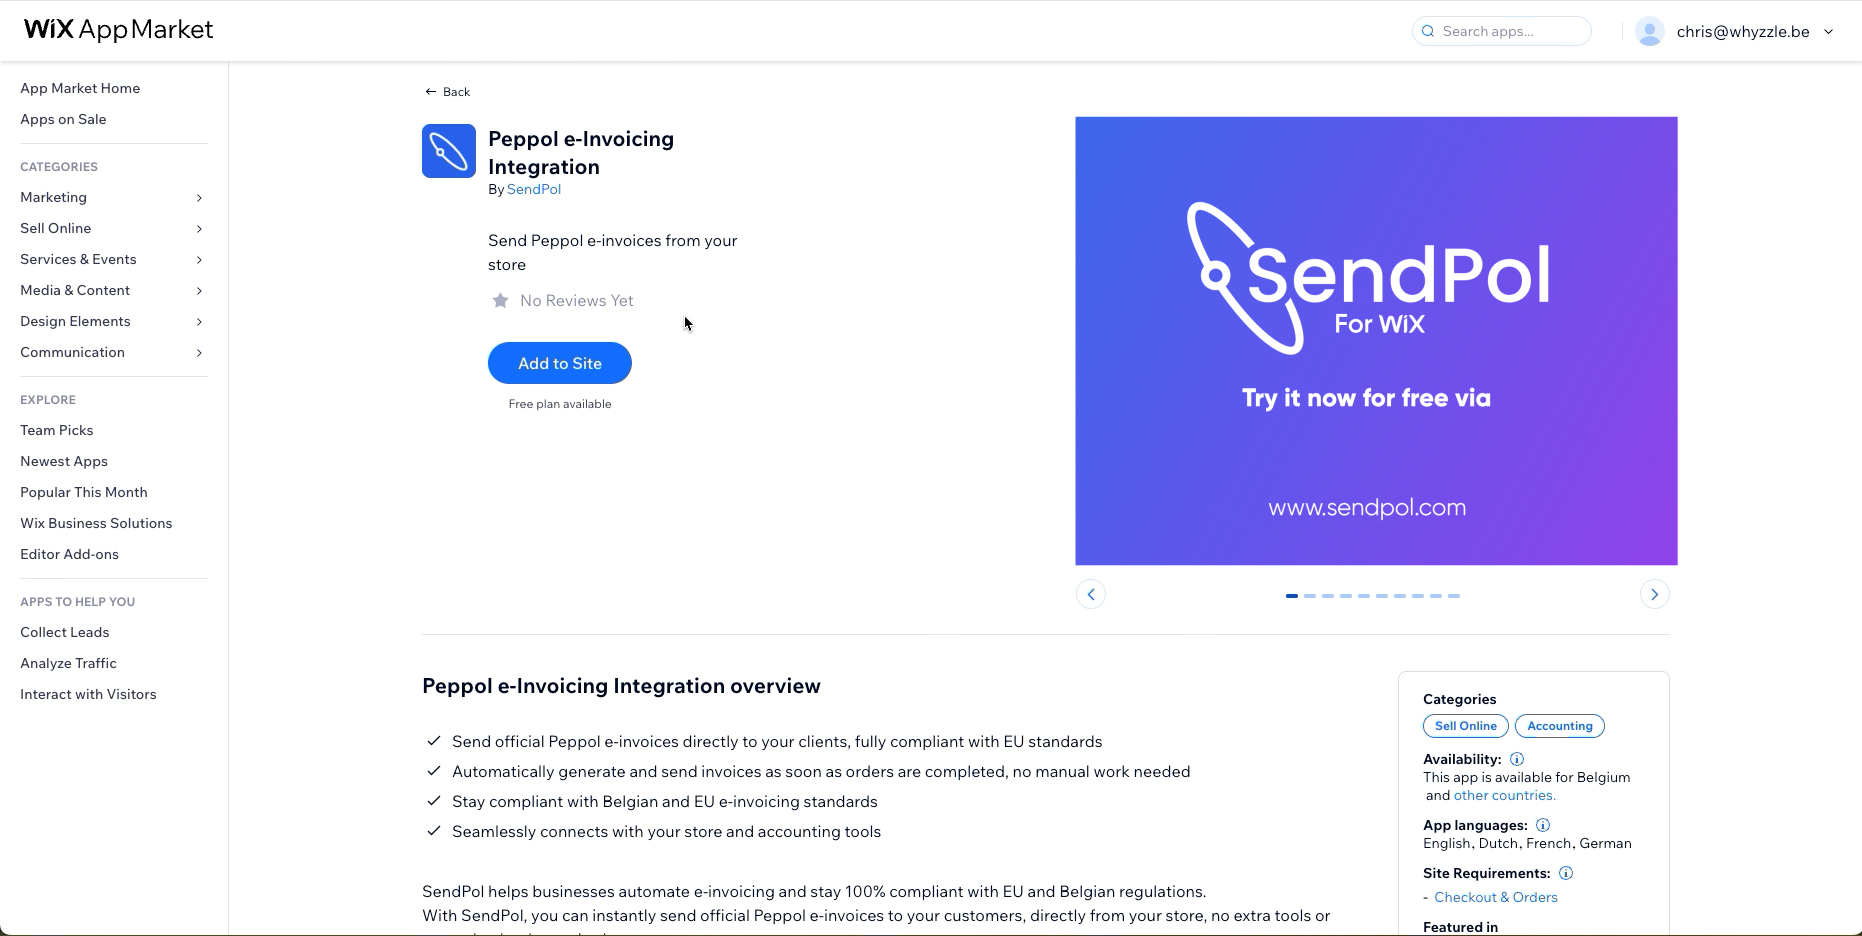
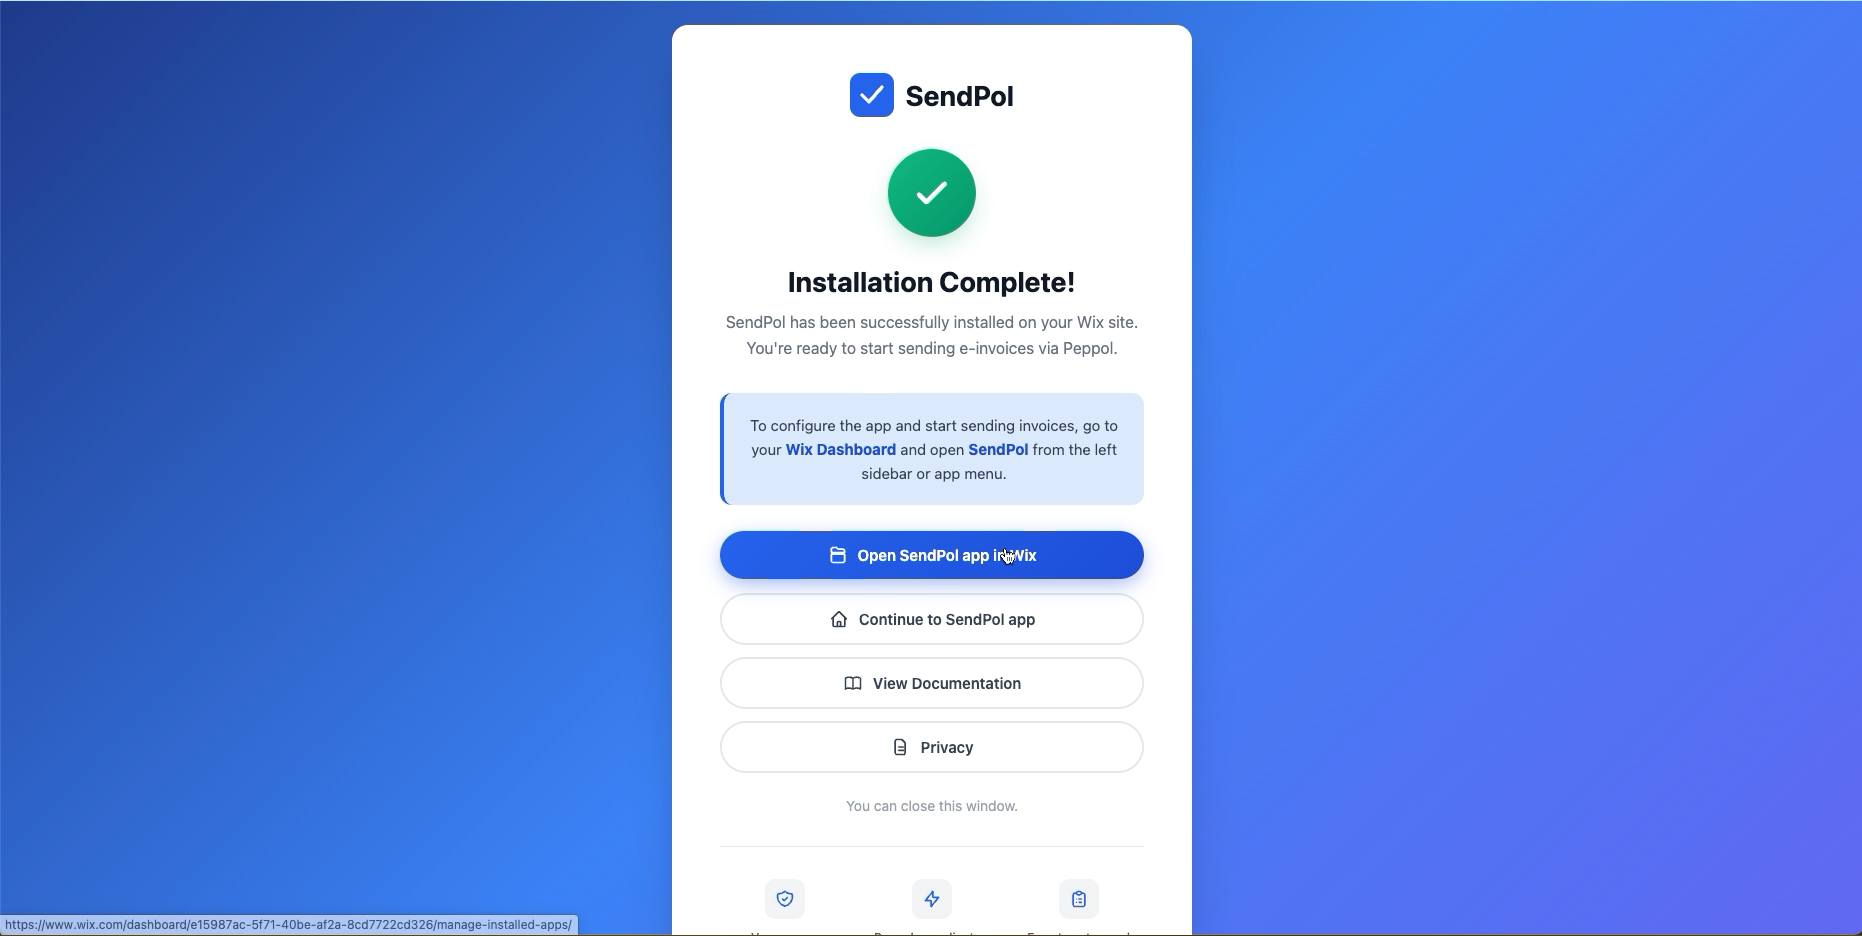
Open the Wix App Market, search for "Peppol e-Invoicing Integration by SendPol" and add it to your site. After installation you'll see a confirmation screen — click "Open SendPol app in Wix" to continue.
2Enter your email address
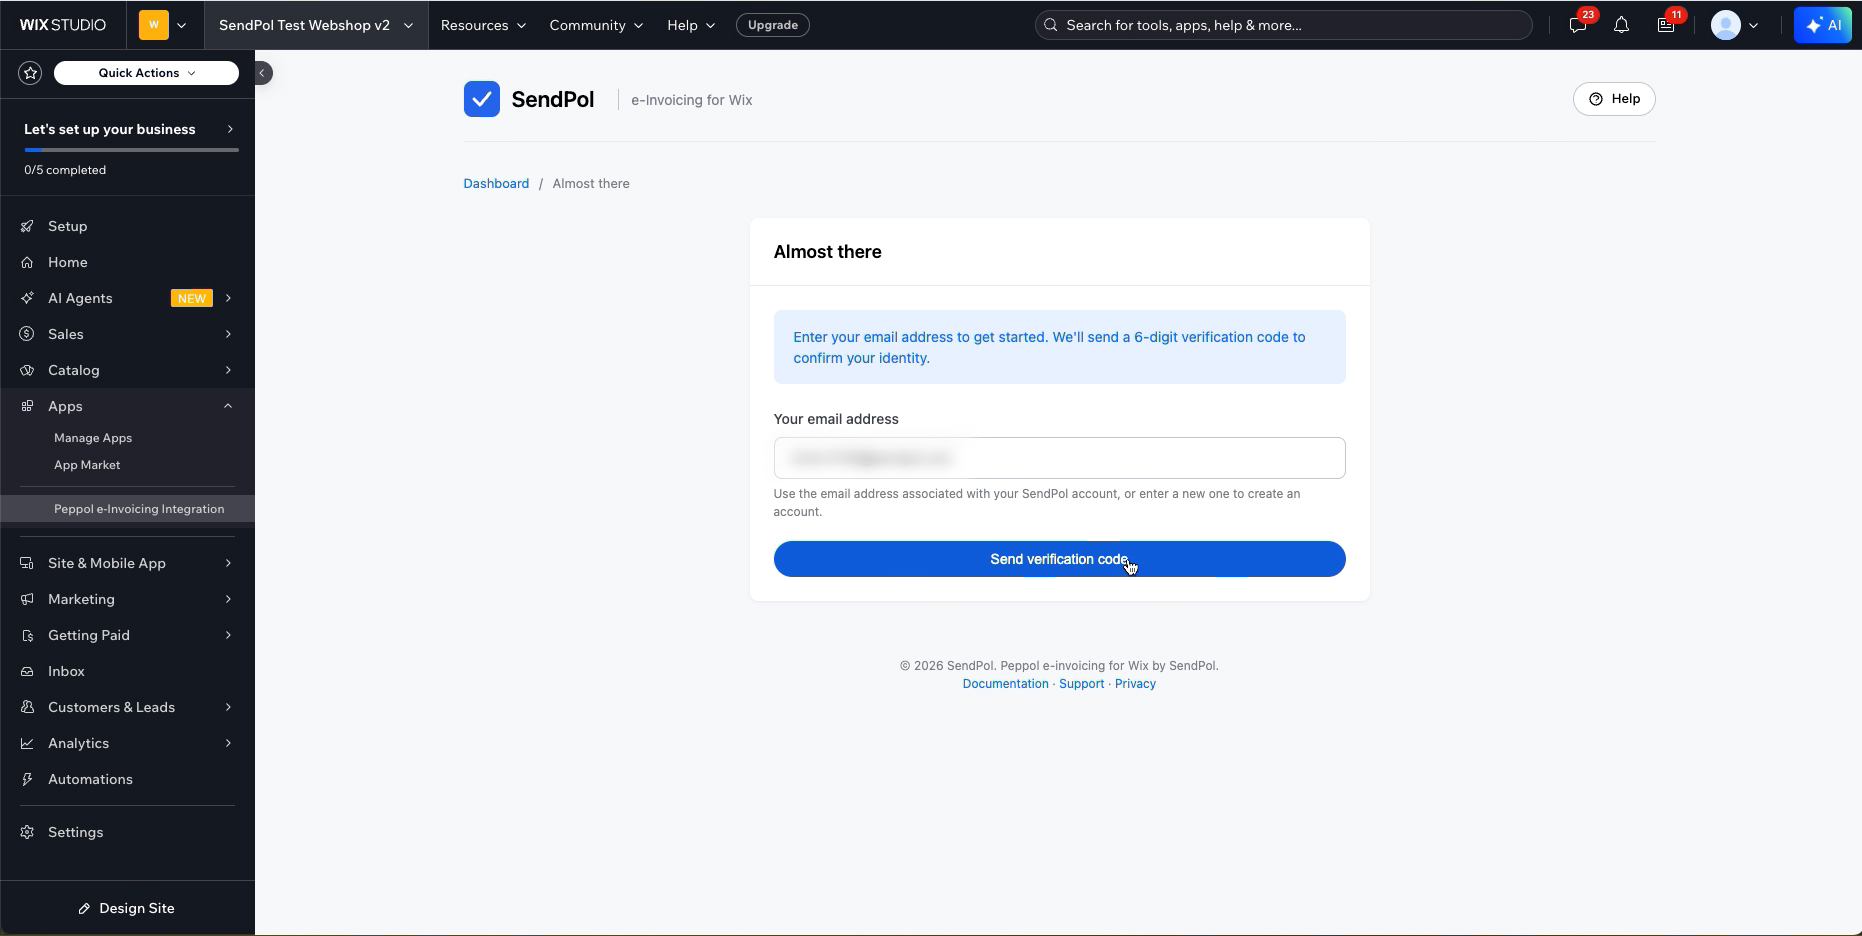
In the SendPol app, enter the email address of your SendPol account and click "Send verification code".
3Verify your email address
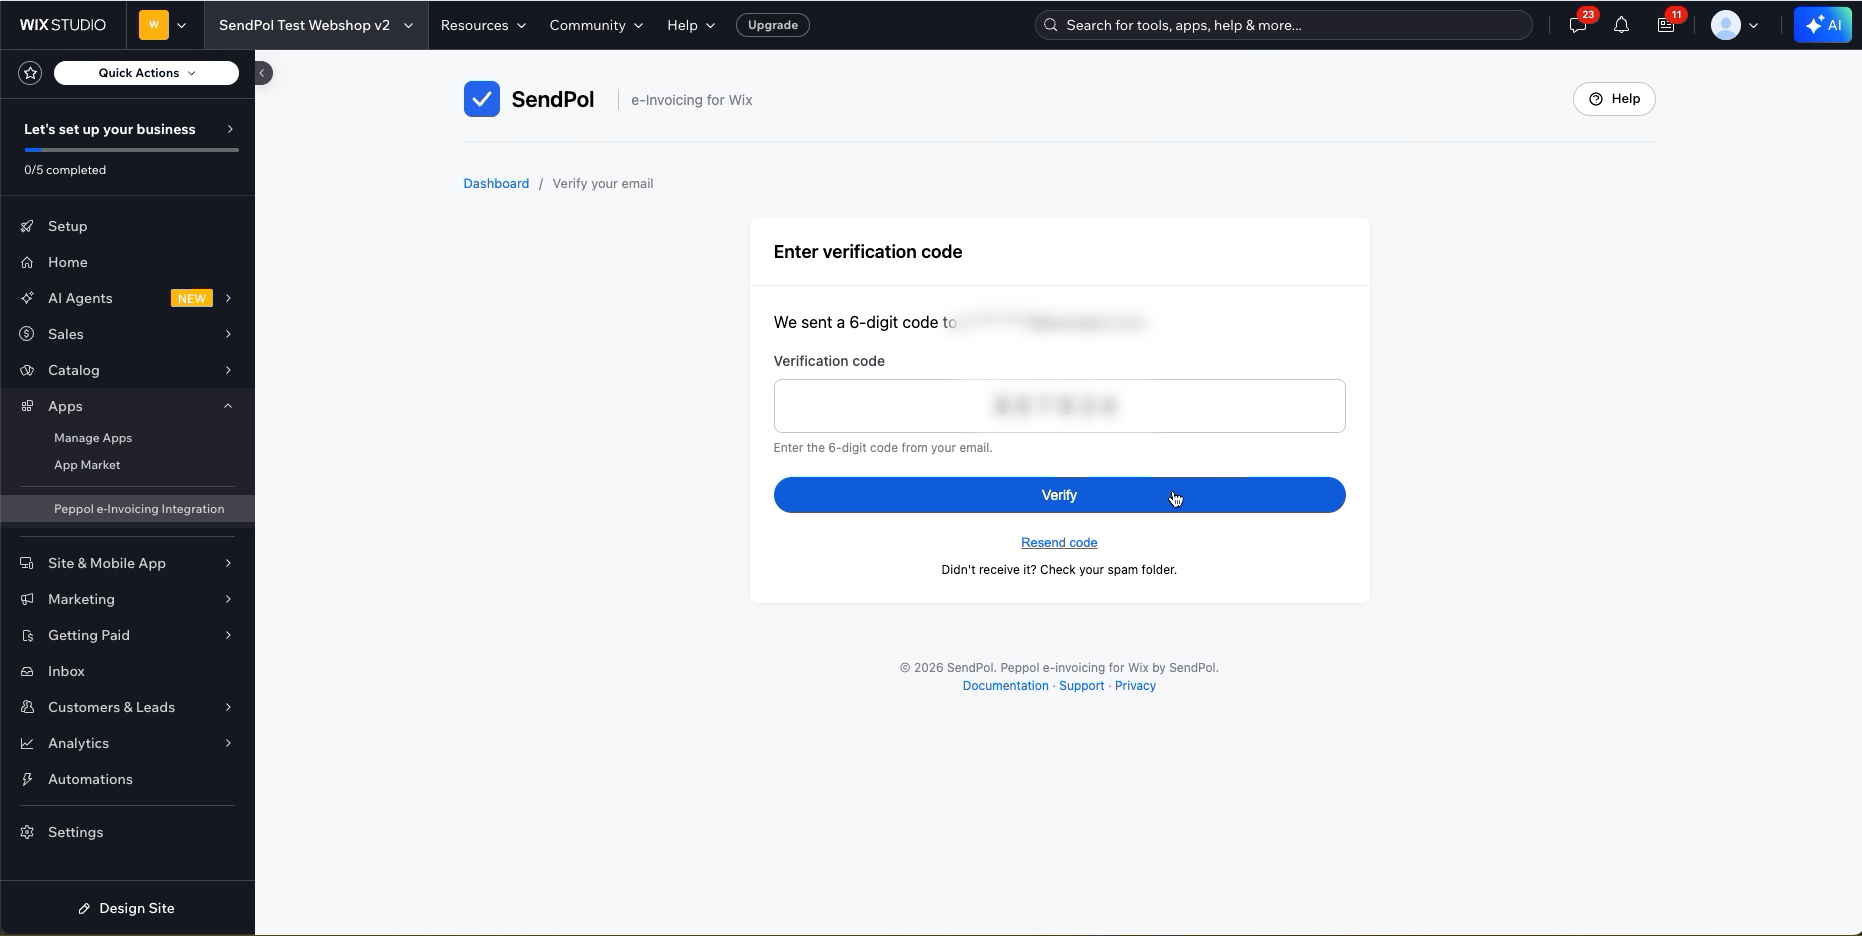
Enter the 6-digit code from the email and click "Verify".
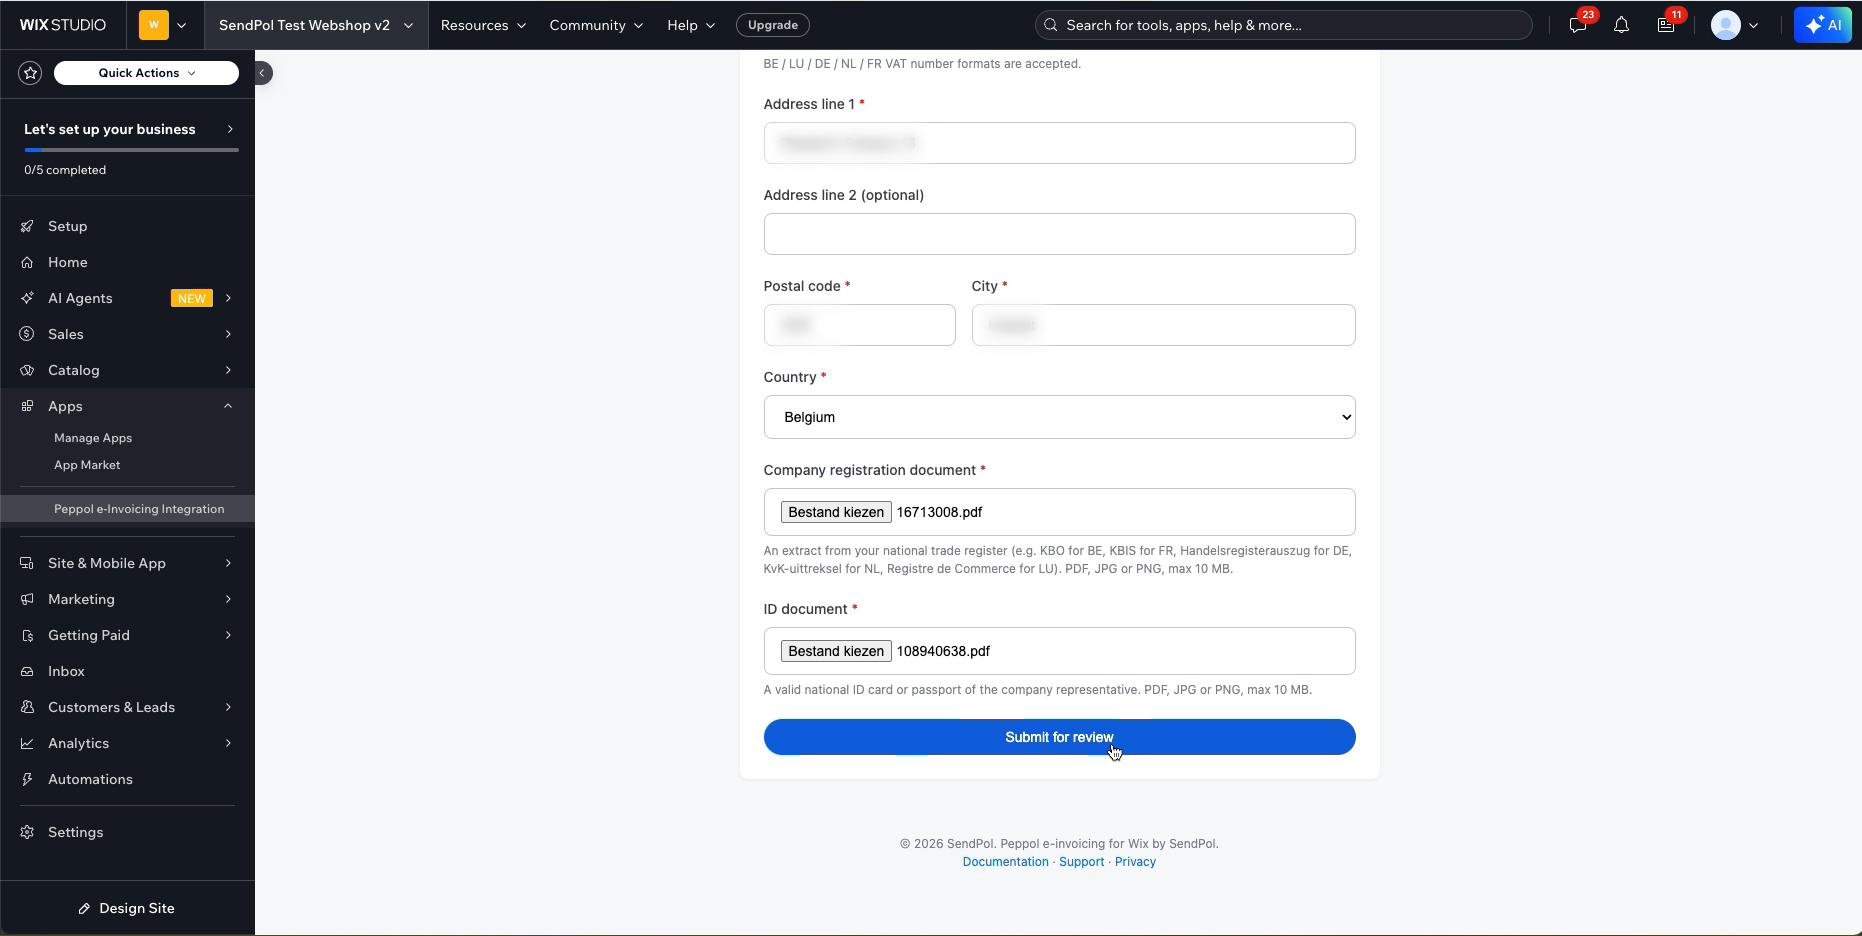
4Submit your VAT number and KYC documents
Complete the onboarding form: your VAT number (BE/LU/DE/NL/FR formats accepted), your address, and upload your company registration and an ID document. Click "Submit for review".
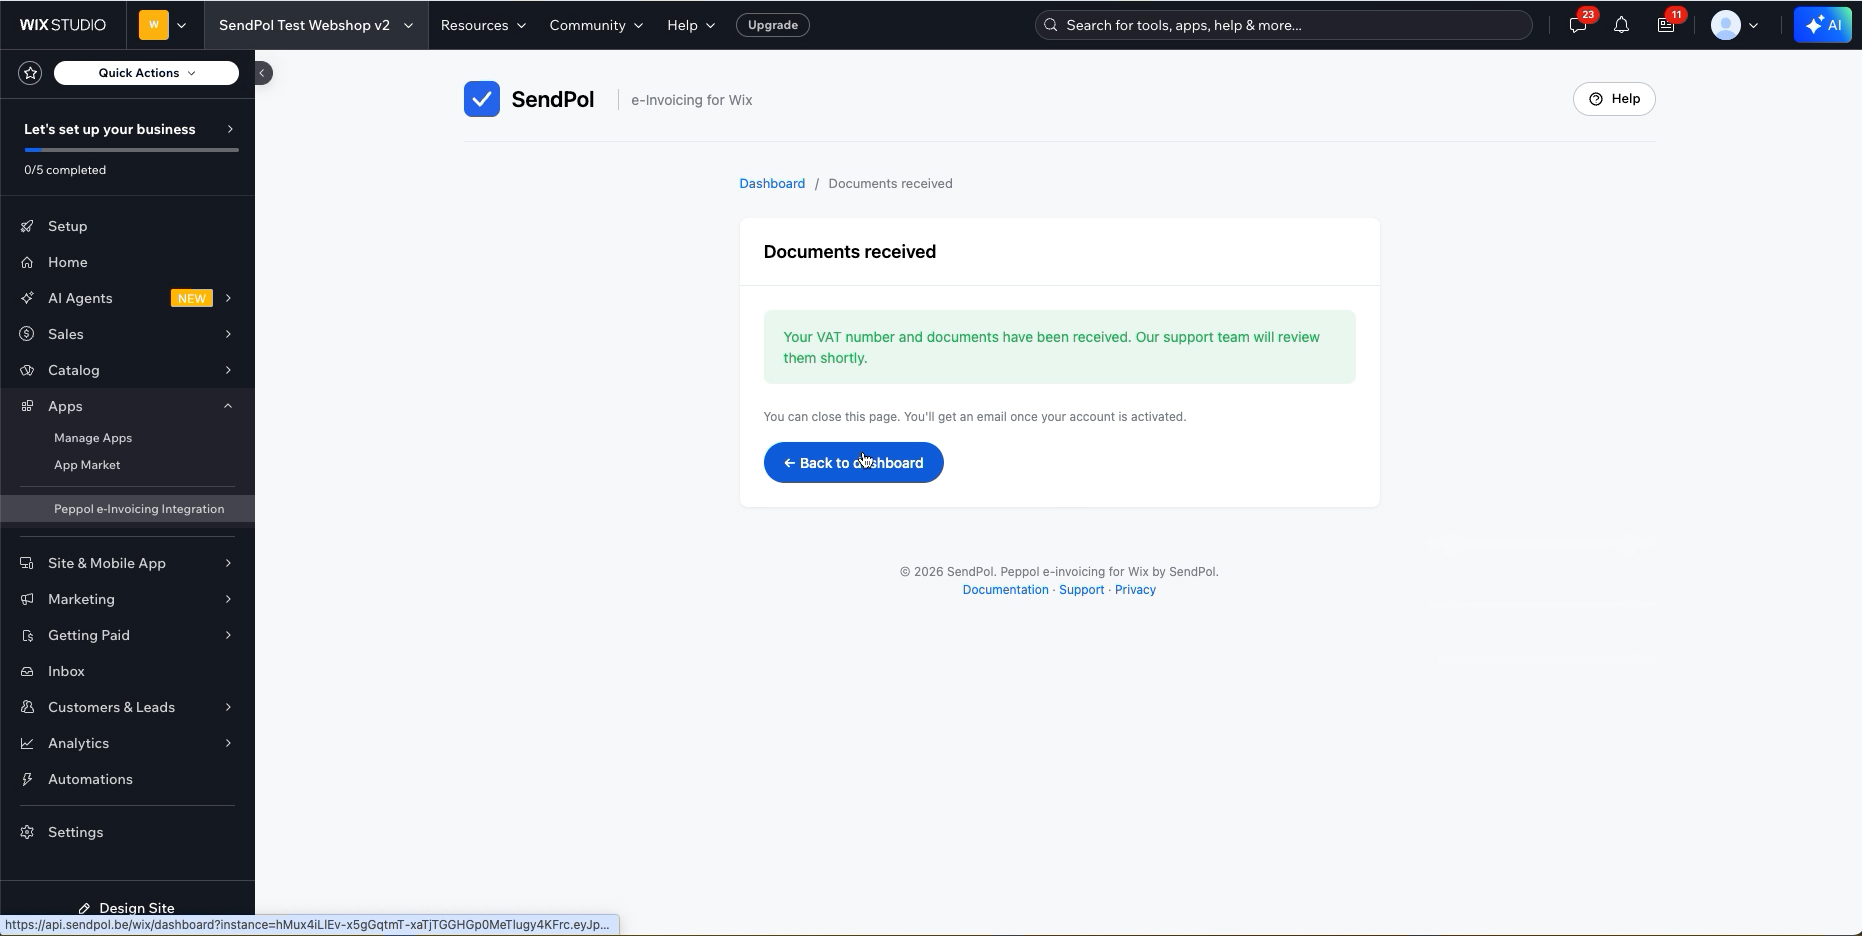
5KYC submitted
You'll see a confirmation that your VAT number and documents were received. Our team reviews them; until KYC is approved you send in test mode.
Your SendPol app in Wix
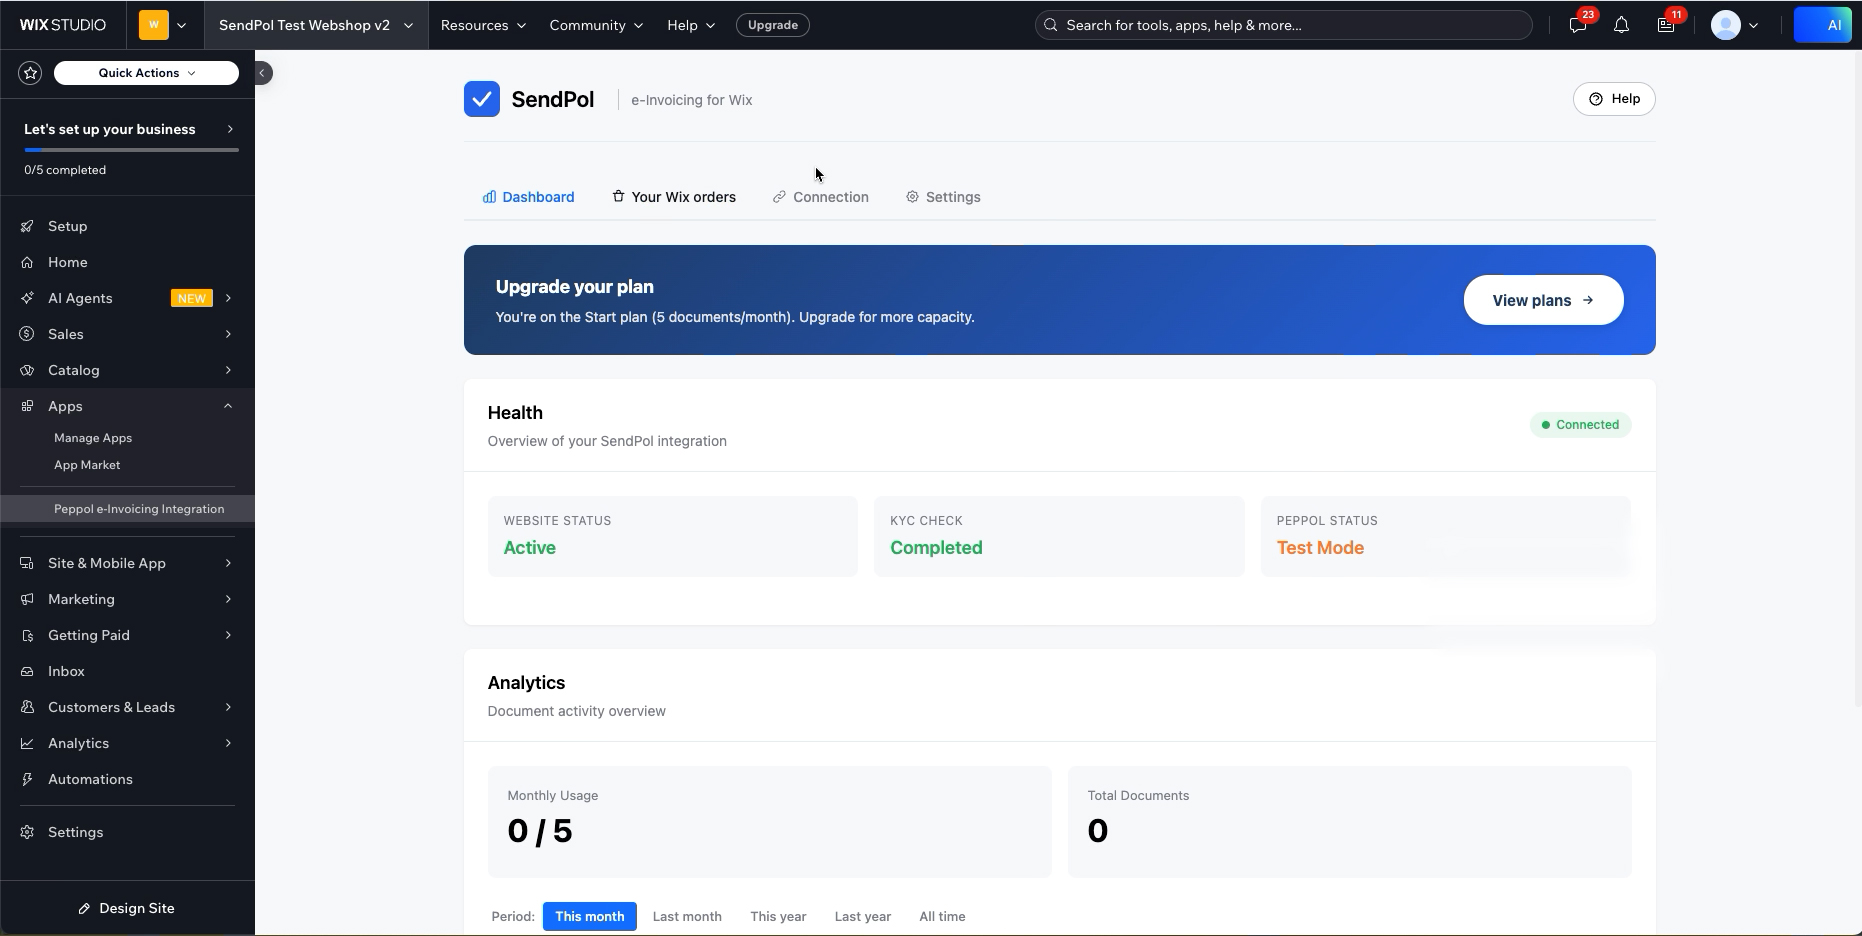
After onboarding you manage everything from the app: check your health, connection and settings, and follow up on your synced orders.
1Dashboard & health
The Dashboard tab shows the health of your connection (website status, KYC check, Peppol mode) and your monthly document usage.
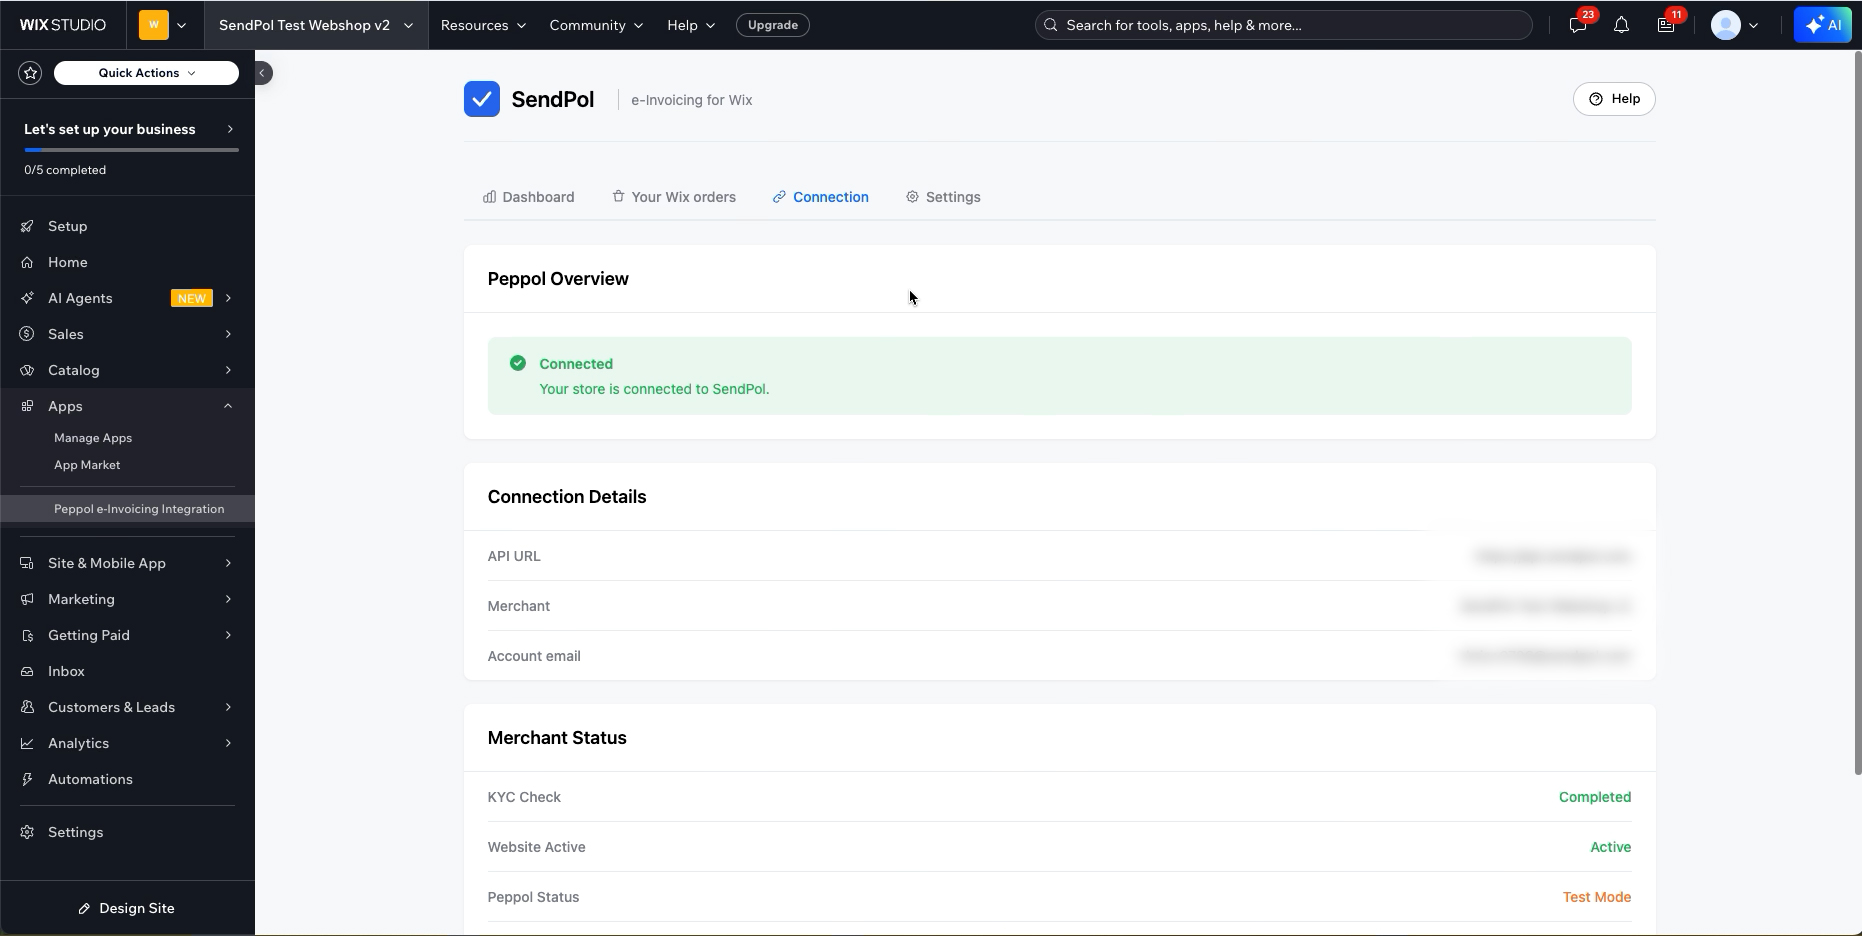
2Connection
The Connection tab confirms you're connected and shows your merchant details, account email and your merchant status (KYC, website and Peppol). Scroll down for your Peppol Participant ID.
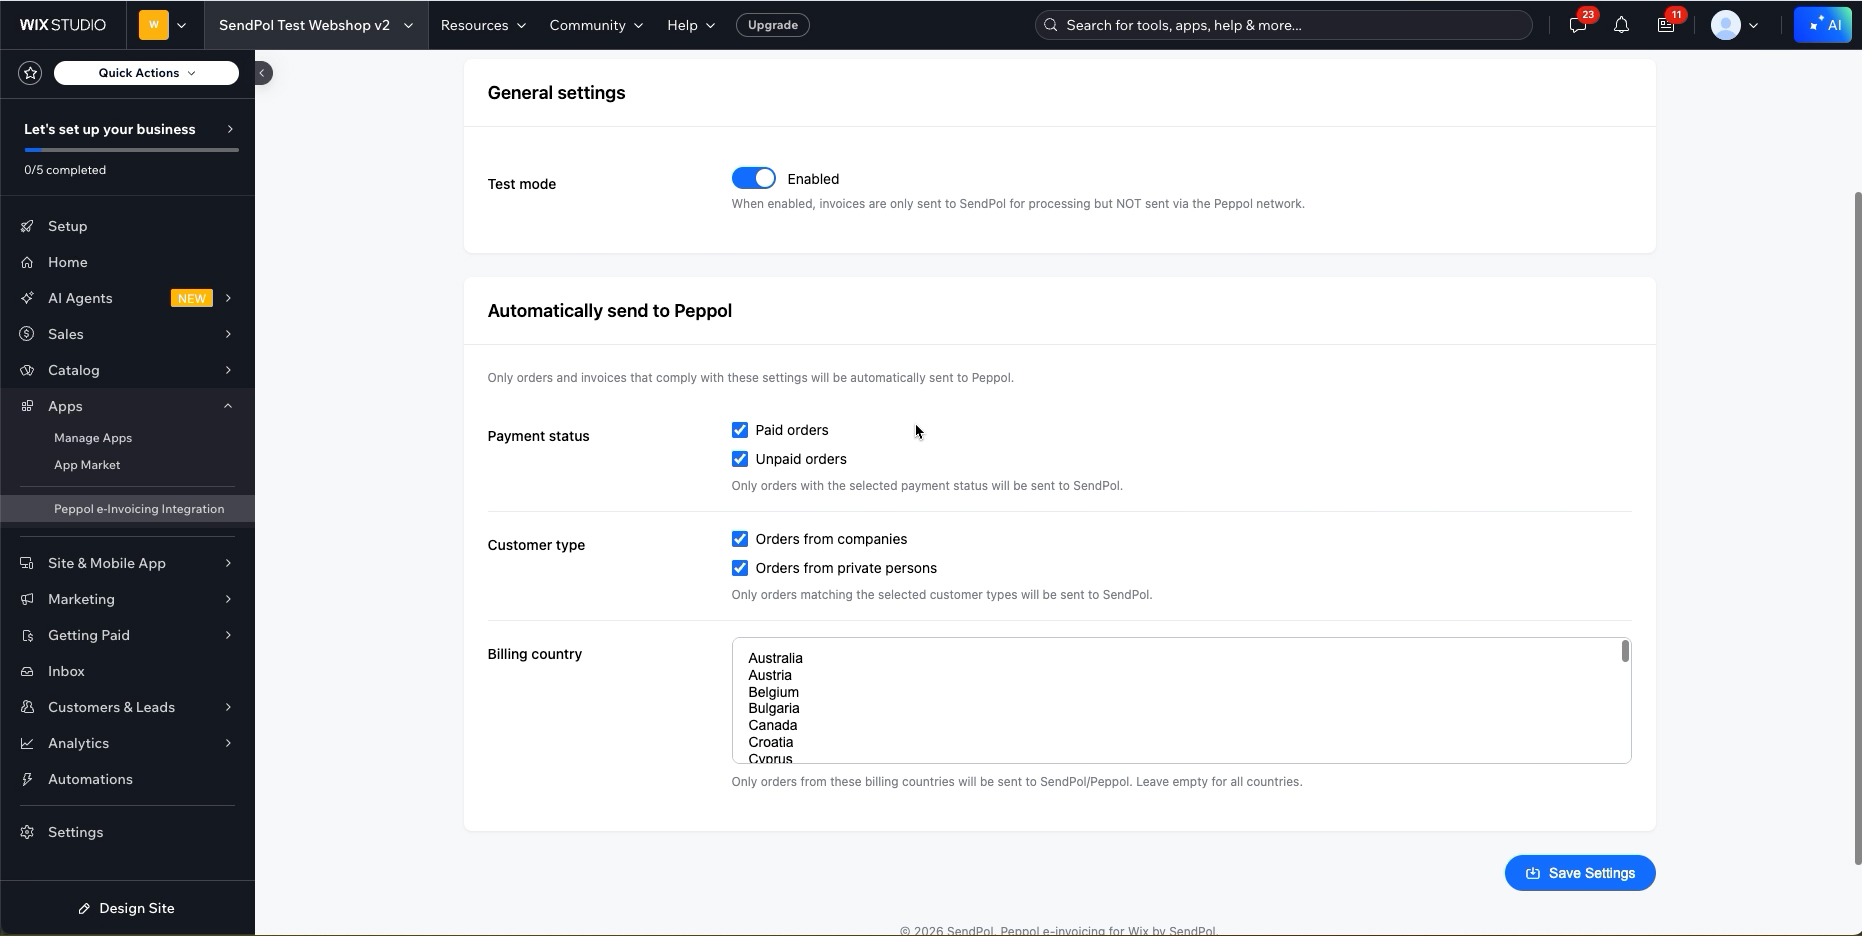
3Settings & automatic sending
On the Settings tab you toggle test mode and set the rules for automatic sending: payment status (paid/unpaid), customer type (companies/private persons) and billing countries. Click "Save Settings".
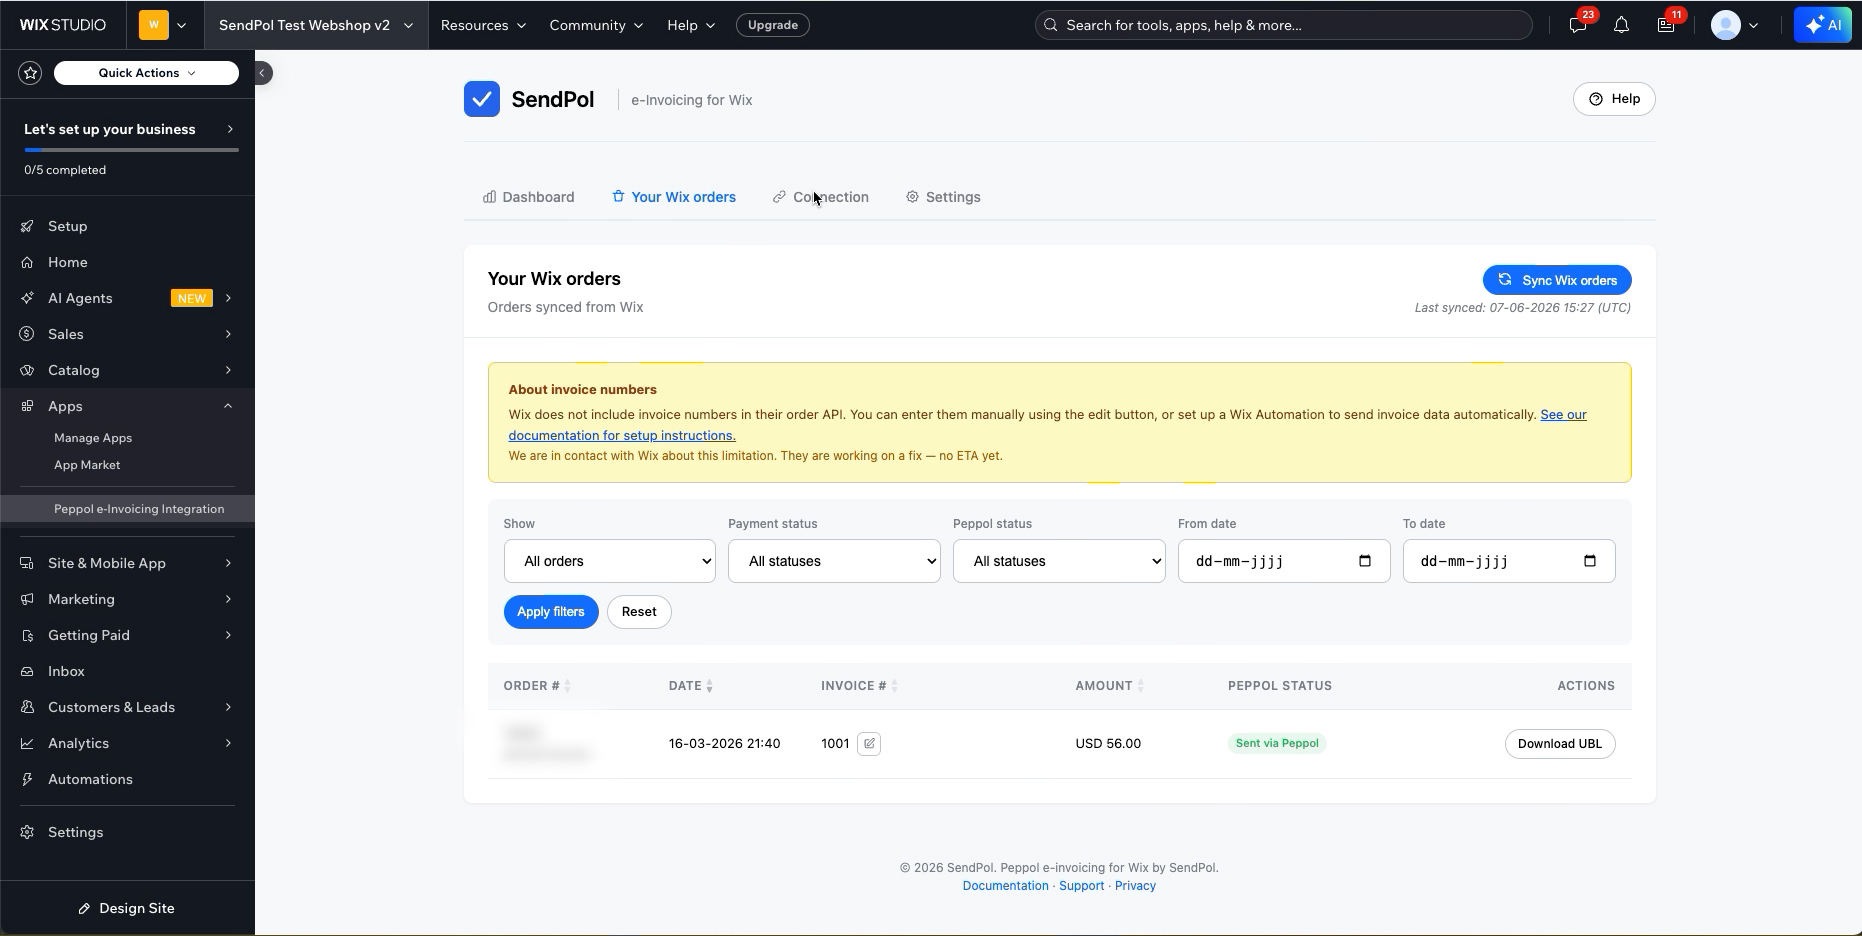
4Your Wix orders
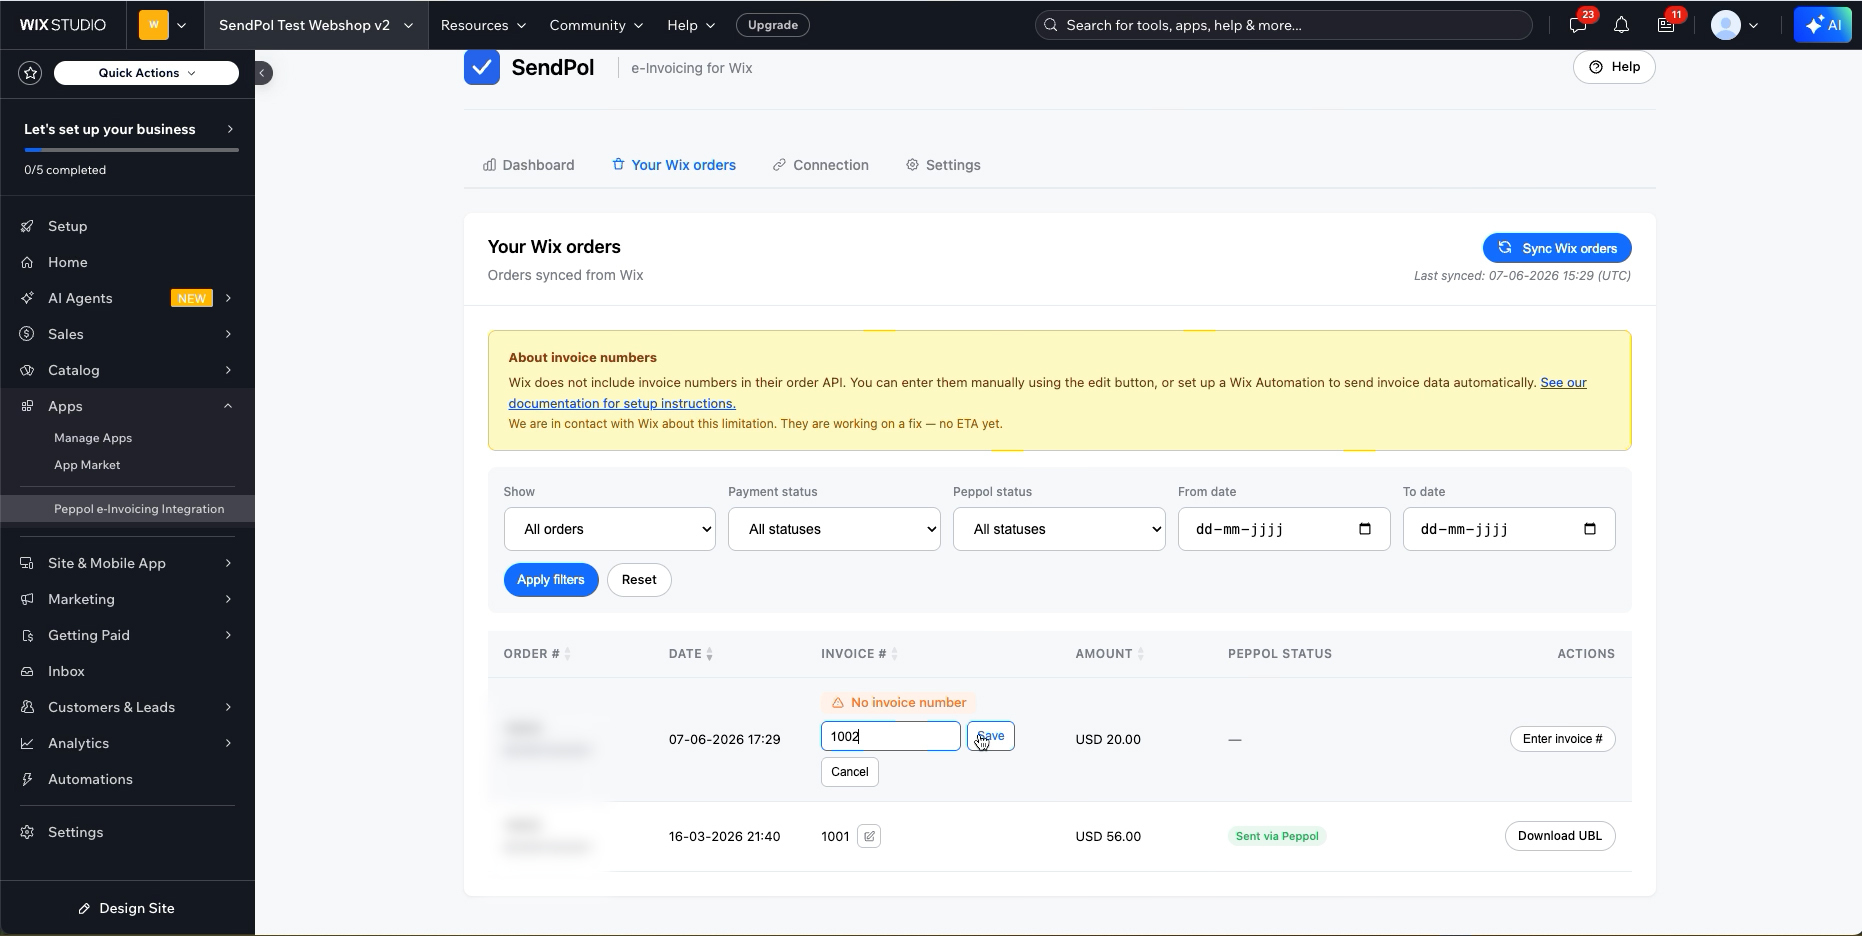
The "Your Wix orders" tab lists orders synced from Wix with their Peppol status and a UBL download. Note: Wix doesn't include invoice numbers via its API, so you may need to add them manually (see below).
Configure Payment Form & VAT Field
⚠️ Important: VAT Number Field
The VAT Number field is essential for SendPol to load company data correctly. Without this field, invoices will not be uploaded correctly to Peppol.
Select the Correct Website
In your website overview, select the correct website where you want to configure SendPol.
Navigate to Settings
In the left menu, select "Settings".
Open Payment Page
Under "Business Solutions", select "Payment Page".
Open Payment Form
Then select "Payment Form" => "Edit".
Add Company Name Field
"Company Name" is a standard field in Wix. You can add this field directly to your payment form.
Click "Create Field"
In the payment form edit screen, click "Create Field" to add a new custom field.
Select "Short Answer"
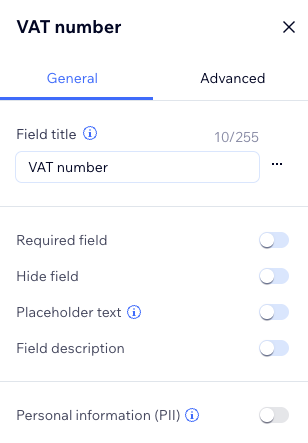
Select the field type "Short Answer" for the VAT Number field.
Enter Field Title: "VAT Number"
In "Field Title", enter: "VAT Number" (or "VAT number"). This is the visible name for users.
⚠️ CRITICAL: Advanced Settings
This is the MOST IMPORTANT STEP. Without the correct field key, SendPol will not work correctly!
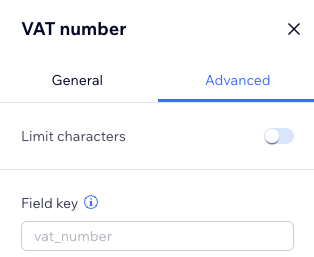
Go to the "Advanced" tab
In "Field Key", enter EXACTLY: vat_number: vat_number
SendPol needs this specific field to load your customer's company data. If you don't do this correctly, these invoices will not be uploaded correctly to Peppol.
💡 Tip
Make sure you enter the field key exactly as "vat_number" (lowercase with underscore). This is case-sensitive and must match exactly.
Invoices in Wix
You can create an invoice from an existing order — or build one from scratch as shown below. As soon as the invoice is emailed to the customer, it also arrives at SendPol and goes on to Peppol.
1Create a new order
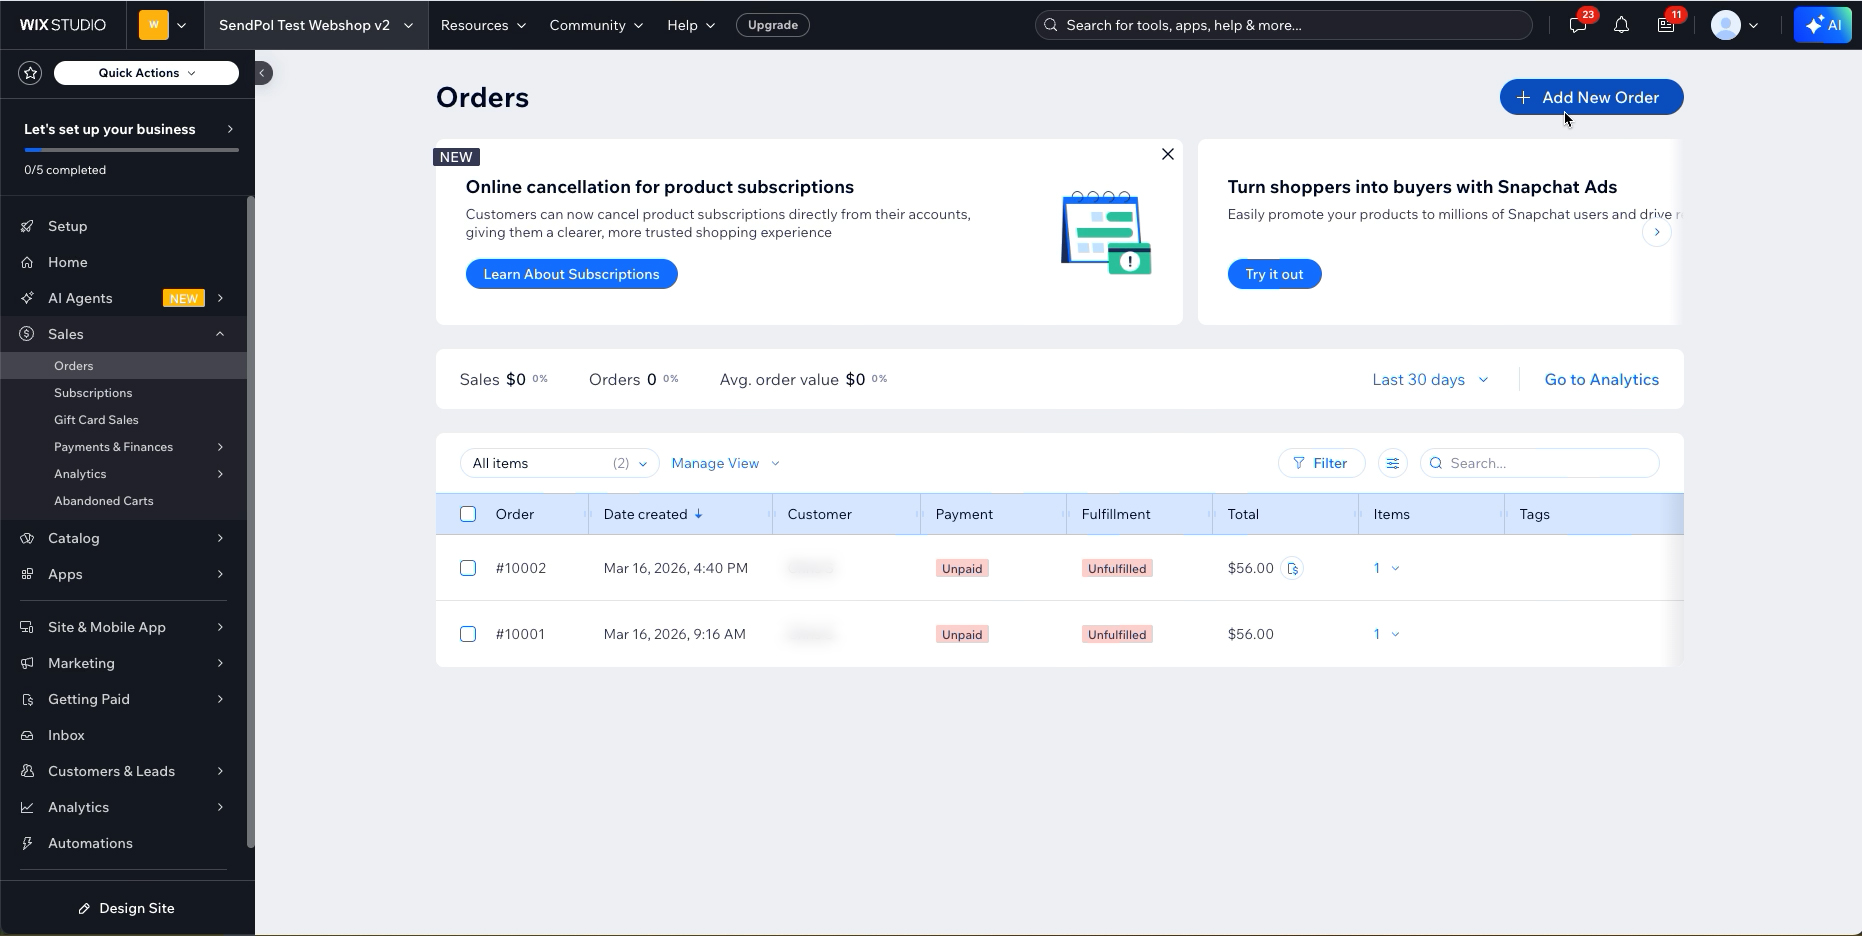
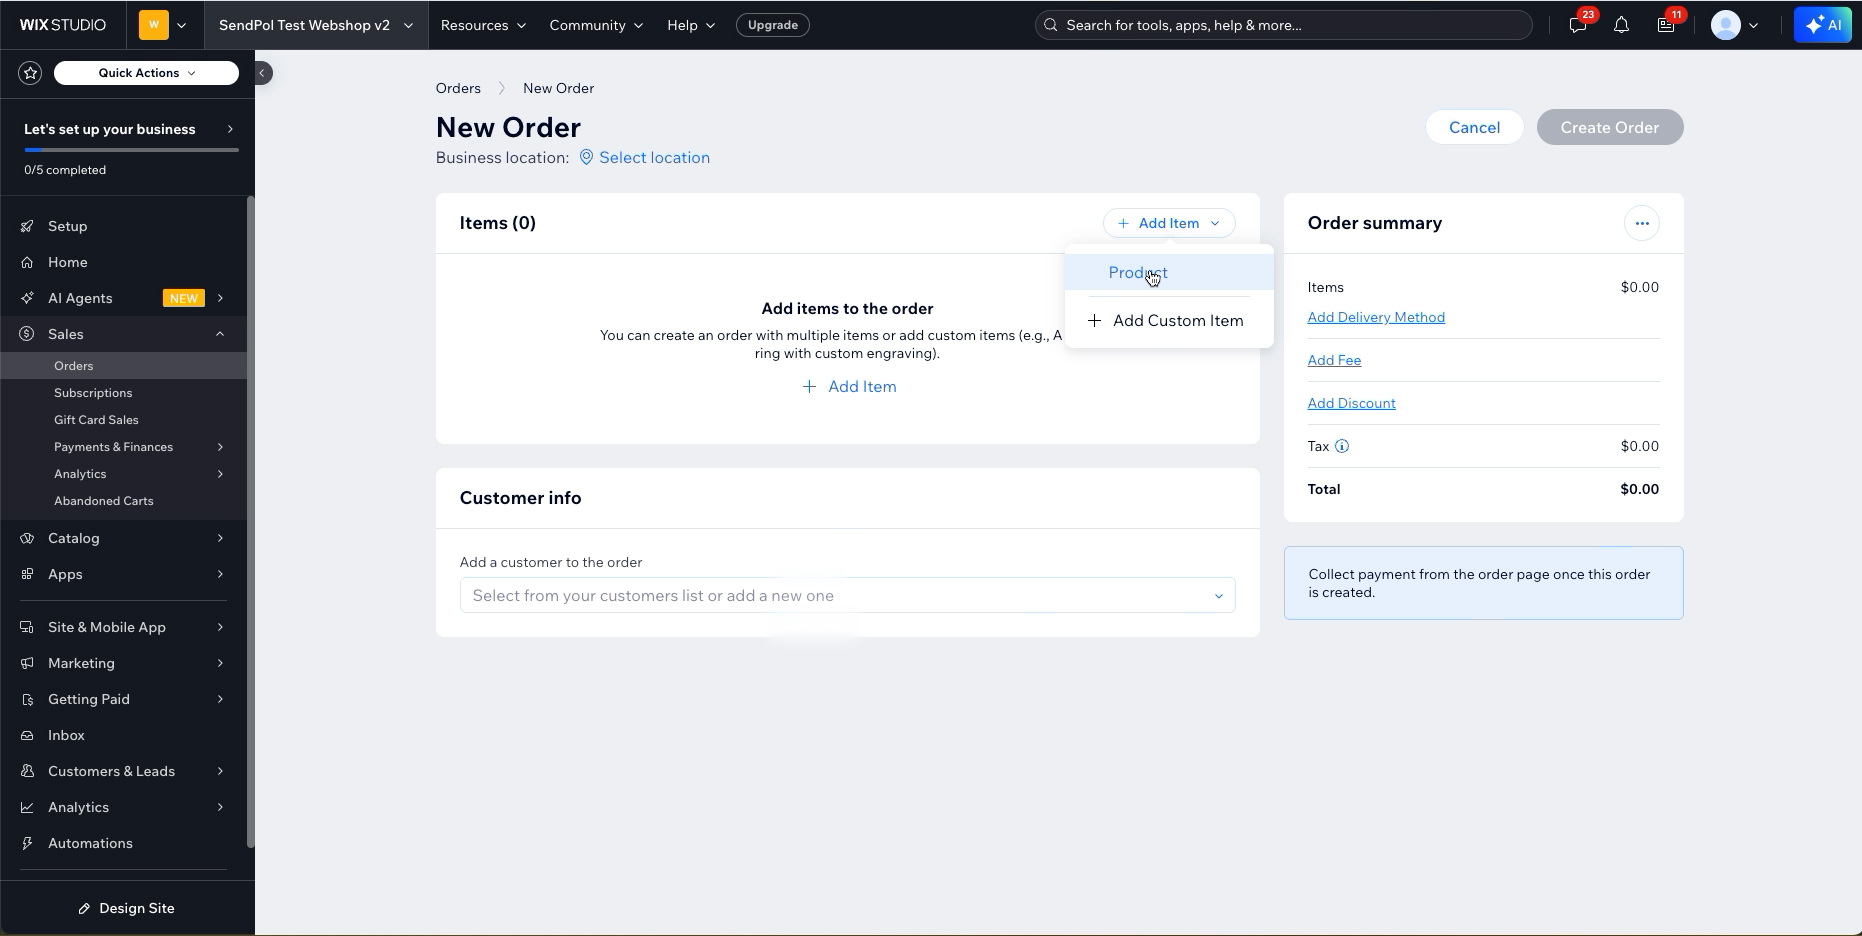
In your Wix dashboard go to Sales → Orders and click "+ Add New Order", then use "Add Item" to start building the order.
2Add a product
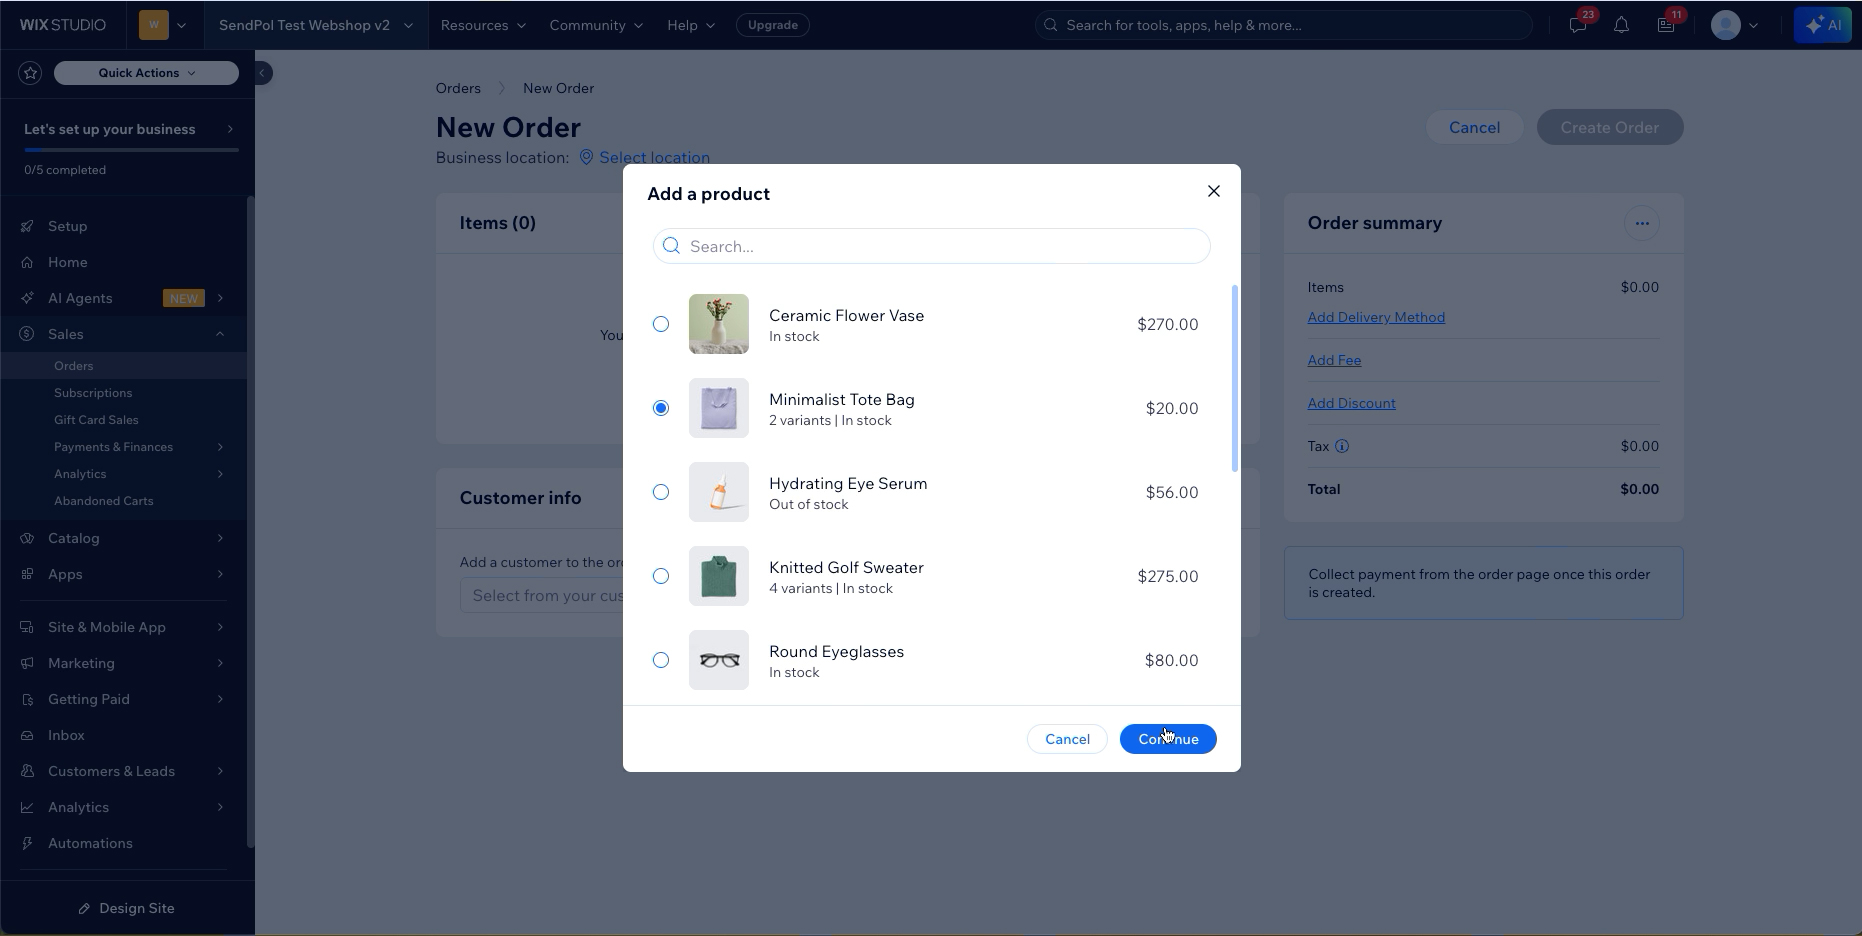
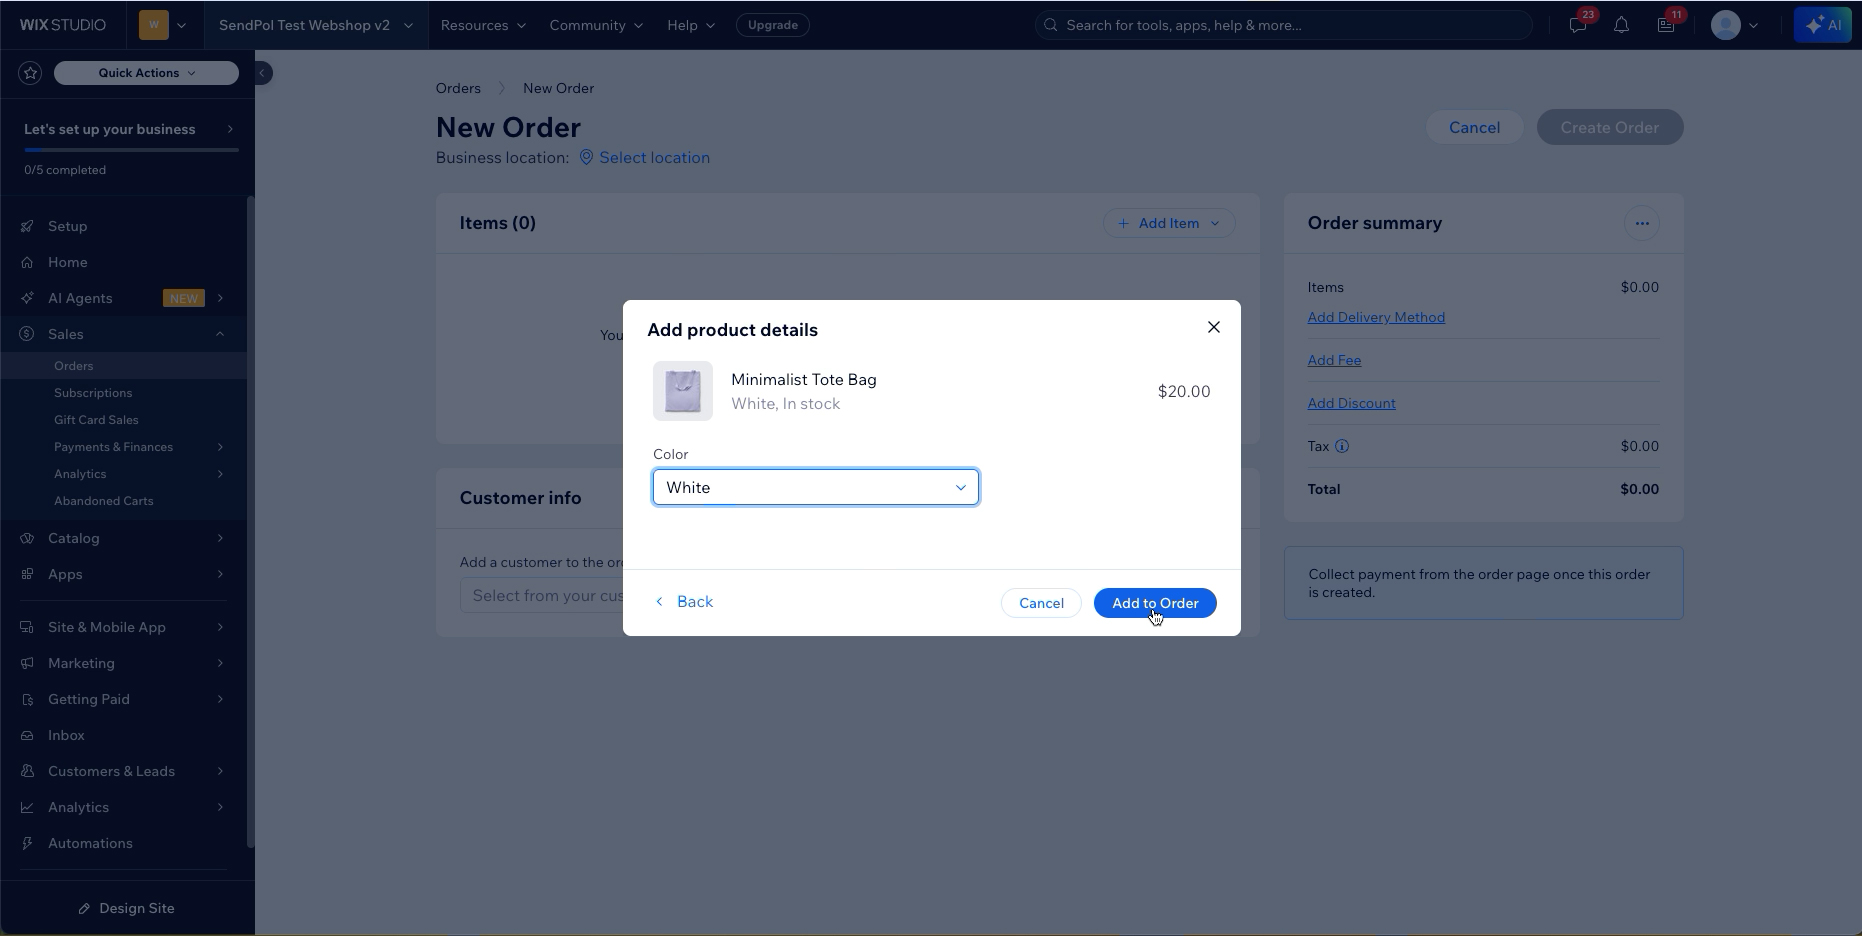
Pick a product from your catalogue, choose the variant if needed and click "Add to Order".
3Create the order
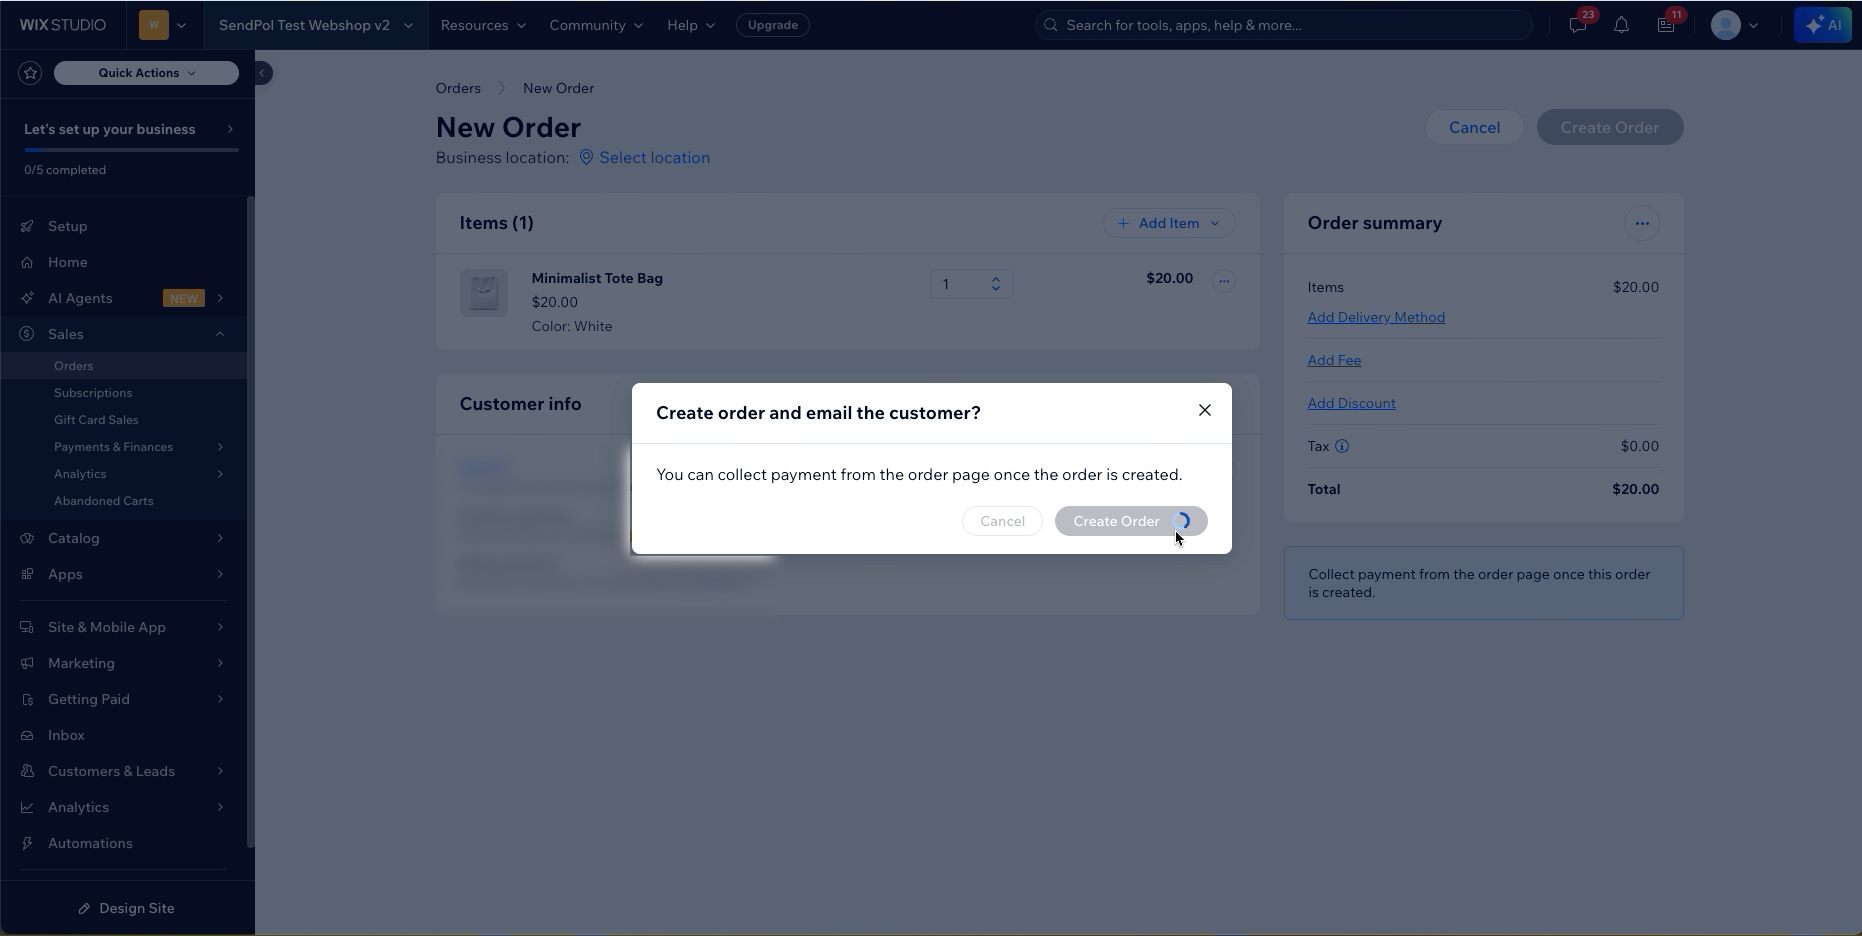
Confirm the order (optionally emailing the customer) by clicking "Create Order".
4Charge with an invoice
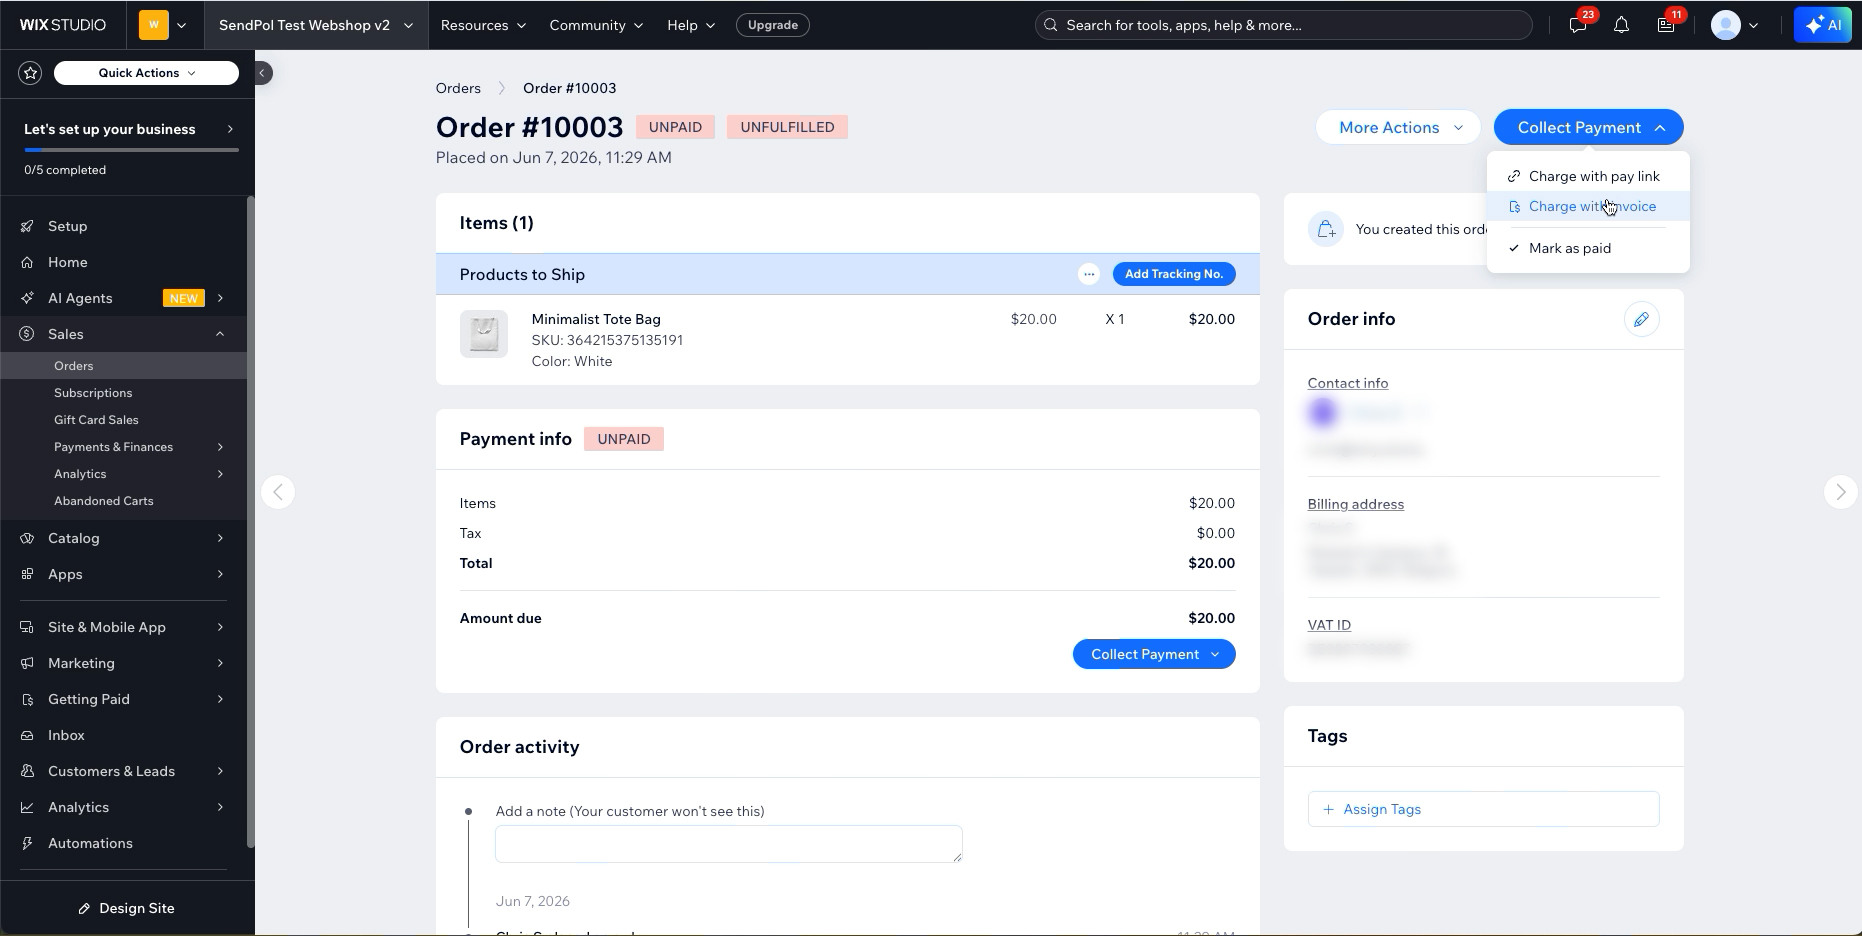
Open the order and under "Collect Payment" choose "Charge with invoice".
5Review and send the invoice
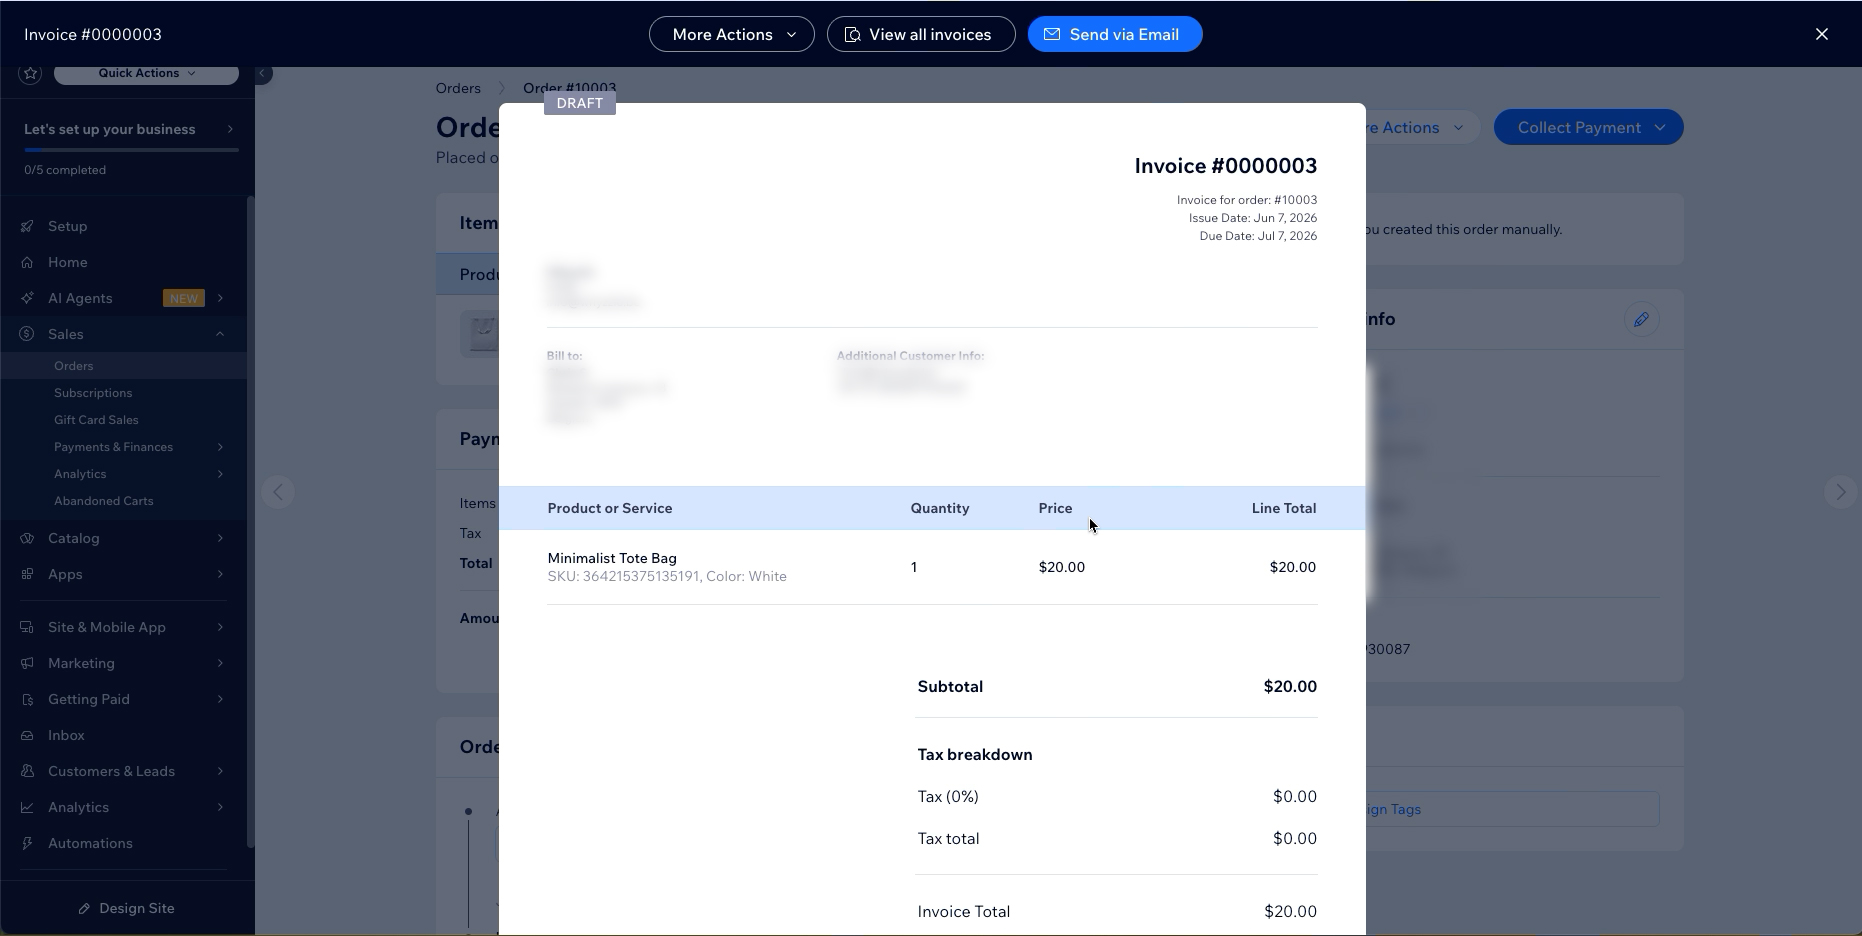
Check the invoice details and line items, then click "Send via Email". Sending the invoice is what pushes it to SendPol and on to Peppol.
6Add the invoice number in SendPol
If the order shows "No invoice number" in the SendPol app, type the invoice number and click Save so the Peppol document is complete.
Troubleshooting
FAQ
Need help?
Our support team is ready to help you with your SendPol integration